Home
Home PC Game Trailers
 News
News Menu
Menu[Top 10] Borderlands 2 - Best Weapons and How To Get Them
Updated: 01 Mar 2023 4:21 am
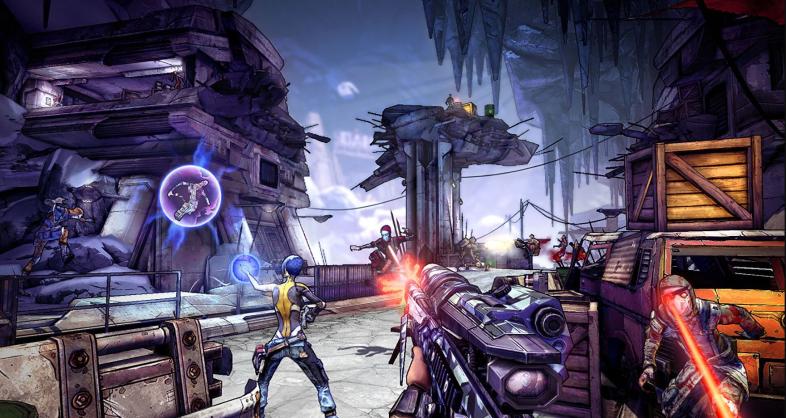
Shooting and looting through Pandora is all fun and games until you realize you don't have the right gear.
 BY: Lorna S.
Looking to fill out your arsenal in Borderlands 2, but don’t know what to pick? Here’s 10 of the best weapons in the game and where to find them. Pandora offer a variety of challenges, and this list offers you the best picks to address them.
10: Grog Nozzle
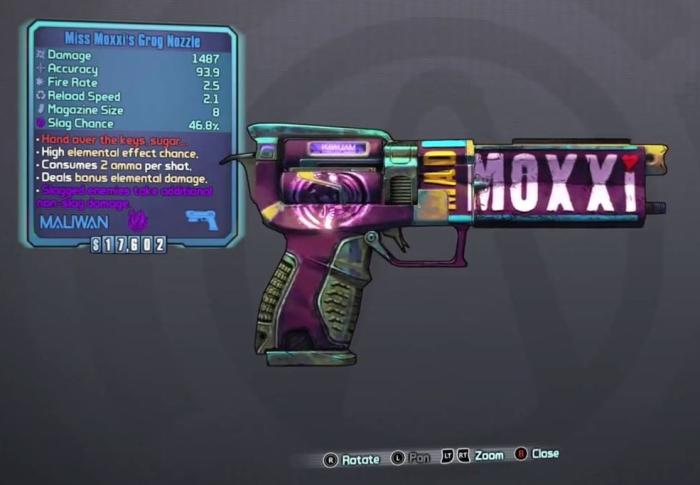
- Manufacturer: Maliwan
- Weapon Type: Pistol
- Rarity: Unique
- Element: Slag
- Unique Effect: +400% Critical Damage
- Unique Effect: +65% Lifesteal
- Unique Effect: makes the wielder Drunk for 5 seconds (13% chance)
Starting the list off strong is the Grog Nozzle, a unique mission-specific gun that sees tons of use from veteran players. It’s a Maliwan Pistol that can apply Slag, restore health with Lifesteal, and boost your Critical Damage. It can also make you Drunk- a unique and thematically appropriate effect for one of Moxxi’s weapons!
What makes the Grog Nozzle so special is its dual Slag and Healing effects. Consistent Slag is just about necessary when you play True Vault Hunter mode, and the Grog Nozzle is a reliable way to apply it. Lifesteal on top of that extra damage rounds it out as a survival tool too.
Why Use It?
You’ll want this gun if you plan to play late game content. Many builds recommend it. Salvador players especially appreciate having it, as he can dual wield it with a damage dealing gun.
What It Does Best:
- Apply Slag - it is one of the most reliable guns for applying Slag in the game.
- Restore Health - built in Lifesteal on top of Slagged DPS heals you for a lot.
- Boost Overall DPS - Slagged enemies will take a ton more damage from your other damage sources,
- True Vault Hunter Mode: For the above reasons, the Grog Nozzle is a must have for True Vault Hunter Mode.
Where To Get It:
This is a mission specific gun, meaning you can only get it through the respective mission it’s from. You’ll have to make your way to The Beard Makes The Man to get your copy.
And if you want to hold on to it, don’t turn in the mission! You’ll lose the Grog Nozzle if you do.
9: Baby Maker
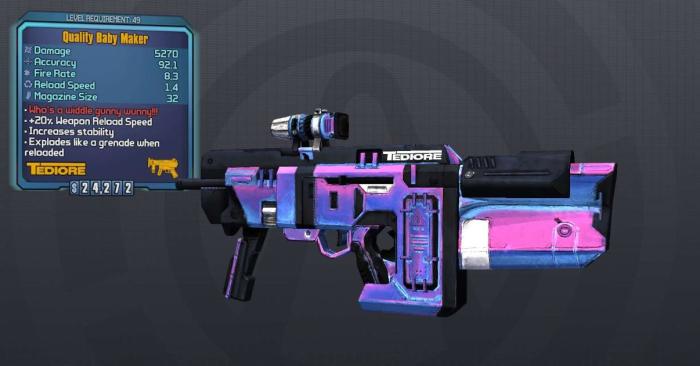
- Manufacturer: Tediore
- Weapon Type: SMG
- Rarity: Legendary
- Element: Incendiary, Shock, Corrosive, or Slag
- Unique Effect: When reloaded, explodes like a grenade.
- Unique Effect: Reload explosion spawn 1-3 extra grenades.
Tediore delivers an explosive experience with the Baby Maker, an SMG that turns into a grenade after exploding. And not just that, it spawns “child” grenades, increasing its damage and radius.
It’s a great way to clear out a crowd from a short distance. Reloading early to chuck the Baby Maker is a viable strategy - in fact, shooting once and throwing it does so much damage so quickly, it’s more effective than shooting!
Why Use It:
It’s a great option for taking down big enemies and bosses. Simply unloading a few Baby Makers does enough damage to down large targets. The damage is also scalable with abilities, making it a great option for gun focused builds.
What It Does Best:
- Close Range Combat- chucking the Baby Maker at close range works great.
- Unloading DPS- Shooting, throwing, and repeating is a quick process with big DPS output.
- Scaling: Luckily, reload damage works off of weapon damage and ammo - meaning abilities that improve either or also improve the Baby Maker’s damage!
Where To Get It:
The Baby Maker can drop from every loot source. For best results, try farming Madam Von Bartlesby in Tundra Express.
8: Pimpernel
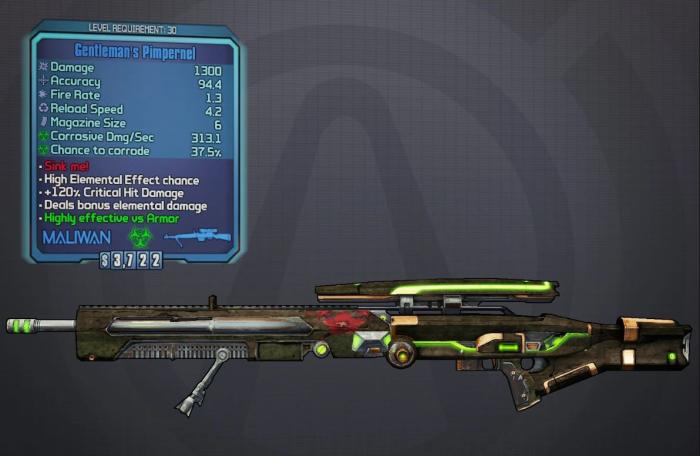
- Manufacturer: Maliwan
- Weapon Type: Sniper Rifle
- Rarity: Rare
- Element: Incendiary, Shock, Corrosive, or Slag
- Unique Effect: Splash Damage - bullets fan out into 5 shots after hitting a target.
The Pimpernel comes from Captain Scarlett’s DLC, and is a unique Sniper Rifle with splash damage built in.
Each bullet splits into an extra bullet, which then splits into another 5 bullets. They fan out in a star pattern, and each bullet is capable of hitting enemies twice, with a damage reduction of 50%.
Why Use It:
Hitting enemies more than once is always a good thing. Critically hitting them multiple times is even better. Aiming the Pimpernel slightly off target, and letting all those extra shots hit does massive damage.
What It Does Best:
- Hitting Large Enemies: Branching shots will hit big enemies more than once, dishing out a lot of hurt.
- Long Range Combat: like any Sniper Rifle, this gun works best for distanced combat.
- Critical Hit Damage: multiple shots can hit for critical damage multiple times.
Where To Get It:
Simply complete the mission Don’t Copy That Floppy in Washburne Refinery to get your copy of this gun.
7: Infinity
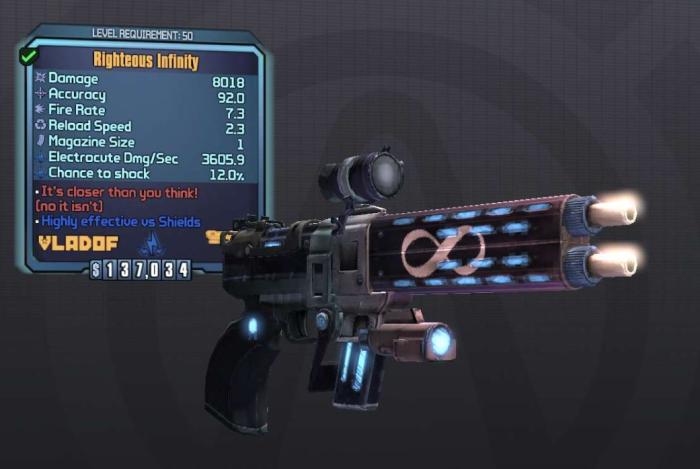
- Manufacturer: Vladof
- Weapon Type:Pistol
- Rarity: Legendary
- Elemental: Incendiary,Shock, or Corrosive.
- Unique Effect: Never uses ammo.
- Unique Effect: Never needs to be reloaded.
The Infinity Pistol is totally unique in that it never uses ammo and never needs to be reloaded. That’s right: you can hold down the trigger and never have to let go.
The Infinity spins away as you hold down the trigger, unleashing bullet after bullet. It’s pretty straight forward otherwise, sporting good damage and able to carry an element.
Why Use It?
Never having to reload means the Infinity is always ready to use, great in Fight For Your Life or for farming and not wasting ammo. Coupled with an element, it also makes it a great way to lay in some elemental effects!
What it Does Best:
- Safety Net: Need a quick hit in Fight For Your Life? The Infinity is perfect for those clutch moments where you don’t have time to reload.
- Ammo Efficient: never using ammo is as efficient as you can get.
- Farming: It’s a great option for clearing mobs, conserving ammo and time.
- Applying Elemental Damage: Consistent fire rate let’s you lay down an element easily.
Where To Find It:
Infinite drops from any loot pool. For higher chances, look to Doc Mercy in Three Horns - Valley, or Lt. Angvar in The Burrows.
6: Amigo Sincero
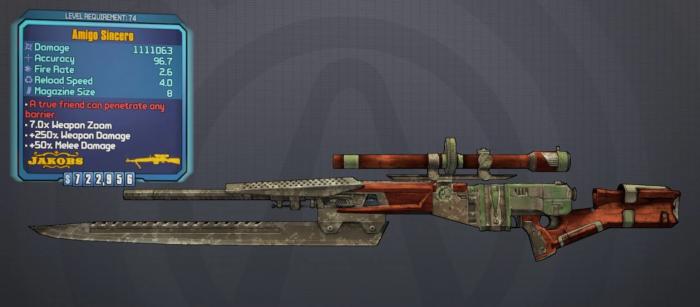
- Manufacturer: Jakobs
- Weapon Type: Sniper Rifle
- Rarity: Legendary
- Elemental: n/a
- Unique Effect: Ignores shields, always dealing damage to health instead
The Amigo Sincero joins the Sniper Rifle with a unique ability: bypass shields, and hit enemies directly in their health pool.
Ignoring shields is an ability shared with just one other gun, The Trespasser. The Sincero takes the spotlight with its higher base damage.
Why Use It?
It’s one of the top Sniper Rifles in the game. Players who enjoy long-range combat will want this in their arsenal. Sniper build Zer0’s will especially want to have it.
What it does best:
- Ignores Shields: this gun skips shields and goes straight to their health, bringing quicker kills.
- Take Down Big Enemies: big health pools getting you down? Bypassing shields and hitting them where it really hurts helps with that problem.
- Sniper Build Essential: this rifle brings a unique effect and great damage, making it a must have for any sniper build.
Where To Find It:
The only thing needed to obtain your Amigo Sincero is to complete the BFFFs mission from. Keep in mind this gun can’t be farmed again.
5: Conference Call

- Manufacturer: Hyperion
- Weapon Type: Shotgun
- Rarity: Legendary
- Element: Incendiary, Shock, Corrosive, or Slag.
- Unique Effect: Spawns 2 extra pellets with every shot, every 0.05 seconds.
As the name implies, this gun is all business - and it’s in the business of dealing massive damage. The Conference Call joins the list as one of the most popular Shotguns in all of BL2.
The Conference Call enjoys splitting projectiles, much in the way others in this do. What makes these on so special, is they periodically spawn, meaning as these bullets travel they keep splitting. Potentially, it’s spraying a whole lot of bullet.
Why Use It:
Multi-hit guns are especially nice against large enemies and bosses, who’ll end up soaking every extra bullet for huge amounts of damage. Gaige especially makes good use of it with her Anarchy stacks, and Zer0’s running the B0re skill will appreciate multiple critical hits per shots.
Where To Find It:
You can find it after killing either The Warrior, the main game’s final boss, or the Handsome Sorcerer, which is the last boss from Tiny Tina’s Assault DLC.
4. Rubi
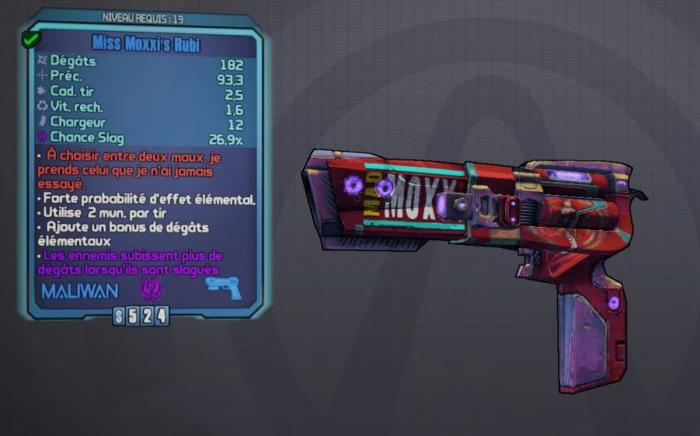
- Manufacturer: Maliwan
- Weapon Type: Pistol
- Rarity: Unique
- Element: Corrosive, Incendiary, Shock, or Slag.
- Unique Effect: 12% Lifesteal - universal all damage when held.
Moxxi brings another hit to the list with the Rubi.
This Pistol comes equipped with a Lifesteal ability. It doesn't just heal from the damage it inflicts though, it also applies Lifesteal to all your attacks as long as you wield it.
Why Use It:
Lifesteal is invaluable in any situation. The Rubi let's you heal from any damage source, which opens up tons of possibilities to get the most out of it.
What it does best:
- Great Healing: 12% Lifesteal keeps your health up.
- Easy To Use: damage from ALL damage sources means you don’t have to overthink how best to get your health back
- Accessible: the Rubi is a quest reward, meaning you won’t have to farm for hours to get it.
Where To Find It:
You’ll have to complete the mission Rakkaholics Anonymous, and more specially you need to give Moxxi the booze to recover the Rubi.
3. Leech

- Manufacturer: Tediore
- Weapon Type: Grenade
- Rarity: Legendary
- Element: incendiary, corrosive, Shock.
- Unique Effect: Transfusion heal effect immediately with damage.
The Leech is another staple grenade mod. Good healing is always necessary, and this mod lets you lob a grenade whenever you’re running low, and patch up your health.
It's a popular pick, and for good reason. It's fast and reliable, and you can never go wrong with those two traits, no matter how far into the game you are.
Why Use It:
No matter what point in the game you’re at, there comes a time when your health is low and you need a quick option. That’s where the Leech comes in, delivering health as soon as you deal damage.
What It Does Best:
- Instant Heal: health recovery the moment you deal damage feels soooo good.
- Survivability: quick activation means you can pop a Leech whenever things go sour, allowing for consistent Survivability.
- Reliable: unlike other transfusion grenades, your healing doesn’t have to actually travel to you, meaning you don’t run the risk of losing it along the way.
Where To Find It:
It can drop from either The Warrior or the Handsome Sorcerer.
2. Fastball
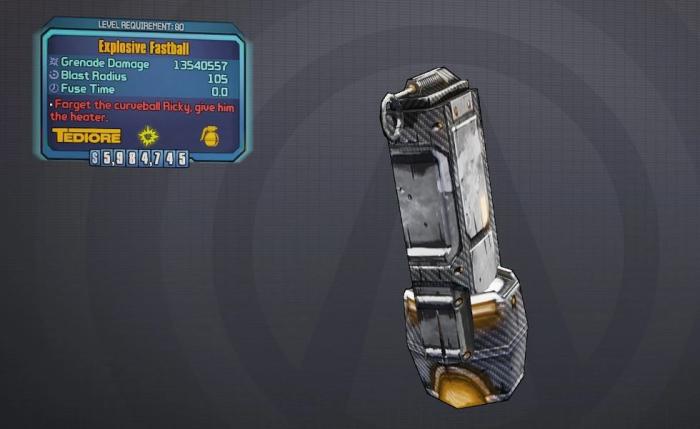
- Manufacturer: Tediore
- Weapon Type: Grenade
- Rarity: Legendary
- Element: Explosive, Corrosive, Incendiary, or Shock
- Unique Effect: 0 fuse time: instantly hits and deals damage.
- Unique Effect: Throws like fast and far, behaving like a baseball.
Ever wanted to lob a grenade like a baseball? Then look no further than the Fastball.
The Fastball detonates on contact, instantly dealing damage to its target. It also travels a considerably long distance.
Why Use It:
The Fastball has become a staple grenade modifier with its reliable speed, distance covering, and incredible damage. This grenade has the special ability of having absolutely no fuse time, instead detonating on contact. It has a smaller than average blast radius, but it barely matters with how hard it hits.
What it does best:
- Massive Damage: The Fastball can easily down enemies with its 500% damage.
- Zero Fuse Time: The Fastball detonates the moment it touches a target. No waiting required.
- High Speed: Super high speeds lets this grenade travel farther than most others.
Where To Get It:
The Fastball is droppable just about anywhere as it can come from every loot location. If you’re looking to farm the Fastball, Boll from Three Horns - Divide has a higher drop chance for it
1.Unkempt Harold
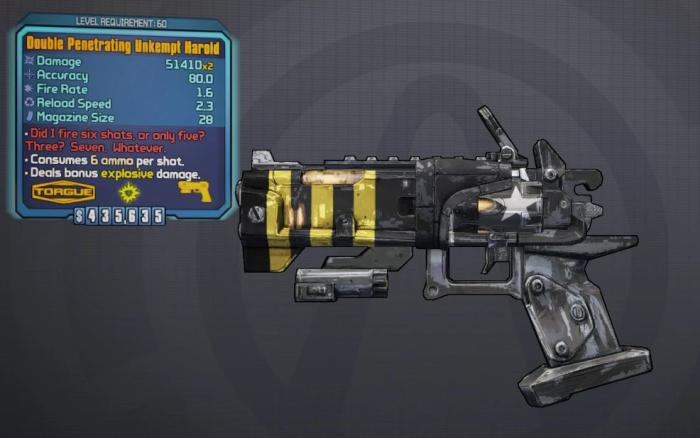
- Manufacturer: Torgue
- Weapon Type: Pistol
- Rarity: Legendary
- Element: Explosive
- Unique Effect: Shoots 6 ammo every shot.
- Unique Effect: Shots split into smaller shots in a spread.
Finishing off the list is the Unkempt Harold, a gun legendary in both rarity and status. This Torgue Pistol always comes with Explosive built-in.
Spread fire, Explosive Damage, and great base damage make this pistol a strong contender for your arsenal. It's also farmable pretty early in the game, making it a good pickup for most playthroughs.
Why Use It:
It’s a great weapon for any character, and easily farmable. It hits very hard. Zer0 and Salvador players can make especially good use of it, with abilities Vel0city and Divergent Likeness boosting it, respectively.
What It Does Best:
- Covering Large Areas: splitting shots help cover more area. More area covered, more baddies blasted.
- Damage: This pistol hits hard, regardless of the prefix it drops with.
- Double Penetrating: An Unkempt Harold with the Double Penetrating prefix dishes out really big damage - worth it for the extra ammo cost.
- Accessibility: The Unkempt Harold is easier to farm than many other legendary weapons, with the bonus of most Harold’s being good enough to use. Less hours grinding!
Where To Get It:
The Unkempt Harold can drop from any loot source, but if you’re looking to farm it, Savage Lee in Three Horns Divide is the place to go.
You My Also be Interested In:
Share this Article:

- Log in or register to post comments


")


")