Home
Home PC Game Trailers
 News
News Menu
MenuAll Zelda: Tears of the Kingdom Bosses Ranked Easiest To Hardest
Updated: 12 Apr 2024 11:59 pm
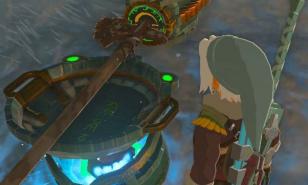
Encounter Flowerblight Ganon, a secret boss that can't be fought!
 BY: Taylor U.
All Zelda: Tears of the Kingdom Bosses Ranked Easiest To Hardest
How many bosses are there in Zelda: Tears of the Kingdom?
There are 11 clear bosses in the main story. 7 of them are dungeon bosses, while the other 4 are singular main mini-bosses in the events you should experience.
Are some easier than others?
Yes, some are easier than others! But it also depends on how you progress through the game.
For example, your health meter, stamina wheel, and overall inventory can impact every boss you encounter.
The list starts with the easiest bosses to the hardest bosses. There may be spoilers ahead, so please read at your own risk.
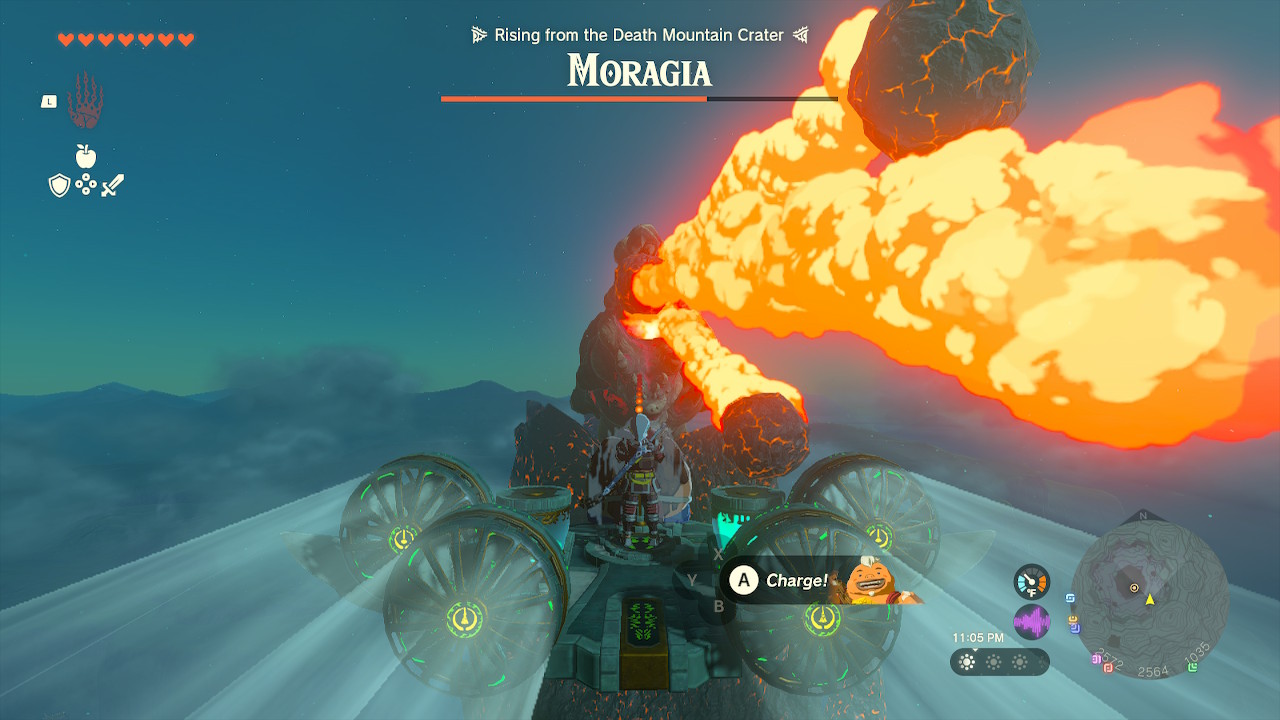
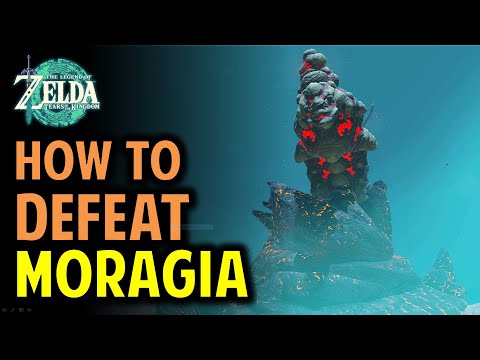
Moragia: (Difficulty: 1/10)
Here’s a link to the Moragia Boss Fight!

Moragia is the monster Rising from the Death Mountain Crater.
You will encounter him when attempting Eldin's Regional Phenomena and following through Yunobo of Goron City's main quest. After defeating Yunobo, he will assist you on your journey to the Fire Temple.
Expert opinion and analysis on the difficulty:
Moragia is very easy to beat. Crush him with Yunobo! Moragia's only attack is spitting slow lava meteors in the air, which is easy to dodge far away. It's a cool boss fight that feels "Godzilla-esque," where you use a Zonai Wing Device to beat him and stay flying around him, not into him.
Jump on the Zonai Wing Device that's pre-made for you on Death Mountain. Yunobo will ride with you, and you can aim him toward Moragia's head. Hit Moragia 3 times to be successful!
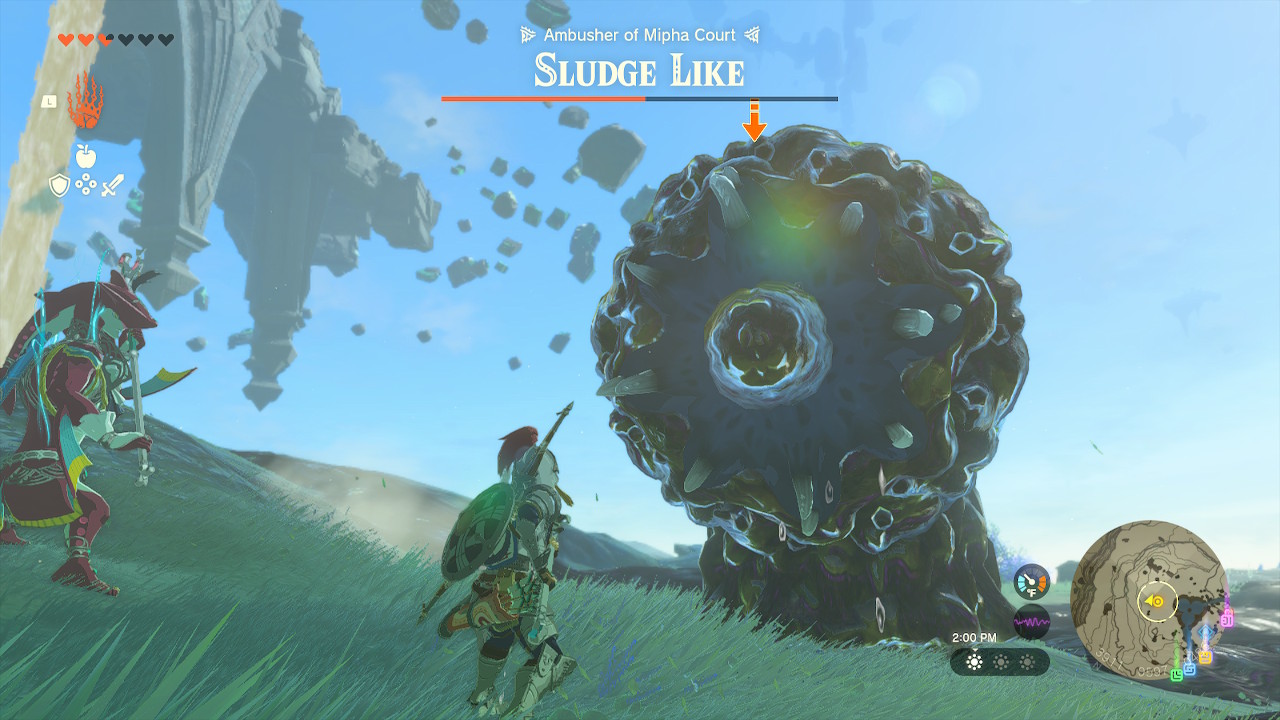
Sludge Like: (1/10)
Here’s a link to the Sludge Like-Like Boss Fight!

The Sludge-Like is a Like-Like infected by sludge. He's the Ambusher at Mipha Court.
You will encounter Sludge-Like when attempting Lanayru's Regional Phenomena and follow through the main quest called Sidon of the Zora.
Expert opinion and analysis on the difficulty
Sludge Like is one of the easiest boss fights because all its attacks have slow tells. He spits out sludge, which slows you down when you approach it. When you get close to it, it will open its mouth, leaving its purple-throat weak spot available to you, perfect for a quick attack.
Stay close to Sidon and activate his water shield bubble. Use the water shield attack to wash away the sludge from the Like-Like. Get near it a few feet away, wait for it to open its mouth, and start attacking it with a spear-type weapon.
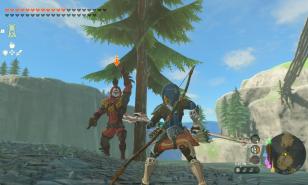
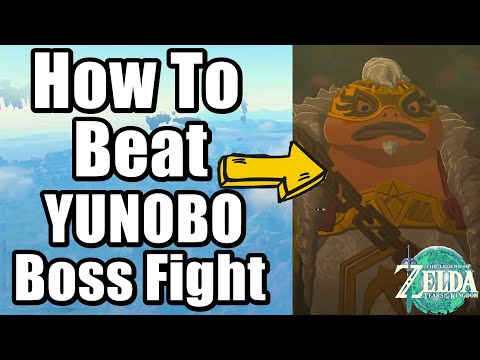
Yunobo Boss Fight: (Difficulty: 1/10)
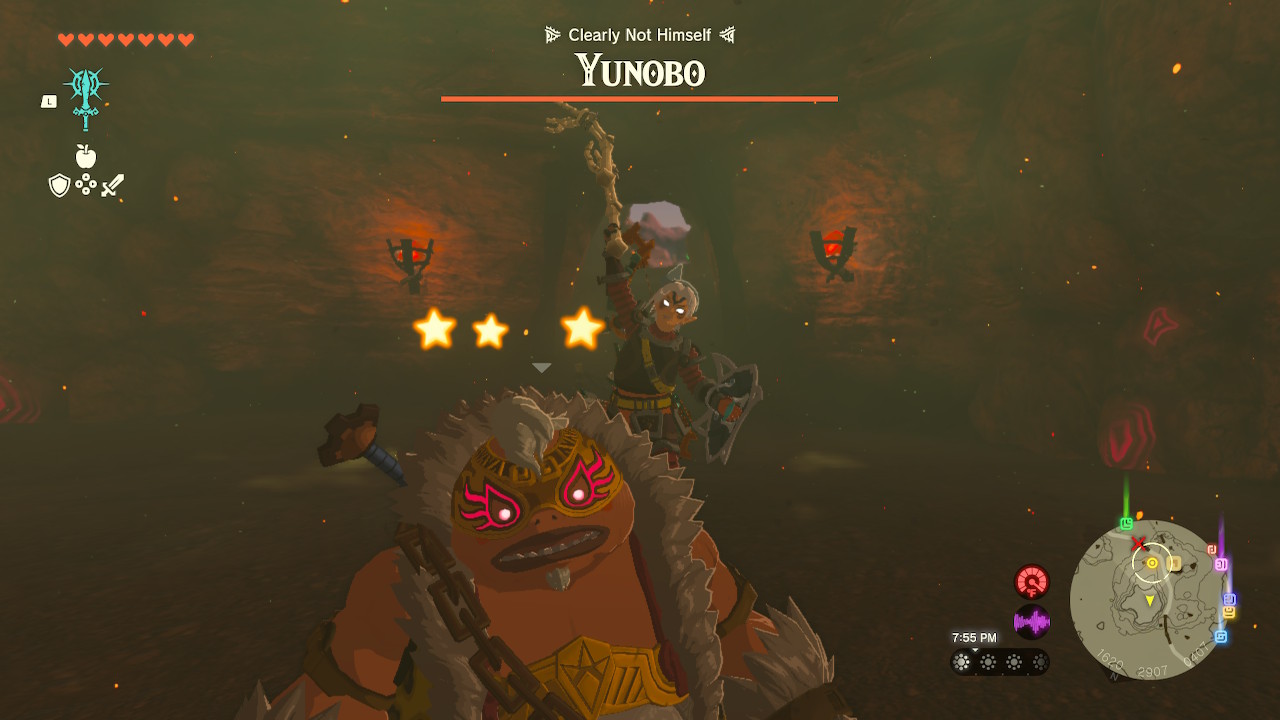
Here’s a link to the Yunobo Boss Fight!
Yunobo is a Goron and the grandson of Daruk. He's also great friends with Link. He's a boss because Marbled Rock Roast infected him and affects how he acts.
You will encounter him when attempting Eldin's Regional Phenomena and investigate the issue with the Marbled Rock Roast. To stop everyone's addiction, including Yunobo's, you must face Yunobo and snap him out of it.
Expert opinion and analysis on the difficulty
The Yunobo fight is challenging because you will fight him in a lava-hot cave. You have to drink a fireproof elixir that uses a flame guard buff. Alternatively, if you have enough rupees, you can buy the Flamebreaker armor early.
The fight is easy because all you have to do is dodge Yunobo when he charges at you. You have to make sure he hits the wall, which stuns him. That's the opportunity to hit him. Hit him 3 times, and you'll be successful.
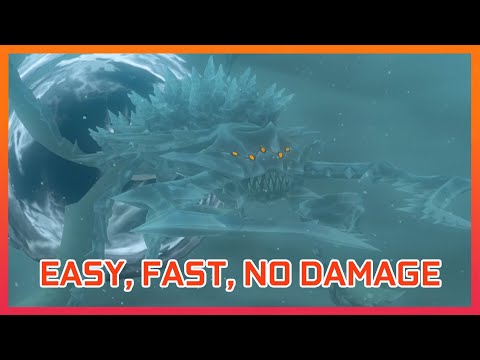
Colgera (Difficulty: 2/10 )
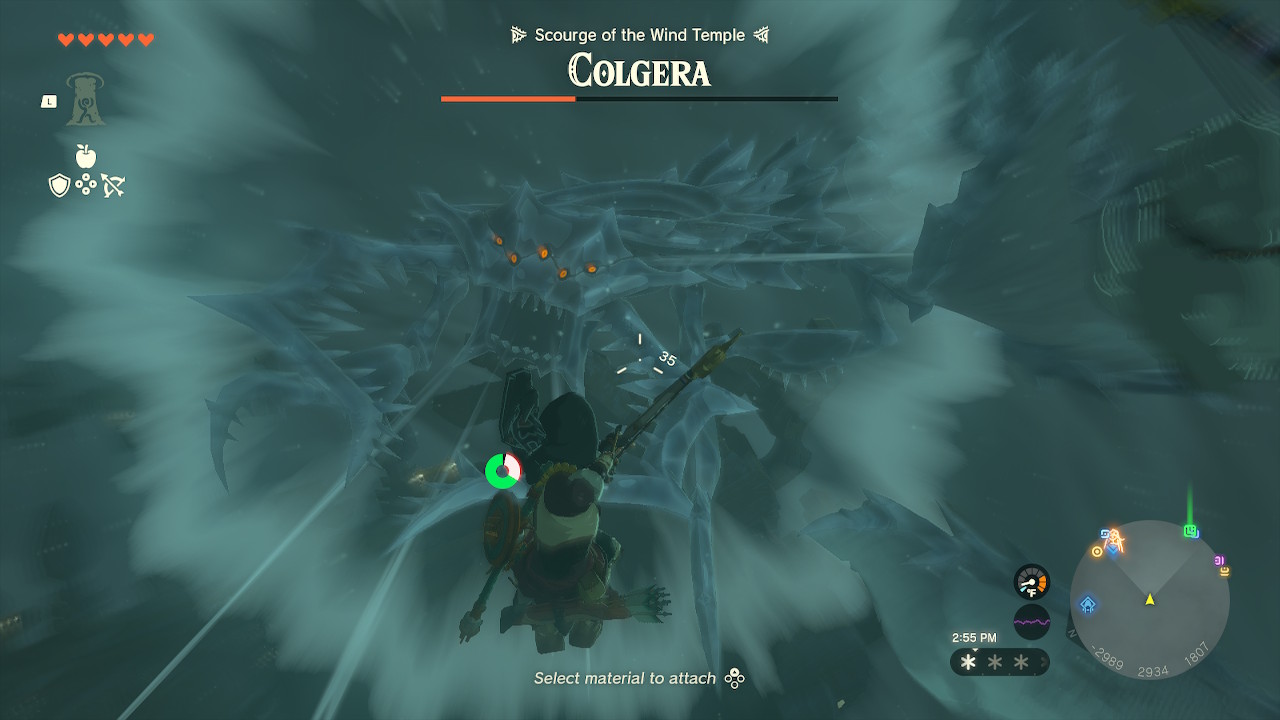
Here’s a link to the Colgera Boss Fight!
Colgera is the Wind Temple dungeon Boss. He's a dragon with warp abilities and tornado abilities.
You will encounter him when attempting the Hebra Regional Phenomena and follow through a main quest called Tulin of Rito Village. Tulin travels with you to the Wind Temple, which is extremely high up. The boss battle will start when you finish all the Wind Temple's puzzles.
Expert opinion and analysis on the difficulty
Colgera is a fun and easy boss! The entire battlefield has updrafts of wind, allowing Link to enter bullet time much faster and time to glide to save stamina. This also slows down the fight to search for Colgera's weak points. On average, he can be defeated in about 3 minutes. The trick is to stay under him and stay in bullet time.
Colgera likes to warp a lot in both phases of the fight. His enormous purple-hexagon-like organs are his weak spot. Aim directly there with a bow and arrow. Shoot arrows to break the shield and his purple-hexagon-like organs. The trick is to try to stay below him the entire time.
The second phase can be slightly annoying because he'll make many tornadoes to throw you off balance and damage you. He warps below and flies up vertically, which can be terrifying! However, that opportunity is when you shoot all 3 of his weak spots facing you.
Marbled Gohma (Difficulty: 2/10)
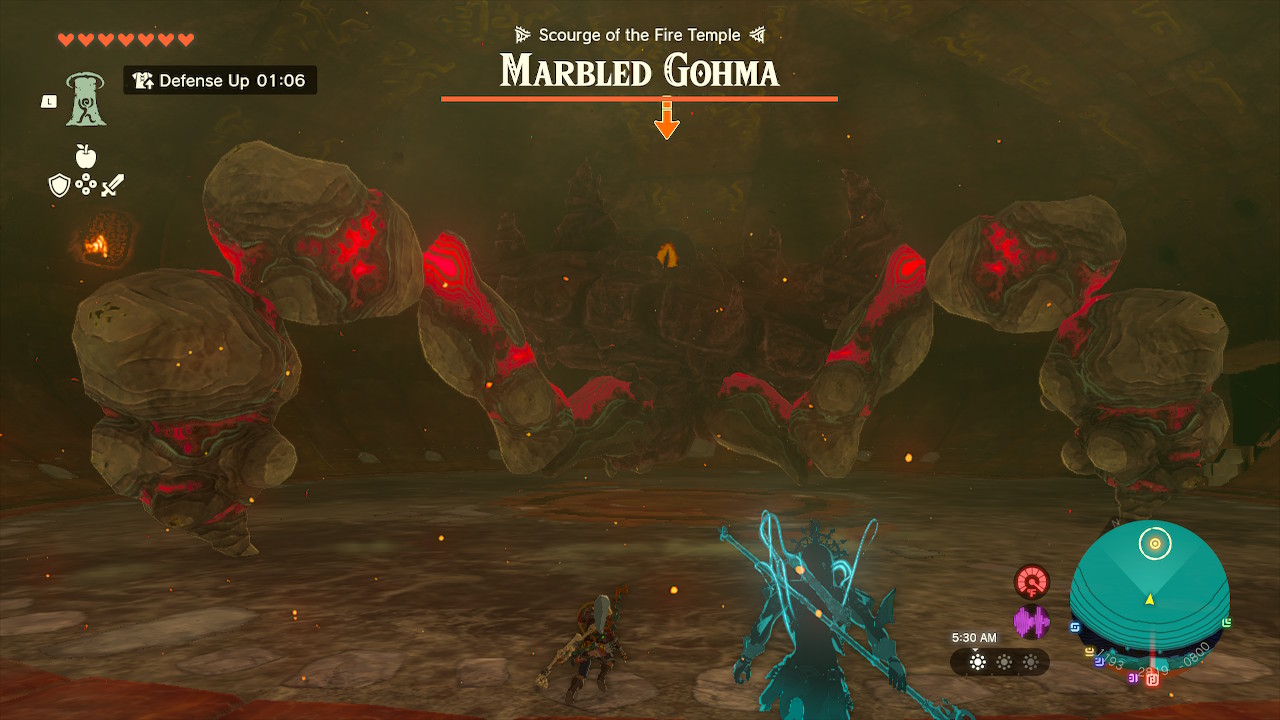
Here’s a link to the Marbled Gohma Boss Fight!
Marbled Gohma is the Fire Temple dungeon boss. He is a gross marbled rock roast that moves like a crab.
You will encounter Marbled Gohma when you attempt Eldin’s Regional Phenomena and follow through the main quest, Yunobo of Goron City. You will face him when you complete the Fire Temple’s puzzles.
Expert opinion and analysis on the difficulty
Marbled Gohma is an easy boss to defeat because his massive crab legs are his weak points. However, this fight has a few challenges.
You must wear the Flamebreaker Armor or use a Flame Guard elixir to survive the Fire Temple’s lava-hot environment. He shoots explosive rocks and can smash you if you get too close to him.
In the second phase of the battle, he traps you in a circle of explosive rocks and likes to stay upside down on the roof.
To defeat it, use Yunobo and aim him to destroy Marbled Gohma’s legs. Run up to attack its eyes quickly with a two-handed weapon and use a spin attack.
Muktorok (Difficulty: 3/10 )
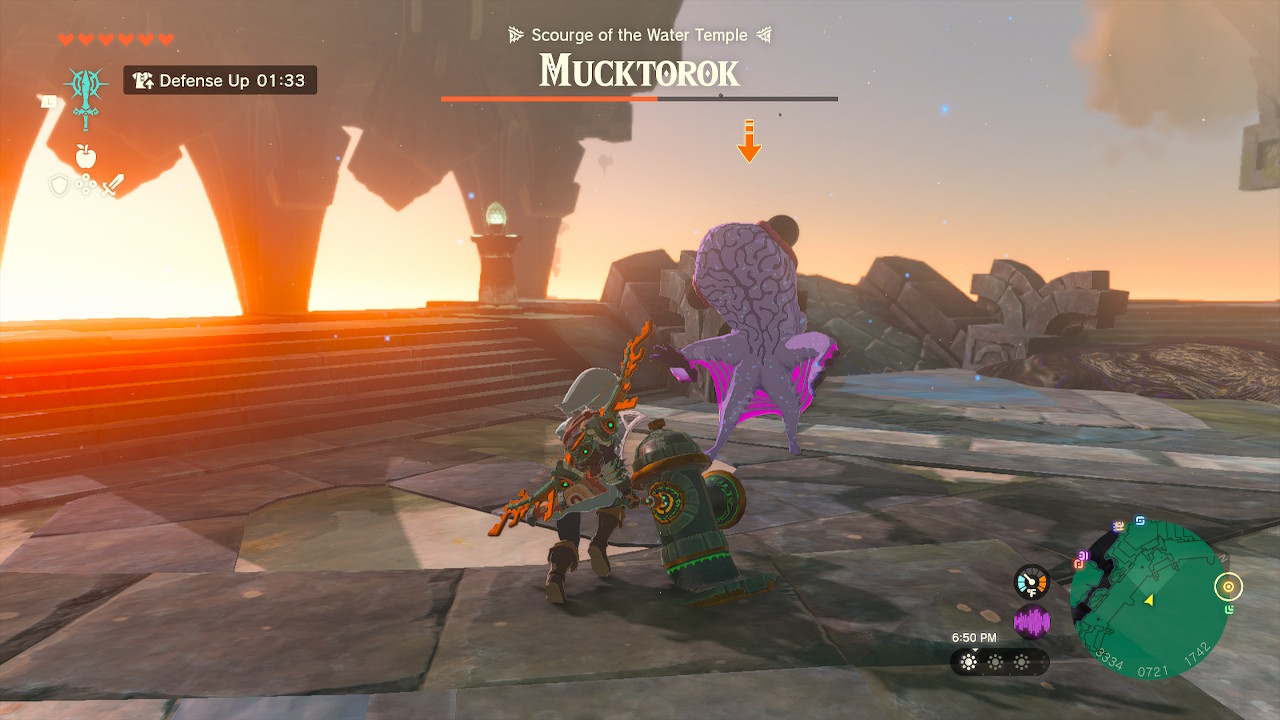
Here’s a link to the Muktork Boss Fight!
Muktorok is the boss of the Water Temple dungeon. He takes the form of an Octorok infected by sludge. Because of his speed, agility, and unpredictability, he is the most annoying boss to defeat.
You will encounter him when attempting Lanayru's Regional Phenomena and following through the main quest called Sidon of the Zora. You will face Muktorok when completing the Water Temple's puzzles.
Expert opinion and analysis on the difficulty
Muktorok does several things that are hard to dodge, such as when it takes the form of a shark and attacks you with a sludge shockwave. In shark form, he swims in sludge to make the battlefield turn into sludge and slow Link down.
When Link strikes him with a Hyrdant or Splash-Fruit, he will run away by swimming in the muck. It's hard to land a physical attack on him in the 2'nd phase of the fight as it will want to stay far away from you.
Muktorok is slightly easier to defeat because the boss battle occurs at a high altitude, where Link can jump high and activate bullet time. Fuse a Zonai Hydrant to wash sludge away so he has nowhere to swim, making running toward him more possible.
In the 2'nd phase of the battle, I recommend activating bullet time and shooting lots of arrows because he will want to stay far away from you.
Master Kohga: (3/10)
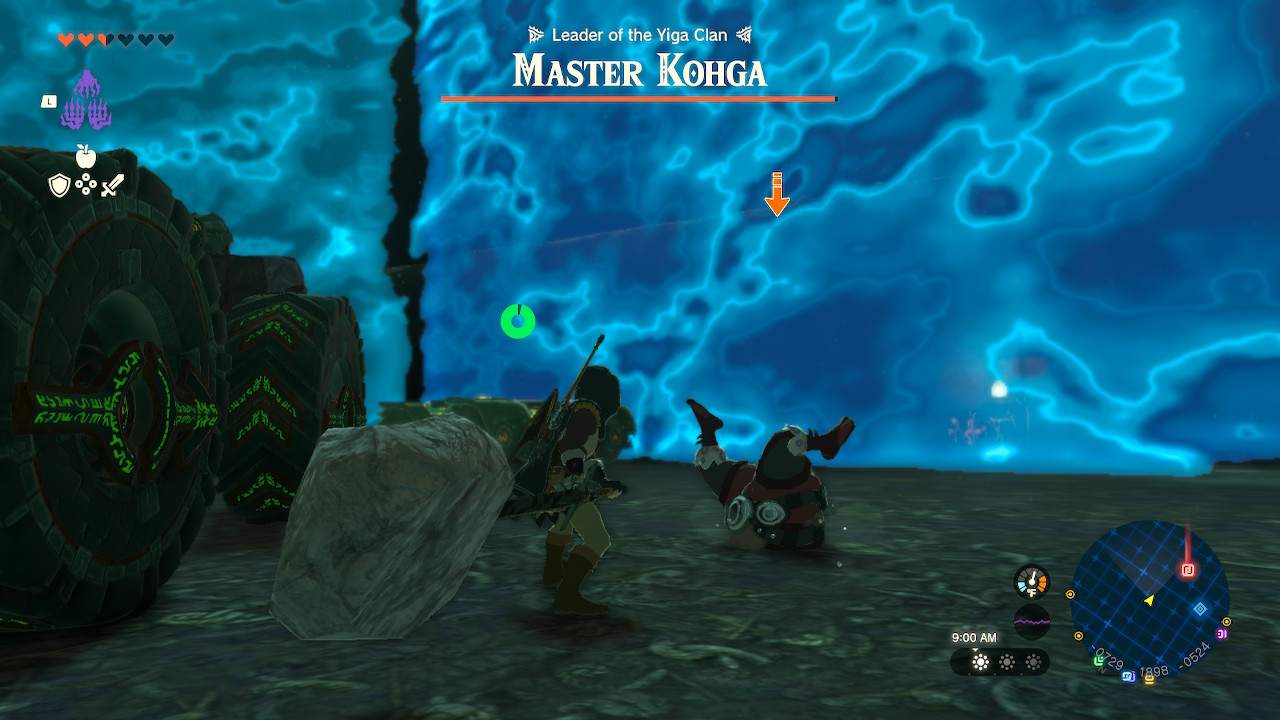
Here’s a link to the Master Kohga boss fight!

Master Kohga is the leader of the Yiga Clan. He's very annoying, and Link doesn't like him.
You will encounter him during the main quest, A Mystery in the Depths. After Robbie prompts you to take pictures of the statues, follow the statues to the Great Abandoned Mine.
After achieving the Autobuild ability, the Master Kohga fight will trigger.
After beating him, a side adventure called Master Kohga of the Yiga Clan starts. You'll also get a Huge Crystalized Charge, which is extremely important for upgrading your Energy Cell.
Expert opinion and analysis on the difficulty:
The boss fight is entertaining because Master Kohga is an easy fool to beat. The boss fight is an entire comedy action sequence. It is one of the most annoying boss fights because he will ram you with his Zonai Battle Cart. Whenever you chase him, he'll drive away.
What makes this boss fight annoying is that if you're not stocked with a bow and arrow and have little stamina early in the game, you must chase him down to take him out and disable the vehicle. It's easy to take him out with a bow and arrow when he's driving.
In the middle of the fight, he repeatedly alters his vehicle and teleports around. He throws an unpredictable Yiga-sphere bomb on occasion, and it could be hard to predict when he will do that. In the first phase, he'll make a board protecting himself from arrows. He'll get stuck in the ground head-first into a hole with his butt out, which is very embarrassing for a boss.
In the second phase, he will make more boards, so you can't shoot more arrows at him or climb from the side of the vehicle. He'll fuse rockets to his vehicle and charge at you! As a result, he'll crash into a wall and get stunned. That's your opportunity to defeat him! Use Bokoblin-Arm Bones, Rock Hammers, or Royal weapons to strike him efficiently!
Queen Gibdo (Difficulty: 5/10)
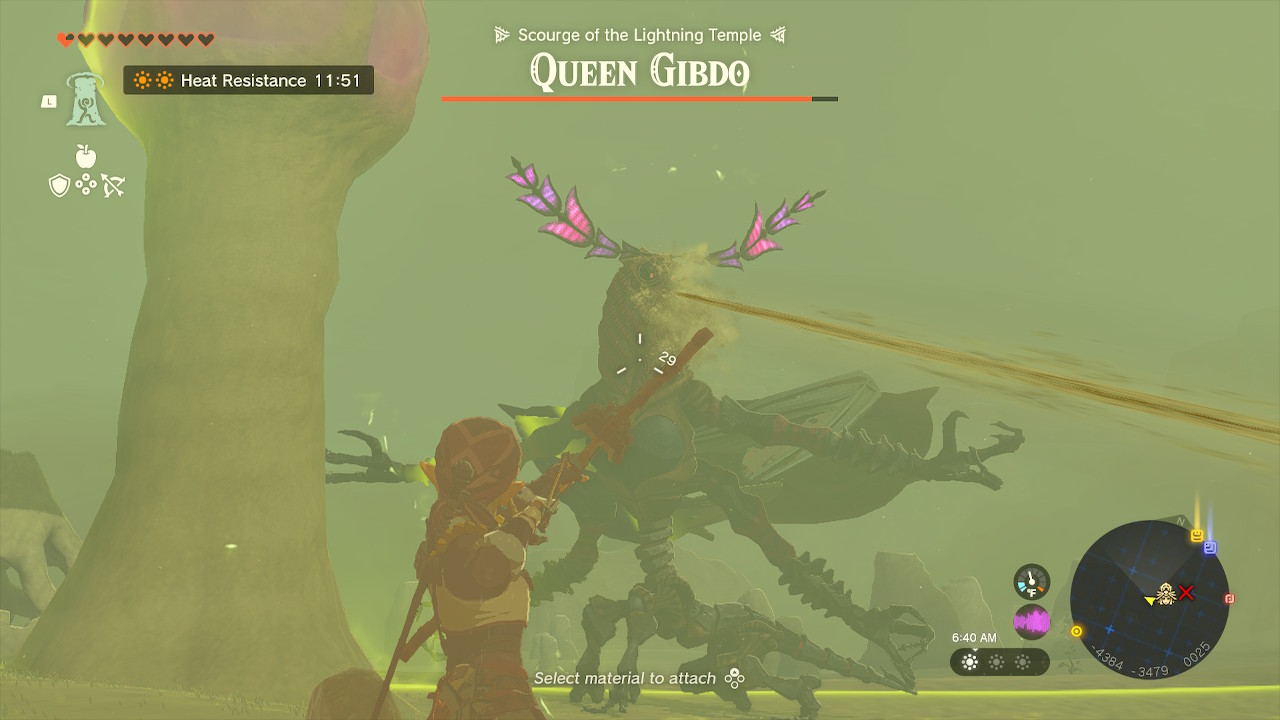
Here’s a link to the Queen Gibdo boss fight! Go to 22:00

Queen Gibdo is the boss of the Lightning Temple dungeon. She is a large flying Gibdo and the leader of all Gibdos.
You will encounter her when attempting Gerudo's Regional Phenomena and following through a main quest called Riju of Gerudo Town. You will face her twice. You'll face her shortly after completing the Pillars of Light puzzle before entering the Lightning Temple. Again, you'll face her after completing the Lightning Temple's puzzles. That's a lot of fighting!
Expert opinion and analysis on the difficulty
What makes this dungeon boss difficult is that you have to face her twice! She's dangerous against Link because she uses sandstorms to cloud your visibility and to attack back.
In the first battle, outside the Lightning Temple, she has no Gibdo reinforcements. She has many Gibdo reinforcements in the Lightning Temple, making the dungeon battle much more stressful.
In the first phase, she shoots out sandstorms to cloud your visibility and defeat Link. It will also damage Riju! She may charge at Link at unpredictable times and spit out her lethal sand beam.
In the second phase, she will fly up high! The Gibdos will constantly chase after you, and the swarms will keep coming if you don't shoot a dang lightning arrow at their tall, purple-glowing sand nest. She'll also spit out her sand beam while you avoid her reinforcements. It's annoying and hard to get an angle on her.
To defeat Queen Gibo, you have to communicate effectively with Riju. Stay around Riju to activate her lightning and shoot arrows at Queen Gibdo. Queen Gibo changes colors and is most vulnerable in her darker colors.
Activate Sidon, Yunobo, and Tulin, as they can protect you from Queen Gibdo's reinforcements. Relying on Sidon's water shield can be useful against her sand beam. If you're low on arrows or elemental items, use Yunobo's fire-charge attack to weaken her. Sidon's sage ability significantly changes the pace of the Queen Gibdo boss battle.
After shooting down a tall-purple-sand nest, light appears. Use it as a safe zone, keeping you safe from swarms of Gibdos. You can also use Zonai mirrors to redirect it, melt Gibdos, and damage Queen Gibdo!
While waiting for Riju to charge, you can shoot arrows with Shock fruits, Yellow Chuchu Jelly, or Electric Keese Wings to disable her. Having lots of Zonai trampolines or Shield Rockets helps slow the fight down, so you can take time shooting lightning arrows at the nests or bomb flower arrows.
Seized Construct (Difficulty: 7/10)
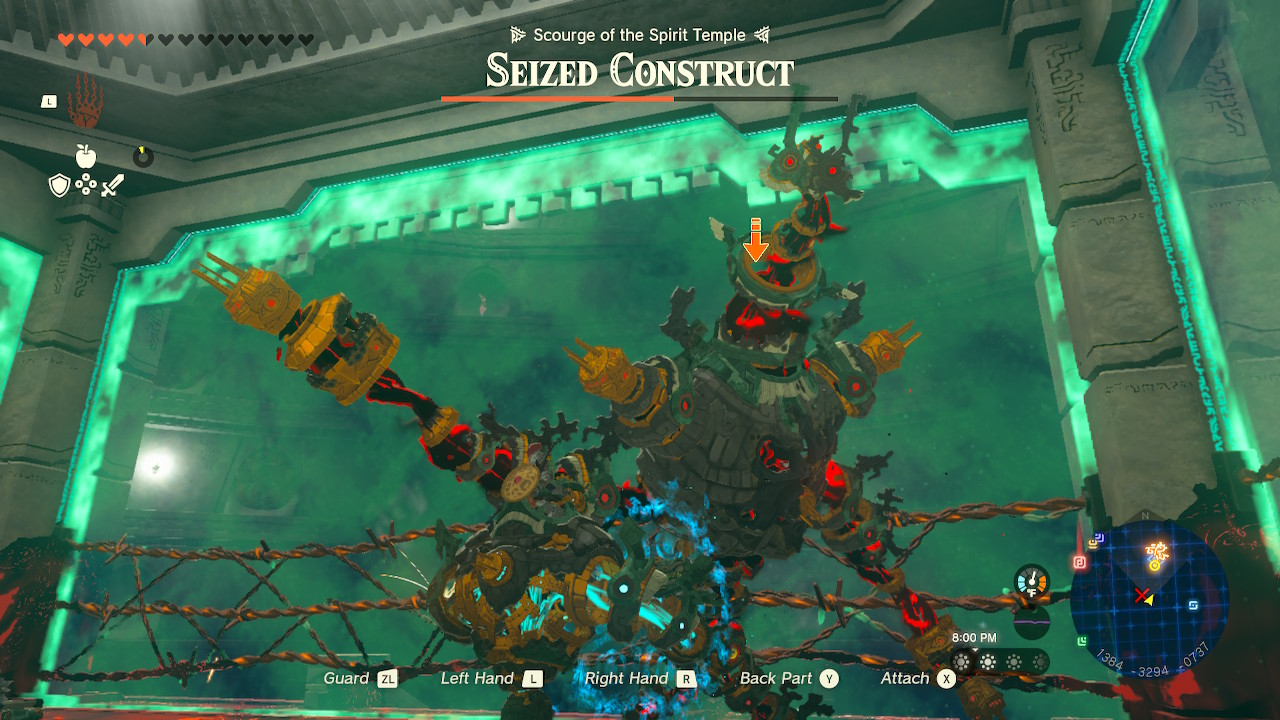
Here’s a link to the Seized Construct boss fight!
Seized Construct is one of Mineru's past inventions that turned evil.
You will encounter Seized Construct when attempting several main quests, such as Finding the Fifth Sage, Secret of the Ring Ruins, and Guidance From Ages Past.
To enter the Spirit Temple, complete the Construct Factory in the Depths. This boss fight is one of the most exciting because it feels like a WWE showdown.
Expert opinion and analysis on the difficulty
Seized Construct is very dangerous because the whole battlefield is pure gloom! You have to use Mineru's Construct to defeat it, and I would not recommend getting off of it.
It will try to knock you out into the barbed wire. It will fuse with several items, such as iron spiked balls, Zonai canons, and Zonai Shock Emitters.
In the second phase of the fight, it will try to jump up and come crashing down toward you. Taking it down is stressful when you need to learn how to use Mineru's Construct well enough. Mineru's Construct is huge and slow. .
To defeat Seized Construct effectively, use a Canon and Spiked Ball to keep pushing it toward the barbed wire. The tactics are monotonous, and what keeps the battle engaging is learning more about Mineru's Construct abilities.
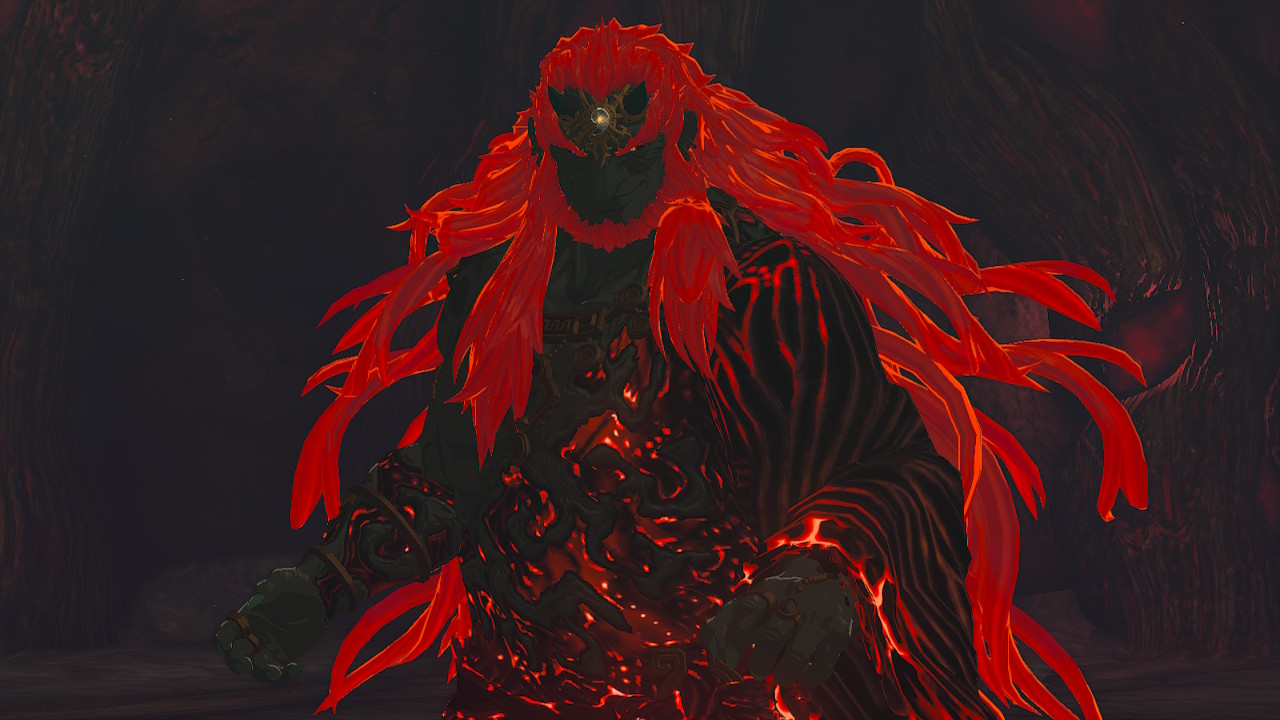
Phantom Ganon (Difficulty: 8/10)
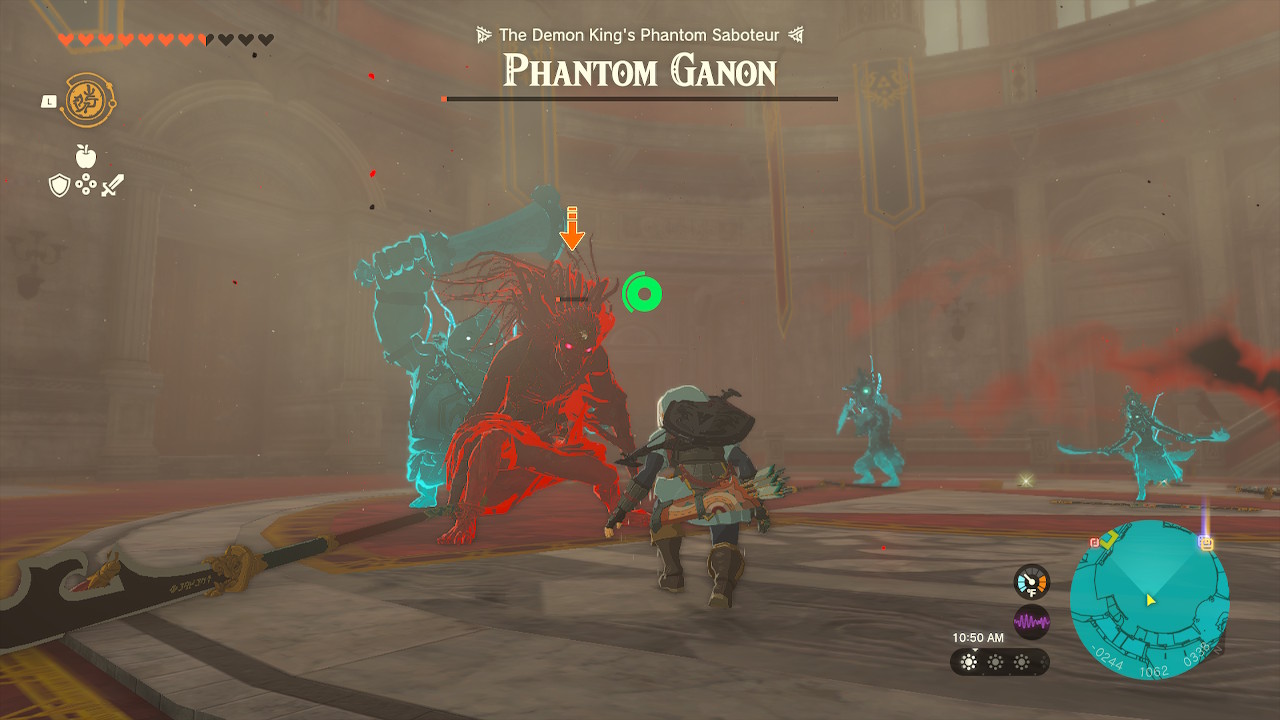
Here’s a link to the Phantom Ganon boss fight!
Phantom Ganon is a phantom puppet that Ganondorf controls.
You face Phantom Ganon after you complete all 4 Regional Phenomena and attempt the main quest called Crisis at Hyrule. After defeating the following monsters in Crisis at Hyrule Castle, you can enter the Sanctum, where the boss fight occurs.
Expert opinion and analysis on the difficulty:
Phantom Ganon is the worst. He is merciless!
In the first phase of the fight, he creates clones of himself as decoys, which can still damage Link. Those clones have clubs, swords, and spears. They are quick to close combat, as the original phantom will subtly be idle and occasionally chase after you.
In the second phase of the fight, he will use a pool of gloom to an advantage, quickly damaging Link's health meter. There are plenty of stressful factors. It's the most terrifying and exciting boss fight you can expect.
One of the major weaknesses is that Phantom Ganon is weak to his own weapons, so when you defeat a clone, steal the clone's weapon to hit him.
He is also weak to other specific weapons, such as the Scimitar of the Seven, the Lightscale Trident, and the Fierce Deity Sword. He's fragile to Royal Guards Claymore-Molduga Hammers because it takes fewer hits to defeat him.
One of his signature moves is taking a wide stance and preparing his sword before striking. You don't have to fight his clones in the second phase, as the original is in a Jesus-like position. Jump off the Sanctum stairs and start shooting arrows at him!
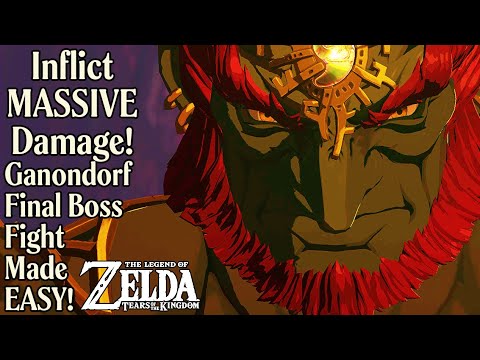
Ganondorf (Difficulty: 10/10)
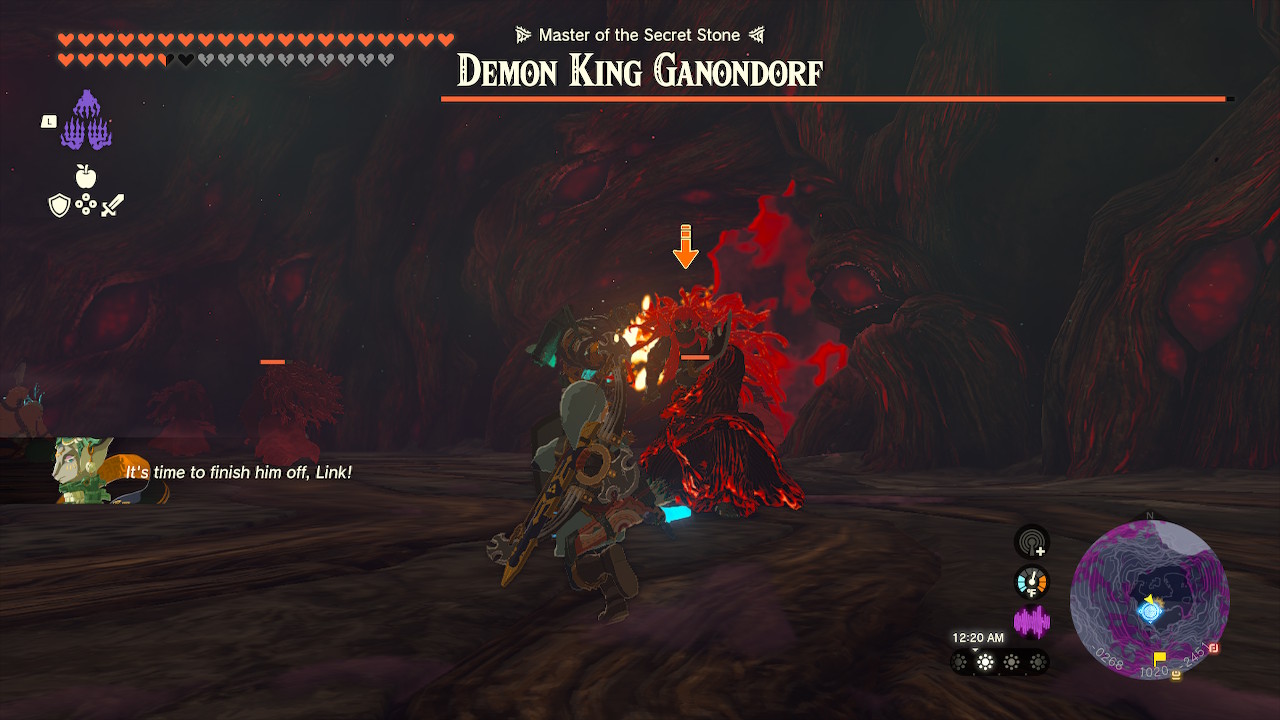
Here’s a link to Ganondorf’s boss fight!
Ganondorf is the main overarching evil boss of Tears of the Kingdom! He is the Demon King.
In terms of story, you will encounter him when you finish all 4 Regional Phenomena, complete the Geoglyphs Tear locations, and achieve the Master Sword. You face him in Gloom's Origin right after completing the War in the Depths of Hyrule.
Expert opinion and analysis on the difficulty:
The most terrifying thing about the fight is that it's long! There is so much necessary equipment, such as a full heart meter and a full stamina meter.
You'll also need to farm many Zonaite, Korok Seeds, Gloom Recovery Meals, Attack-Up Meals, alternate weapons, etc.
You must endure a war against many monsters before facing the Demon King.
Many fans like to take him out the easy way or the hard way. (Psst, the easy way is to throw damaged Royal Guard Claymore's fused with Moluga Jaws at him or use Zonai killing devices). Either way, he is the main boss for a reason.
In the first phase, Ganondorf loves to charge at you and attacks you with his sword. He will notice the flurry rushes right away and use his own.
In the second phase, he'll make phantom clones of himself, and they will attack you too! They're all decoys, as the original won't hesitate! Link's friends will help you at this point of the fight.
The third stage is exhilarating! He'll shoot gloom orbs at you. He'll come jumping up and smash down. He'll go far away and use a gloom shock wave ability. He uses a shadow dash to charge at you fast! What's unnerving is that during close combat, he'll be able to flurry rush with a backflip!
In the 4'th phase, he becomes a freaking dragon! It's an epic fight in the sky, and you must dodge the gloomy meteors he shoots. You must destroy all of his eyes. The last spot is located at his head.
Reccomendations:
For the first 3 phases of the fight, I recommend stocking up on alternate melee weapons if the Master Sword runs out of energy, such as the Royal Guard Claymore, Fierce Deity Sword, Bighorn's Sword, Dusk Claymore, Smitar of the Seven, and the Lightscale Trident! You can also grab the clones' weapons, such as the Gloom Club, and quickly fuse them with Molduga Jaws to throw at Ganondorf.
Ganondorf is most vulnerable in the 4'th phase of the fight. Use excellent bows like the Mighty Zonaite Bows, Gerudo Bows, Royal Guard's Bows, and Savage Lynel Bows. Staying in the air and shooting bomb arrows at his eyes is better than landing on him.
Thanks for reading!
Share this Article:

- Log in or register to post comments