Home
Home PC Game Trailers
 News
News Menu
MenuZelda: Tears of the Kingdom Best Caves To Explore First
Updated: 10 Apr 2024 12:06 am
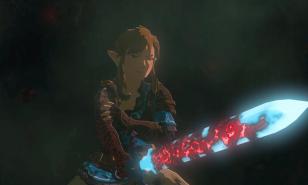
Link is lost in a cave and asks a Stalkoblin for directions.
 BY: Taylor U.
Zelda: Tears of the Kingdom Best Caves To Explore First
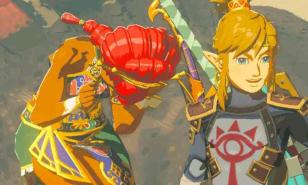
Caves have many items you don't want to miss, such as Zonaite Dispensers, Brightbloom Seeds, Bomb Flowers, weapons, armor, miscellaneous treasure, and special Misko Treasure! Visit these caves first because they have unique items to advance further in the game.
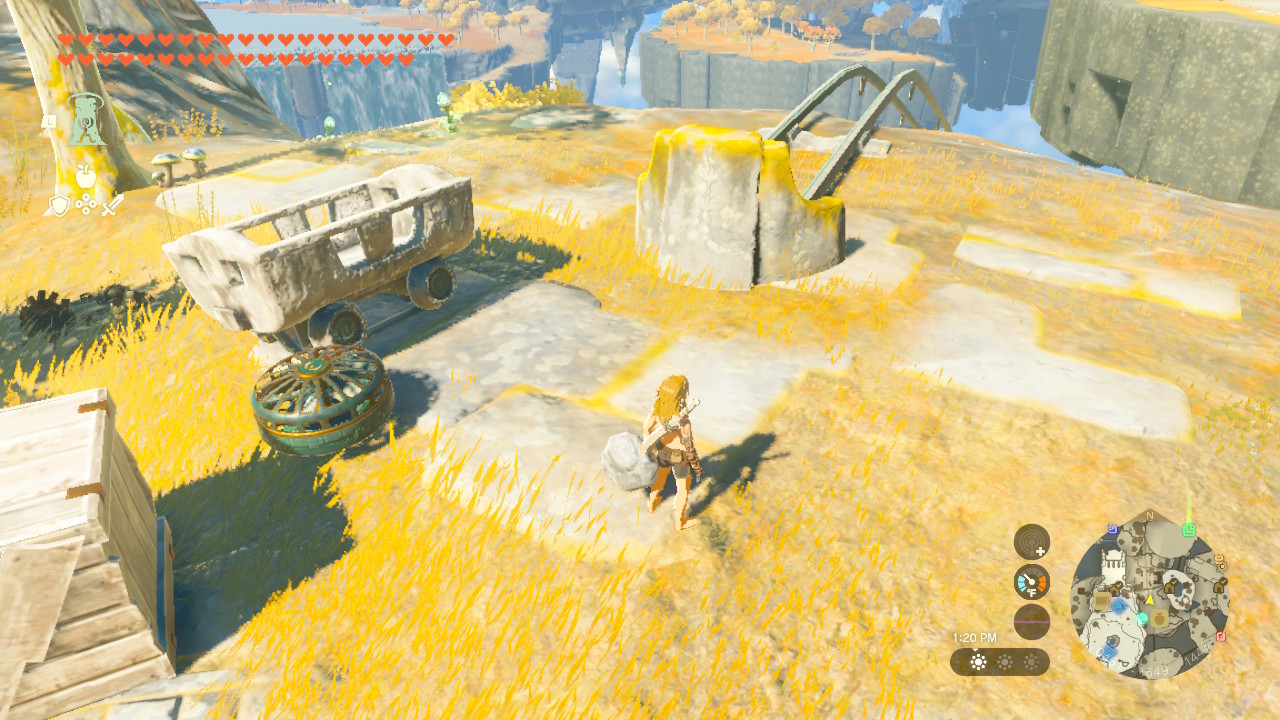
Great Sky Island Mining Cave


The mining cave is on Great Sky Island, below the Room of Awakening floating island.
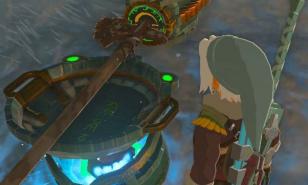
What's special about this cave is that a Forge Construct lives there, and there is also a device dispenser.
The mining cave on Great Sky Island is the best one to explore first so you can get items and mine early Zonaite! You can start fusing items, such as a mine-cart shield, which is useful for traveling on the ground faster. There is a Forge Construct and a Device Dispenser.
Why explore this Cave:
- There is a Forge Construct where you can exchange Zonaite for Zonai Charge or Crystalized Charges. There are Zonaite dispensers everywhere. Crush them all, and you can have enough to buy only a few things from the Forge Construct.
- Achieve lots of bright gloom seeds! This cave has plenty, so save some to explore more dark caves.
- Find some minecarts and fuse some to your shield, allowing you to shield surf! You can shield surf on slopes or minecart rails.
- Remember to use the fuse ability to create weapons! This cave has stones and wooden sticks to create a brief rock hammer, which is most important to early survival.
- Other useful items in this cave have fans, restless crickets, and a Bubbul Gem. You can fuse fans to a wooden stick, blowing enemies away. You can start farming restless crickets, creating stamina recovery elixirs. Bubbul Gems are useful later in the game, such as buying monster-related armor and items at Kilton's shop.
Great Sky Island Mining Cave location:
I marked the quickest way to travel to the cave with a purple pin.
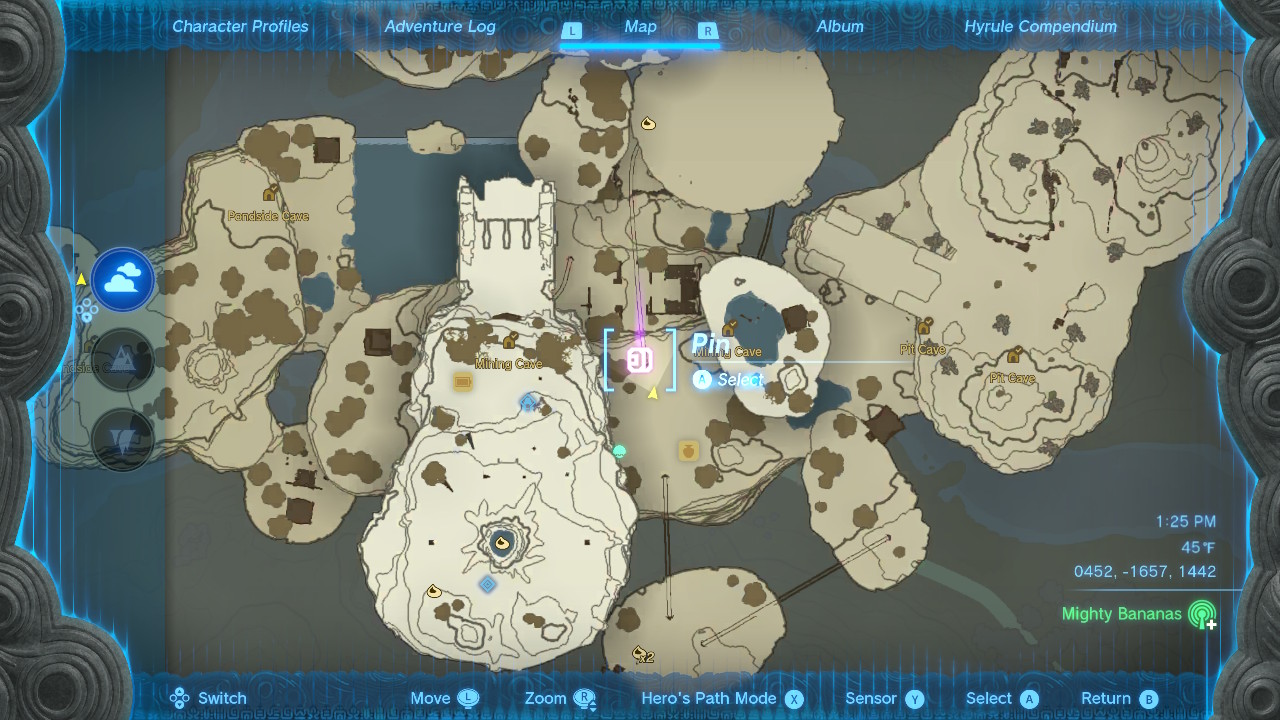
You should find a minecart trail. Use the minecart there. Fuse it with a shield to shield surf down to the cave, or use the Ultrahand ability to craft the fan with the minecart. If you sled down the hill and walk to the left, there's an alternate route to the cave's exit.
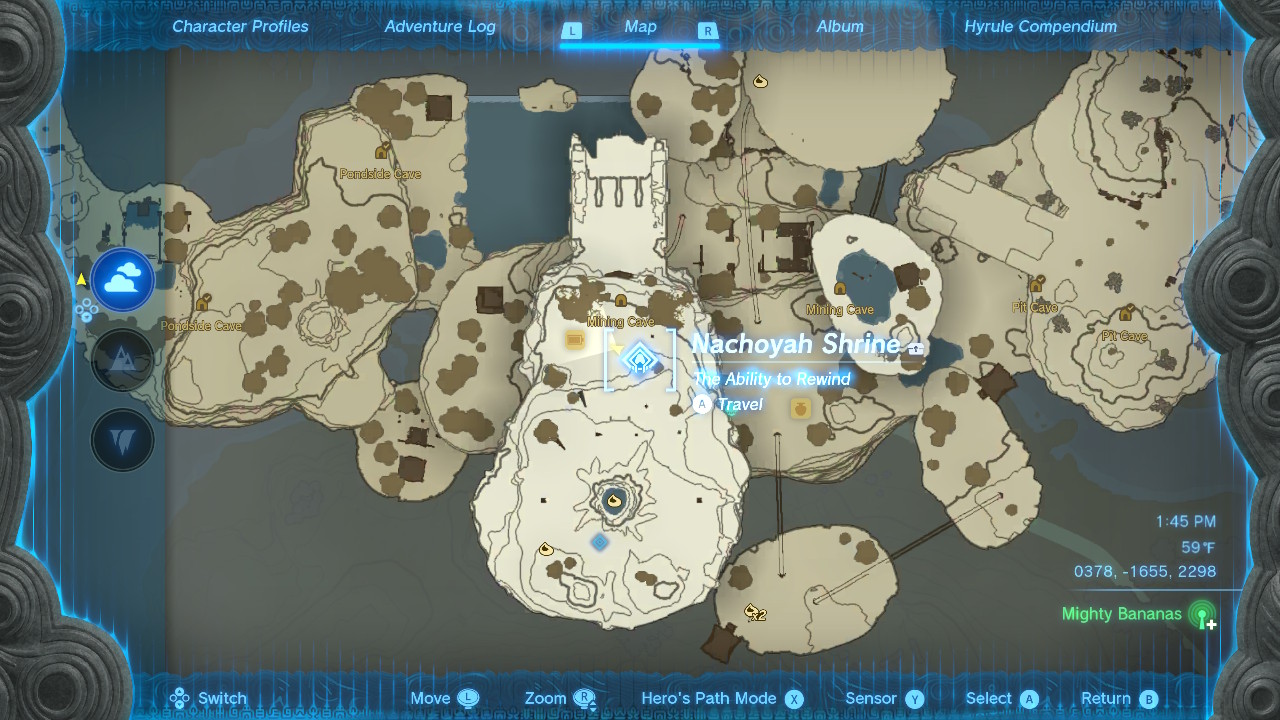
2. The Hidden Cave in the Room of Awakening
The hidden cave in the Room of Awakening is behind the spinning wheels. Use the recall ability on the spinning wheels to get there successfully. Ideally, this should be your 2'nd cave to visit after completing all of the Great Sky Islands' shrines.
What's special about the Room of Awakening hidden cave is that the steward construct runs a crystal refinery near the Nachoyah Shrine. The refinery improves the amount of slots in your energy cell.
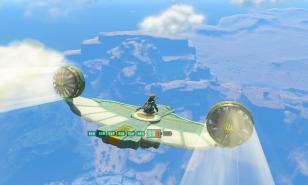
This is the best cave to revisit so you can continue to improve the energy cell to its maximum power and buy instant Zonai devices. Outside, there are wings, so you can fly above Great Sky Island and observe what is most important to you with a bird's eye view.
Why explore this cave:
- This will be your most frequently visited cave because you'll start to notice that more energy cells will give Zonai devices to run longer. By talking to the Steward Construct, you'll need 100 crystalized charges to improve your energy cells. The more you have, the easier it will be to run the Zonai devices or Zonai weapons you create.
- Once you have fully upgraded your energy cell, the steward construct can trade crystalized charges for your choice of Zonai devices. This is where you can get all Zonai devices! Besides the Big Battery, all Zonai devices cost 3 crystalized charges. The Big Battery costs 30 crystalized charges.
- Explore and finish the Nachoyah Shrine. It has a treasure waiting for you 10x arrows. You will also have a light of blessing, so you can return to the goddess statue at the temple of time and improve your hearts.
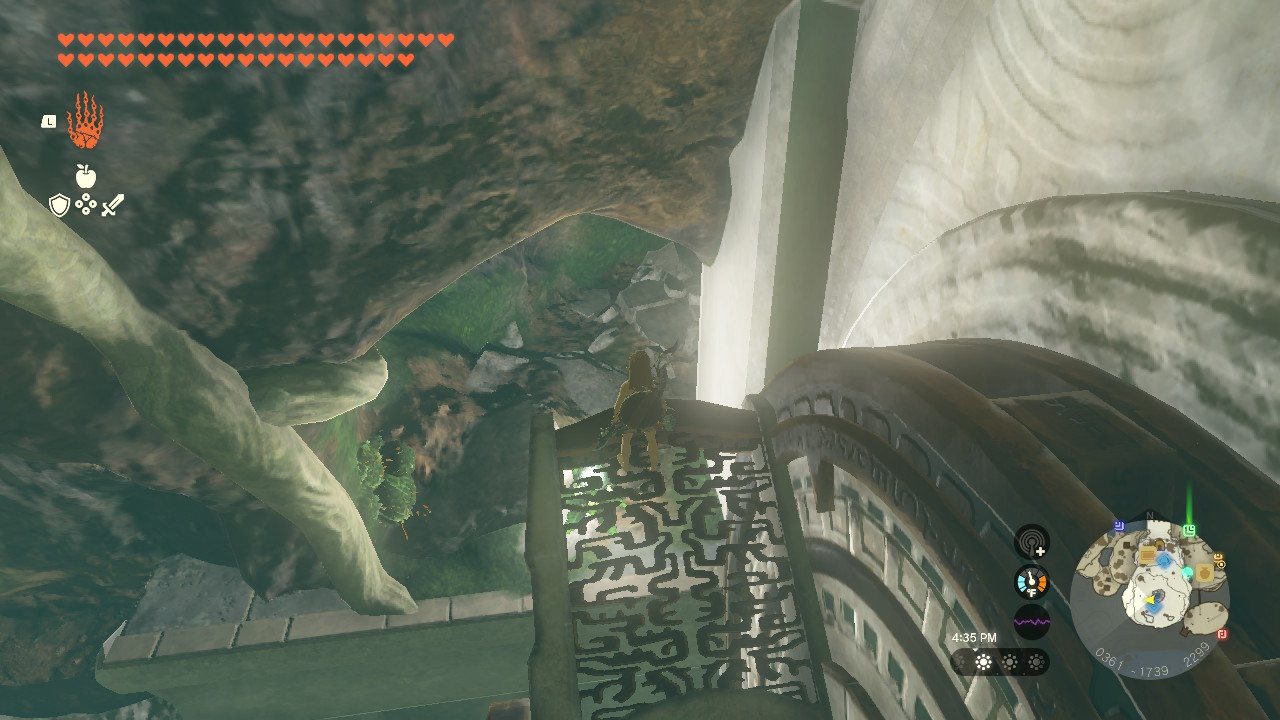
Hidden Cave in the Room of Awakening hidden cave location:
Go to the Room of Awakening. There will be a noticeable path to the Nachoyah Shrine.
Ascend on a roof facing the wheels. Use the Recall ability on the wheels and head toward this cave opening. Alternatively, stand on a rock in the water below one of the wheels and Ascend from there.
3. Bottomless Cave Great Sky Island

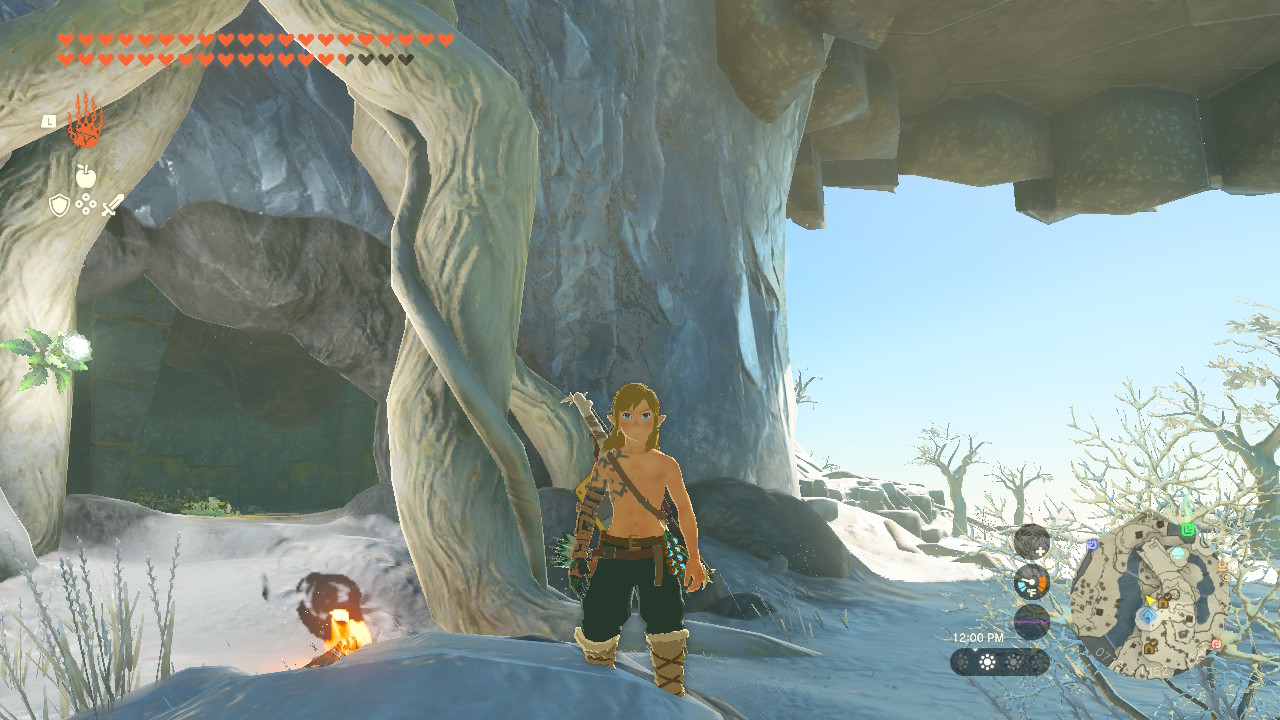
The Bottomless Cave is located north of the Gutanbac Shrine, in Great Sky Island's freezing area! Be prepared to have your Archaic Warm Greaves or eat some Spicy Peppers for cold resistance.
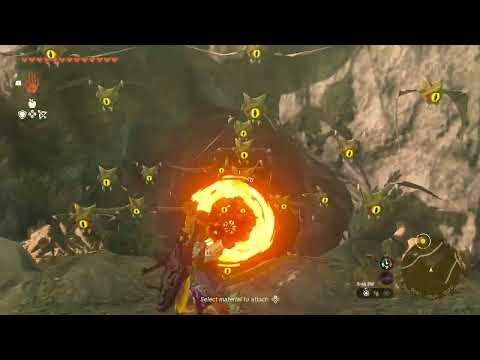
What makes this cave special is that it has a flame-emitter shield! Not all caves have loose fusion weapons hanging around. This cave introduces like-likes, which are monsters that have treasure!
After completing all 4 of the shrines on Great Sky Island, you should head here immediately to grab some important stuff. Few items are available for survival, such as the flame-emitter shield, as there are items to sell, such as like-like stones.
Why explore this Cave:
- It has a fused Flame-Emitter Shield! They are useful for far-range defense against enemies, protecting yourself while burning them. You can burn vines, defrost treasure stuck in ice, and use them for igniting a campfire.
- It's one of the best-looking caves in Great Sky Island, as tree branch vines surround the cave. It introduces you to climbing tree-branch vines. It's great practice for practicing climbing at angles. By climbing its walls and branches, you can find Skyshrooms and Bomb Flowers. There are plenty here!
- There are 2 Like-Likes. They can be stunned by a Flame-Emitter Shield and defeated by a few sets of Rock-Hammers. Both will drop a Like-Like stone worth 15 rupees and a piece of Opal worth 30 rupees.
- You can also find some stones, Brightgloom Seeds, and a Bubbul Gem. The mineral deposit inside here has rock salt and amber. There are 2 Zonai treasure chests. One has amber below the cave stairs, and another upstairs has a flame emitter. Amber is worth 30 rupees.
Bottomless Cave location:
It's north of the Gutanbac Shrine, under the big tree stump.
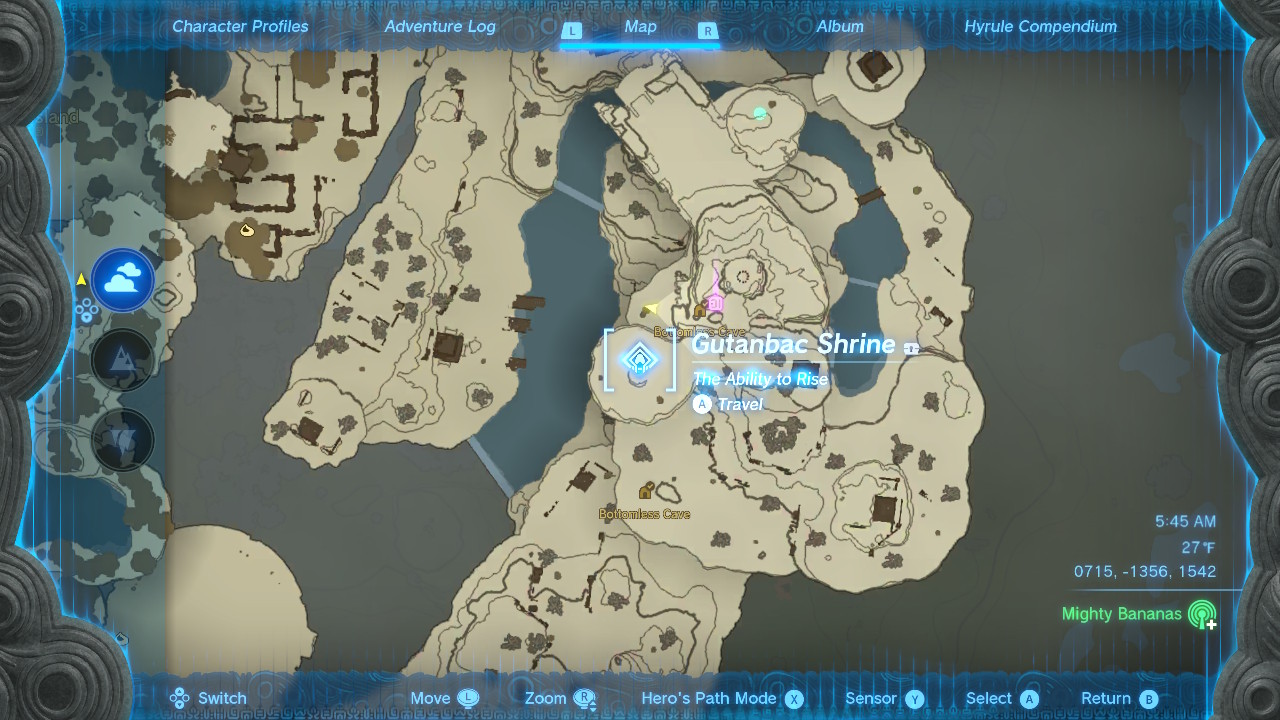
Don’t jump down! Safely climb down the tree vines where you can find the cave here.
4. Ranch Ruins Cave in Mabe Village Ruins
Once you dive into the Bottomless Pond and journey to Lookout Landing, the Ranch Ruins Cave should be the first cave you visit. It's northwest of the Bottomless Pond, near the Mabe Village Ruins.
Get some early items in Hyrule! The Ranch Ruins Cave is special because it has a Knight Broadsword and Travelers Bow waiting for you.
The Ranch Ruins Cave is one of the best caves to visit early because finding loose food is highly important when you may not have enough arrows to hunt animals. Horriblins in caves usually have food. This cave is one of their monster camps.
Why explore this Cave:
- There are great weapons here! You'll find some Rock Sledges that are good for crushing mineral deposits and rubble. A loose Travelers Bow is hiding in a small gap in the cave. You'll need lots of bows before heading to the 1'st regional phenomena. The treasure chest has a Knight's Broadsword with 7 defense points and a durability up.
- There's a loose steak near the treasure! Take it before the 2 Horriblins eat it. To regain health, you will want to harvest as many meals as possible with steak.
- Other items in this cave include Brightbloom Seeds, a Bubbul Gem, a loose Arrow x5, and Brightcaps. Brightcaps can be used in meals, regaining hearts and making you glow in the dark, which will be essential for visiting the depths for the first time.
Ranch Ruins location:
Follow through the ranch ruins and head toward a large boulder-like cave.
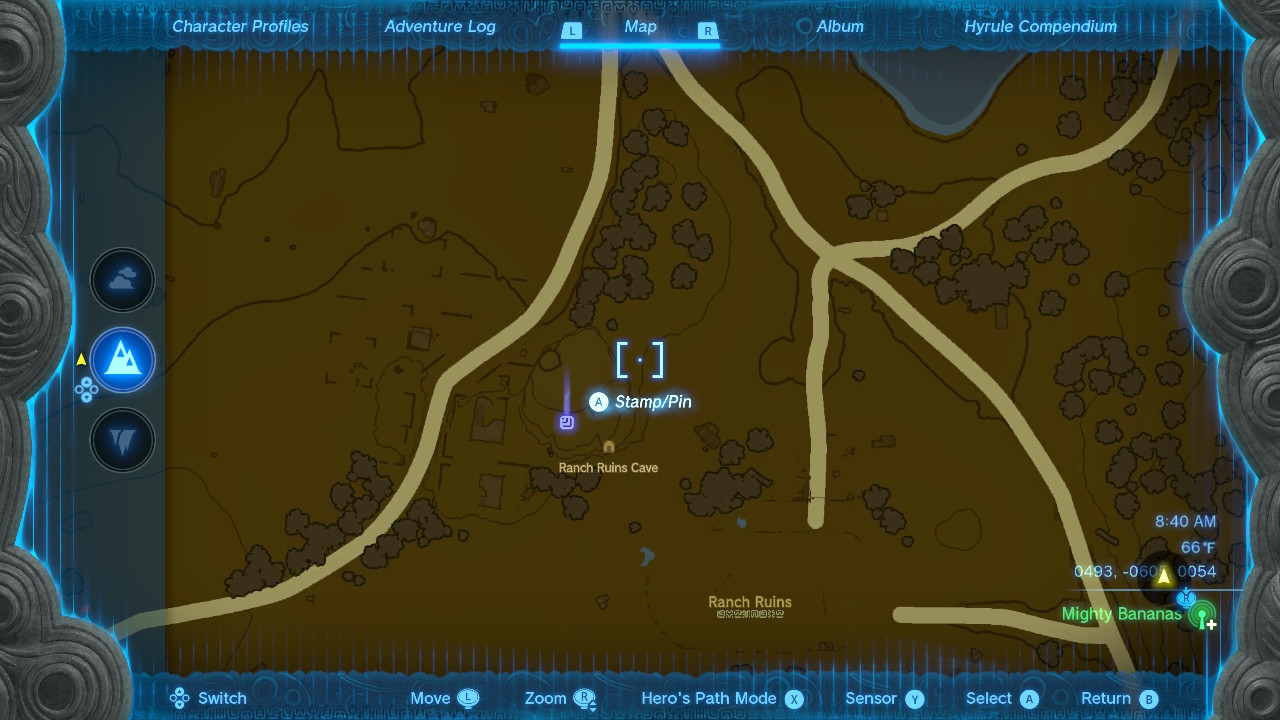
It looks like this. If you see a glowing bunny, shoot it with arrows and get some rupees!
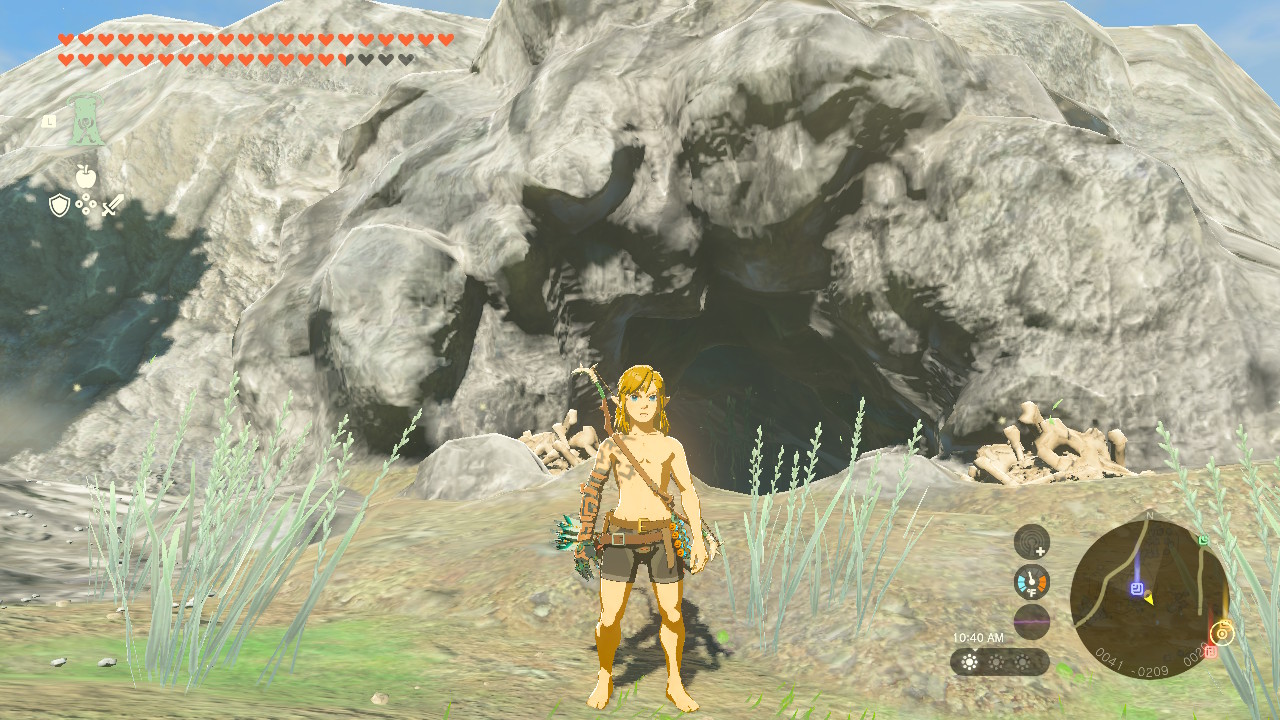
5. Royal Passageway Cave
The Royal Passageway is located at Lookout Landing's shelter room. It's also located at the Observation Room across the moat.
What's special about the Royal Passageway is that it is home to the Soldier Armor set. This particular armor has the highest defense when fully upgraded, with 84 points. If desired, you can get this armor early in the game. The Soldier's Armor offers no unique abilities, and there are much better armors that share the same stats, such as the Zonaite armor, which offers an Energy Up ability.
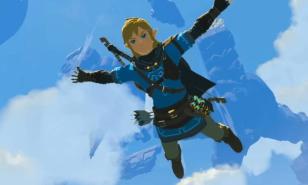
The Royal Passageway cave is the most important cave to visit after talking to Purah, getting the paraglider, and unlocking Lookout Landing's Skyview Tower. It offers various great weapons, from Royal Halberds to Royal Claymores. Grab plenty of shields, such as a soldier's shield, a traveler's shield, and a royal shield or royal bow if you're lucky to find one!
Why explore this Cave:
- The cave has many Hyrule weapons! A few of the strongest weapons I recommend saving are Royal Halberds, Soldier's Bows, Soldier Spear, Soldier's Broadsword, Soldier's Shield, and Royal Claymores. There are far more weapons to explore. Some Like-Like's have a Royal Bow, one of the game's best bows.
- There are lots of bomb flowers, Brightbloom Seeds, and Brightcaps. Search for other useful food items, such as Hylian Shrooms stuck on tree stumps. Throughout the passageway, you can find rooms with Ironshrooms, Rushrooms, Stamella Shrooms, Hearty Truffles, Palm Fruits, Wildberries, and Mighty Bananas! Making many meals will be important before heading to the 1st regional phenomena.
- Collect many monster parts for fused weapons, such as Blue Lizalfos Horns, Black Bokoblin Horns, and Silver Hornibal Claws. You can crush minerals in this cave to collect salt, flint, amber, and occasionally ruby and sapphire. Monster guts, amber, ruby, and sapphire are helpful for increasing your rupee wallet quickly.
- The Royal Passageway is an intriguing cave as its ruins and prisons blend in with the cave. There's much to explore, and it is worth revisiting as weapons and items respawn in the game over time.
Royal Passageway location:
Use the Skyview Tower for the first time and glide toward the Observation Room. I marked it with a purple pin.
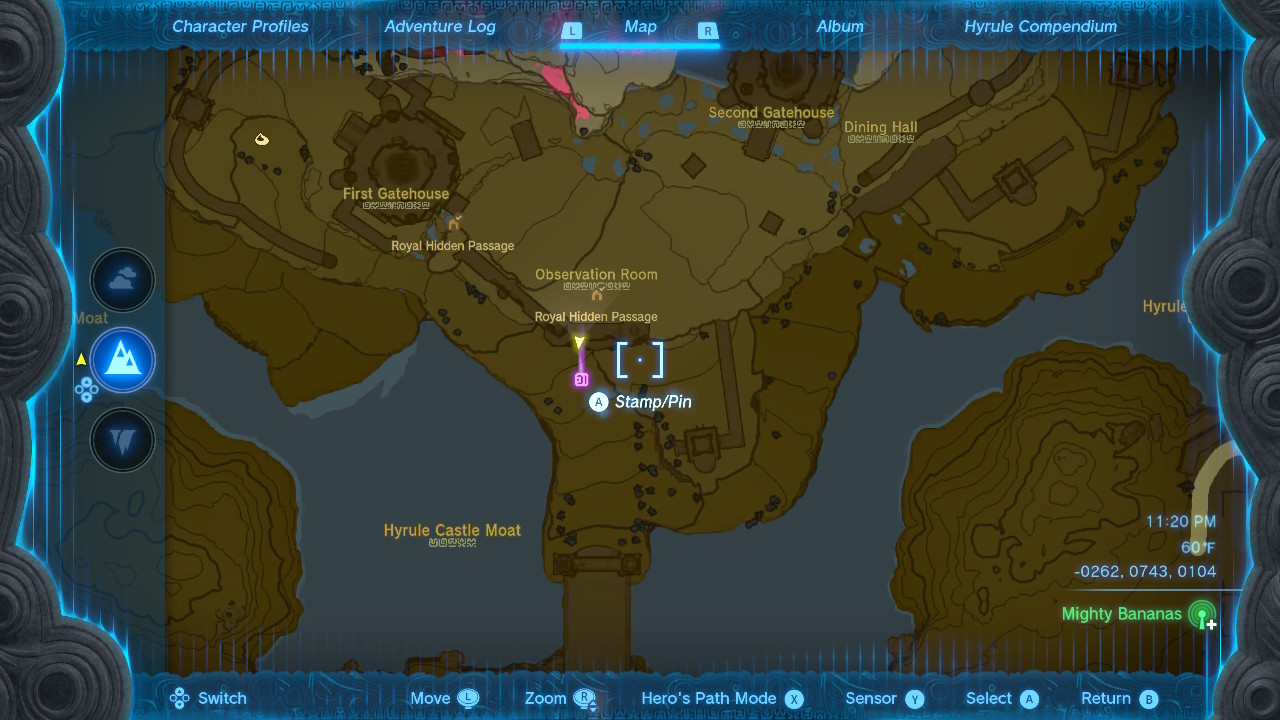
Glide toward the Observation Room. It’s the one with 3 open arcs facing the moat and has a red Triforce flag. I marked it with a Brightbloom Seed for you.
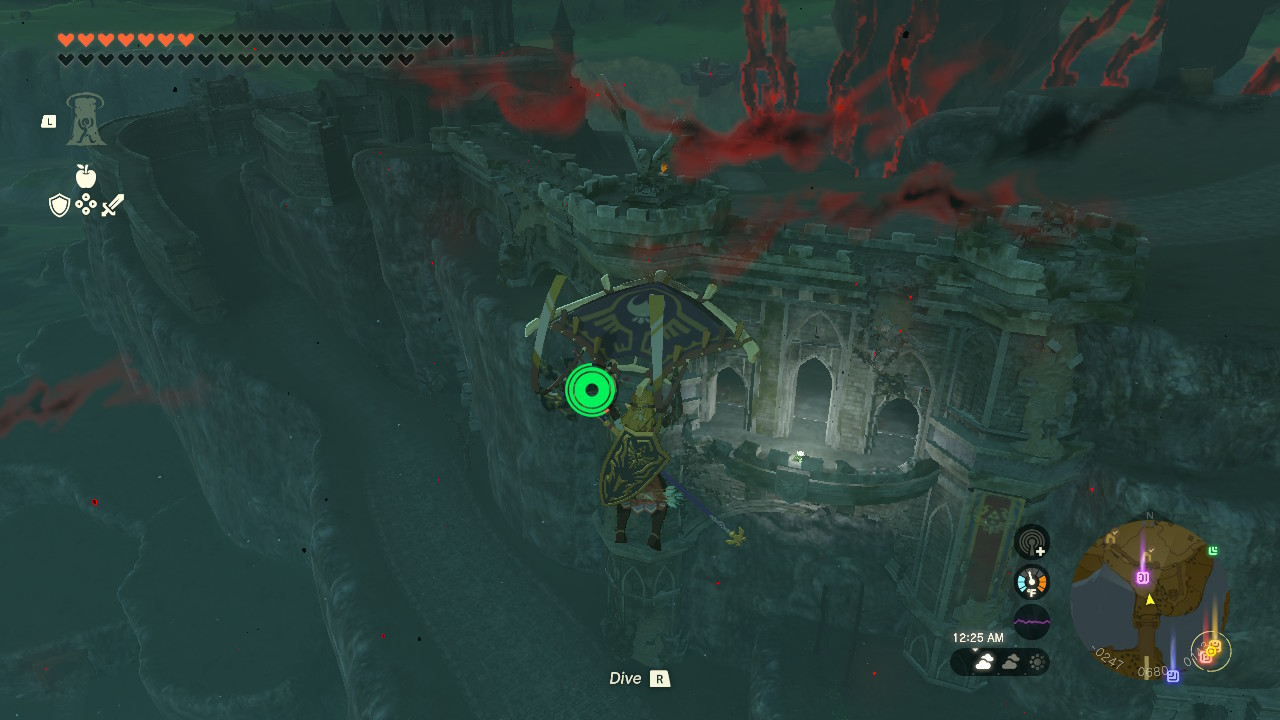
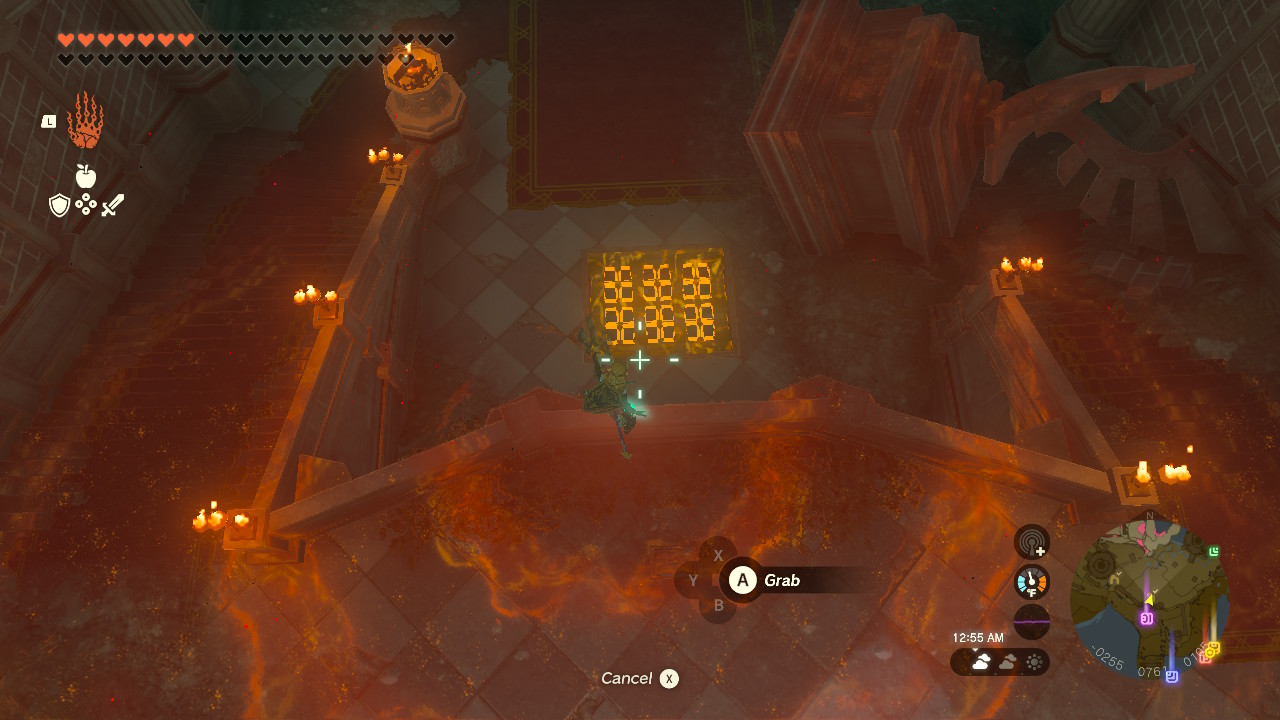
Here’s the secret entrance! Use the ultrahand ability to open it and have fun exploring!
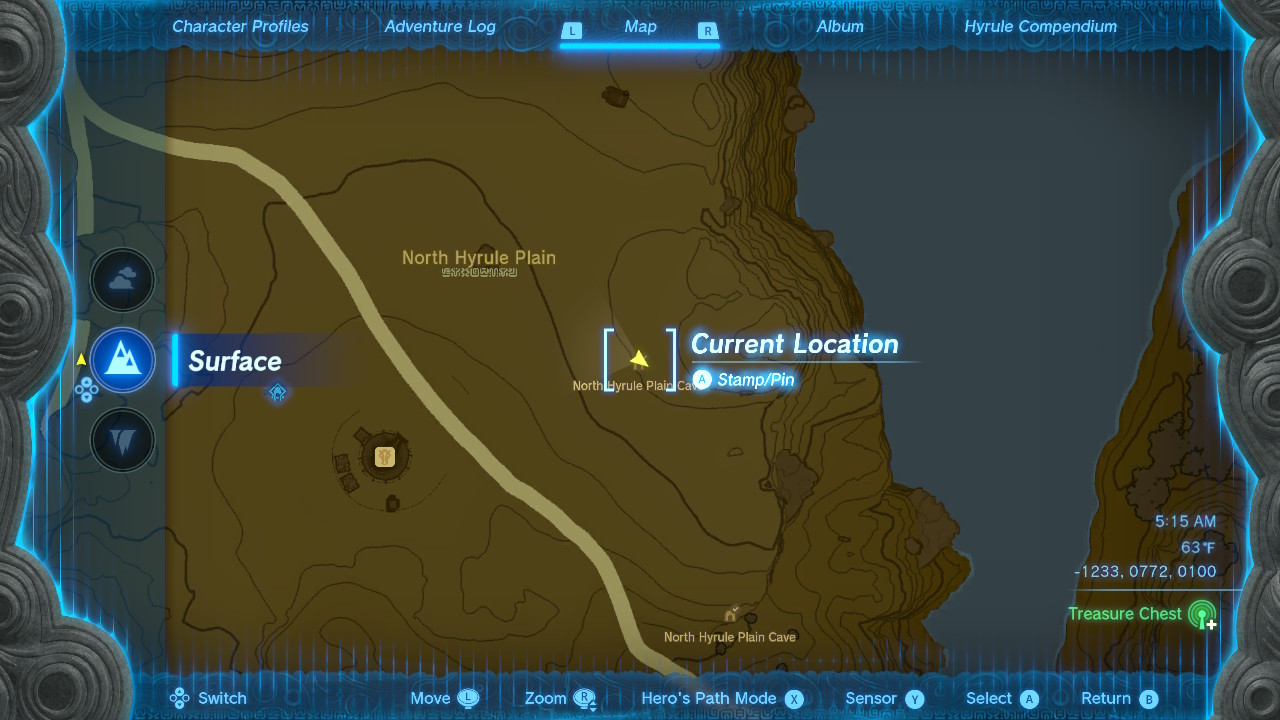
6. North Hyrule Plains Cave

The North Hyrule Plains Cave is west of Hyrule, near the first Dragon Tear tattoo you should encounter with Impa.
What's special about the North Hyrule Plains Cave is that it has the Climbing Torso! It will partially increase your climbing speed.
This cave has important critters for making several elixirs early in the game. One of the most valuable critters is sticky lizards. When cooked in an elixir, it allows you to climb wet surfaces.
Why explore this Cave:
- Get the Climbing Torso early! It's behind a waterfall, and it's easy to miss. You'll want to increase your climbing speed early in the game as fast as possible.
- Achieve a few weapons and treasure. A Horriblin wields a rusty Halberd Stick good for far-range combat. 2 Like-Likes have treasure, 2 Royal Shields with durability ups, some arrows, and their Like-Like stones.
- Important critters to grab here are Sticky Lizards, Tireless Frogs, Hot-Footed Frogs, and Glowing Fish. Sticky Lizard elixirs help you climb wet surfaces. Tireless Frogs elixirs help you create extra stamina. Hot-Footed Frog elixirs help you move faster, like running or climbing. Glowing Fish offers glowing effects when cooked into a meal. They offer slightly more hearts than Brightcaps do. Remember to acquire a Bubbul gem!
- Spicy Peppers are outside the cave, facing the Carok Bridge. Cook them into a cold-resistance meal to attempt the 1st regional phenomena in Hebra. It's freezing there!
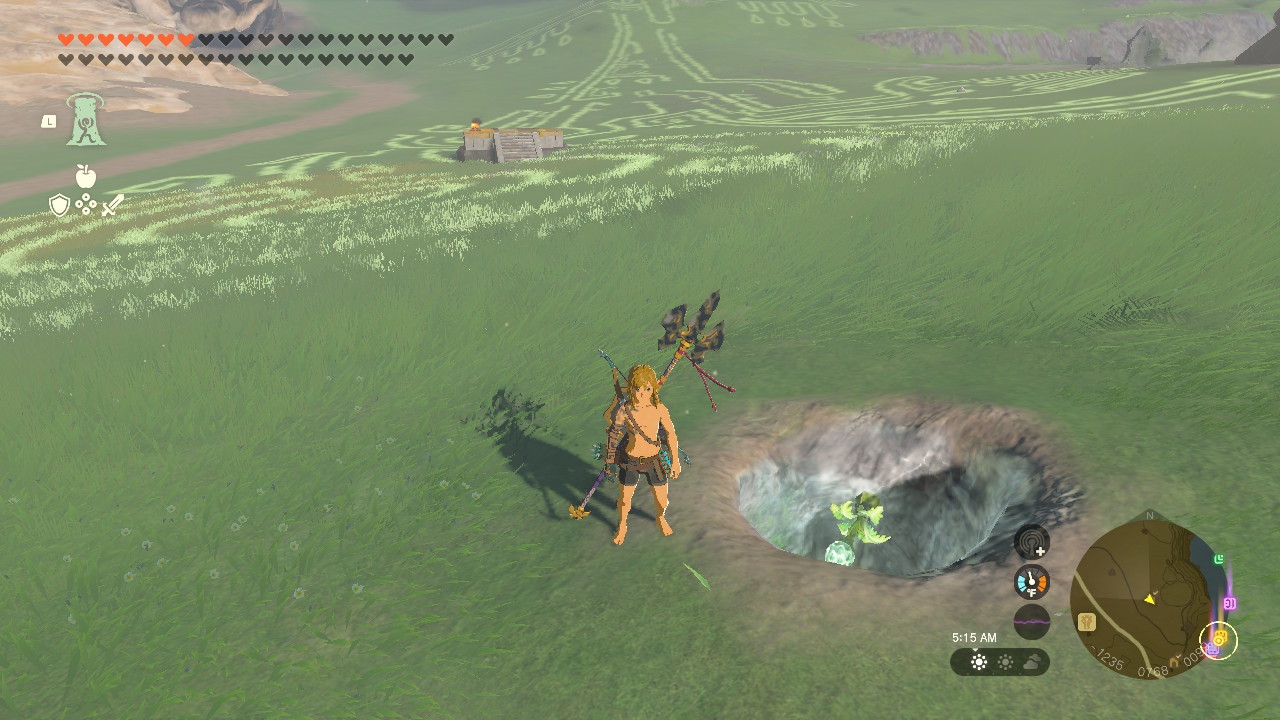
North Hyrule Plain location:
You can find a hole south of the Dragon Tear.
Here’s what it looks like!
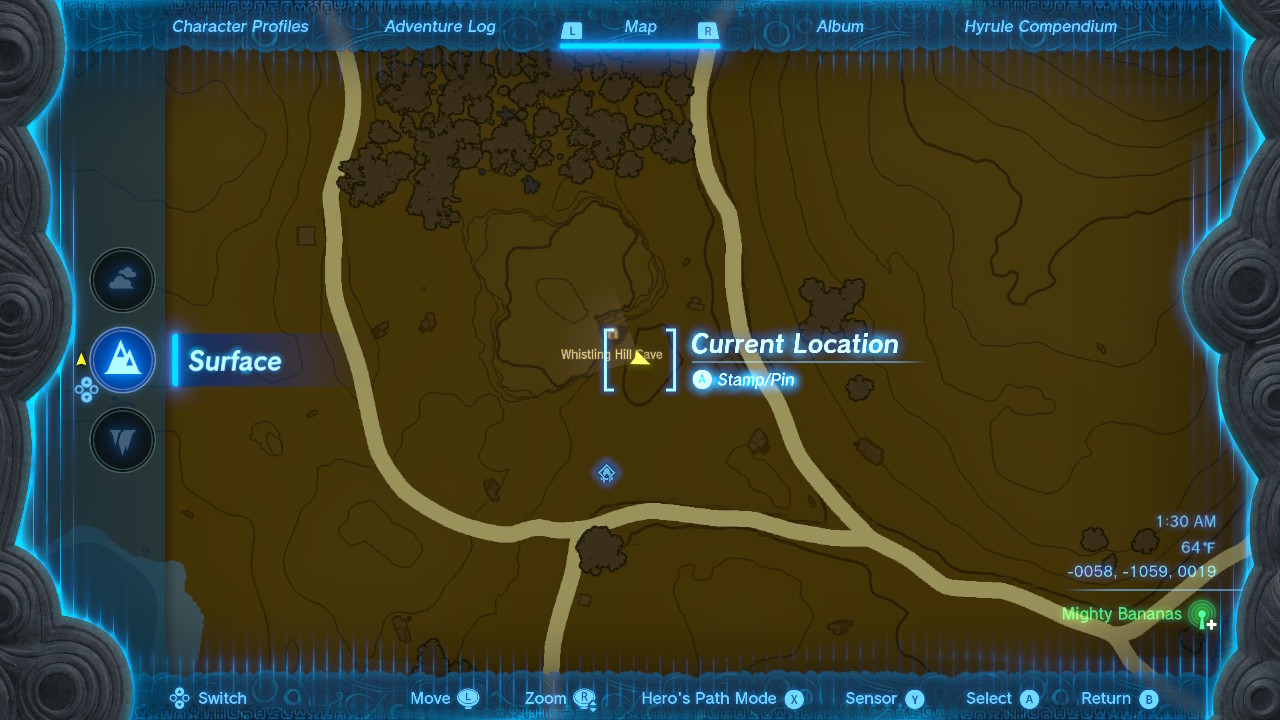
7. Whistling Hill Cave

Whistling Hill Cave is in South Hyrule by Whistling Hill and is close to the Teniten Shrine.
What’s special about the Whistling Hill Cave is its Rubber Armor Chest! The Rubber Armor grants a shock resistance ability.
Whistling Hill has many useful early weapons, such as a Boko Bow, Construct Bow, and a few rusty weapons. The Like-Like’s have treasures such as amber and a Traveler’s Shield.
Why explore this Cave:
- Get the Rubber Chest early! It grants shock resistance, which is useful when Hyrule has a thunderstorm. It’s useful against enemies that have electric powers. An electric Like-Like guards it.
- Get some Bokoblin Monster parts early! Stalkoblins reside here during the night. Defeat them and get their horns and arms. Bokoblin horns are useful for arrow fusions. Bokoblin arms are perfect for fusing onto melee weapons such as a strong Soldier’s Broadsword. You can also take their weapons, such as a Rusty Claymore, a Rusty Halberd, and a Boko Bow.
- Farm many early items here, such as Bomb Flowers, Brightbloom Seeds, and Brightcaps. You can find Amber, Opal, Flint, Topaz, and sometimes a Diamond. Occasionally, there are crawling Sticky Lizards.
- The Like-Likes in this cave will drop different sorts of treasure. A normal Like-Like will drop a piece of Amber or a Royal Shield if you’re lucky! The Electric Like-Like drops Shock Fruit, an Electric Like-Like Stone, a Traveler’s Shield, or a Royal Bow.
Whistling Hill location:
It’s behind the Teniten Shrine, where there is a large rocky mountain.
This is what it looks like!
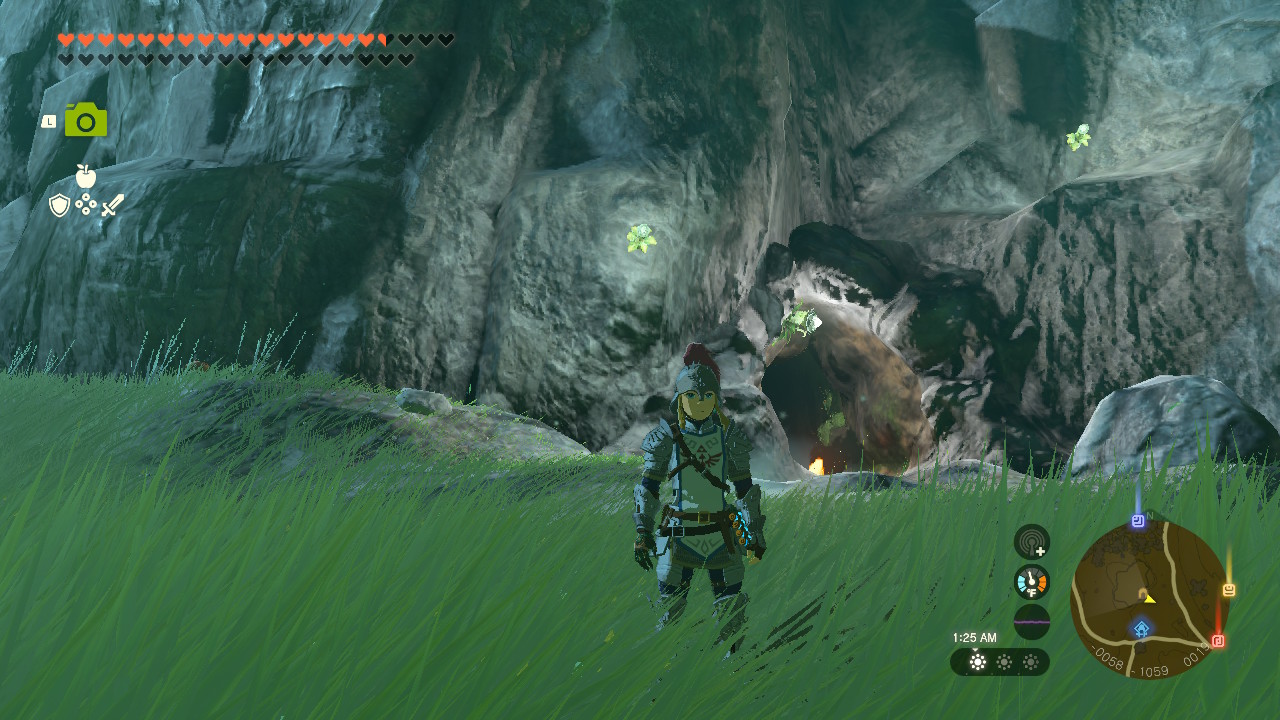
8. Brightcap Cave
Brightcap Cave is east of Lake Totori and close to the Orumuwak Shrine. It has dangerous vines. Vines are weak to fire items such as Red Chu-Chu Jelly, Flame Emitters, and Fire Fruit.
What's special about Brightcap Cave is that it has the Frostbite Shirt! It will grant you a cold-weather attack ability.
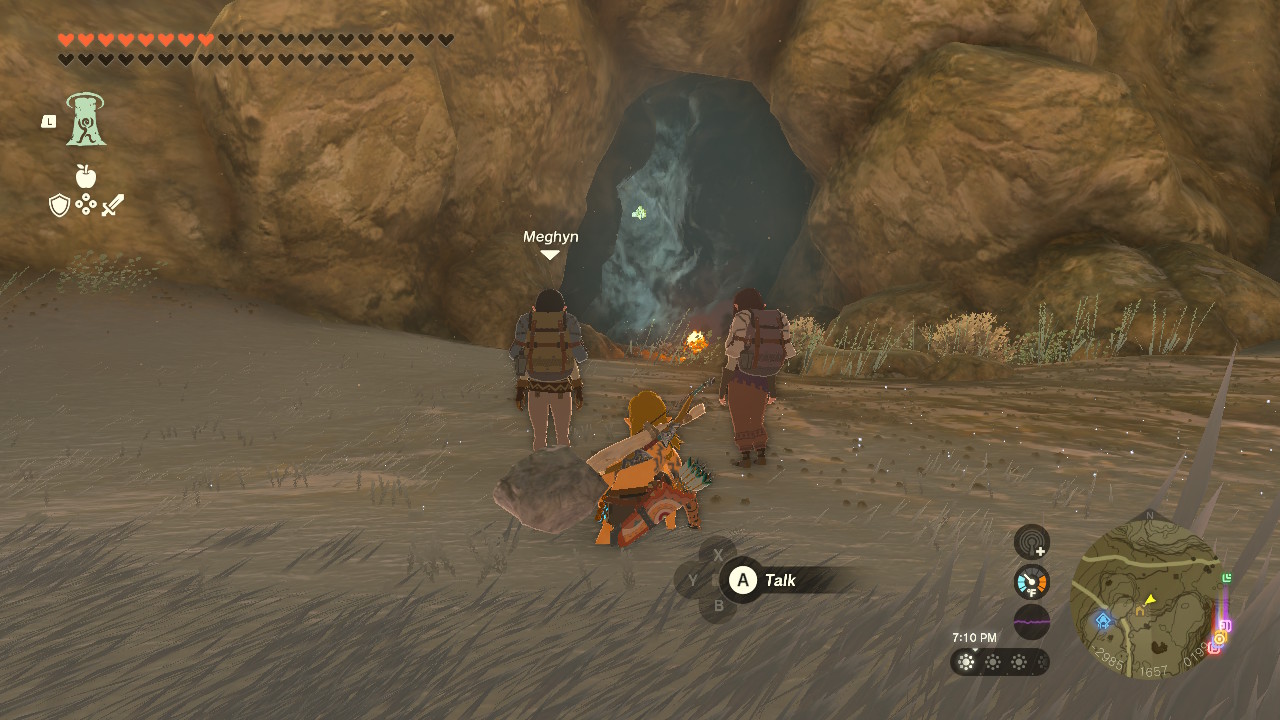
Before visiting Brightcap Cave, acquire a piece of the Snowquill Tunic sold in Rito Village's Armor Shop to Village's Hebra longer. Brightcap Cave has useful items to sell, such as luminous stones and sapphire. 2 NPCs, Nat and Meghyn, want Brightcaps but are afraid to go. They need your help, and you should because there's a reward!
Why explore this Cave:
- It has the Frostbite Shirt! It grants a cold-weather attack, which is useful for fighting enemies in Hebra. It's recommended to wear the Frostbite Shirt with some pieces of the Snowquill Tunic to gain cold resistance in addition to cold-weather attacks.
- The Like-Like here has a rare treasure, a Swallow Bow. One of The best types of Swallow Bows you can get is 14 defense points and an attack up +6 or more. Depending on some Like-Like's in Hebra, not all Like-Like's will drop a Swallow Bow with a high attack power.
- The mineral deposits here drop minerals such as rock salt, flint, sapphire, and luminous stones. Rock salt is perfect for enhancing all your meals. Flint is useful for creating fires but great to keep for upgrading armor. Luminous Stones have a partial value selling for 20 rupees, but keeping them to upgrade armor is recommended. Sapphire sells for 150.
- If you talk to the 2 NPCs outside the cave, NPC'snd Meghyn, you start the Cave Mushrooms That Glow side quest. Achieve 10 Brightcaps and give it to them. They will reward you with a free meal, a Spicy Tomato Mushroom Stew. The meal grants 4 hearts, including 5 minutes and 30 seconds of cold resistance. Grab this meal before you attempt Tulin of Rito Village!
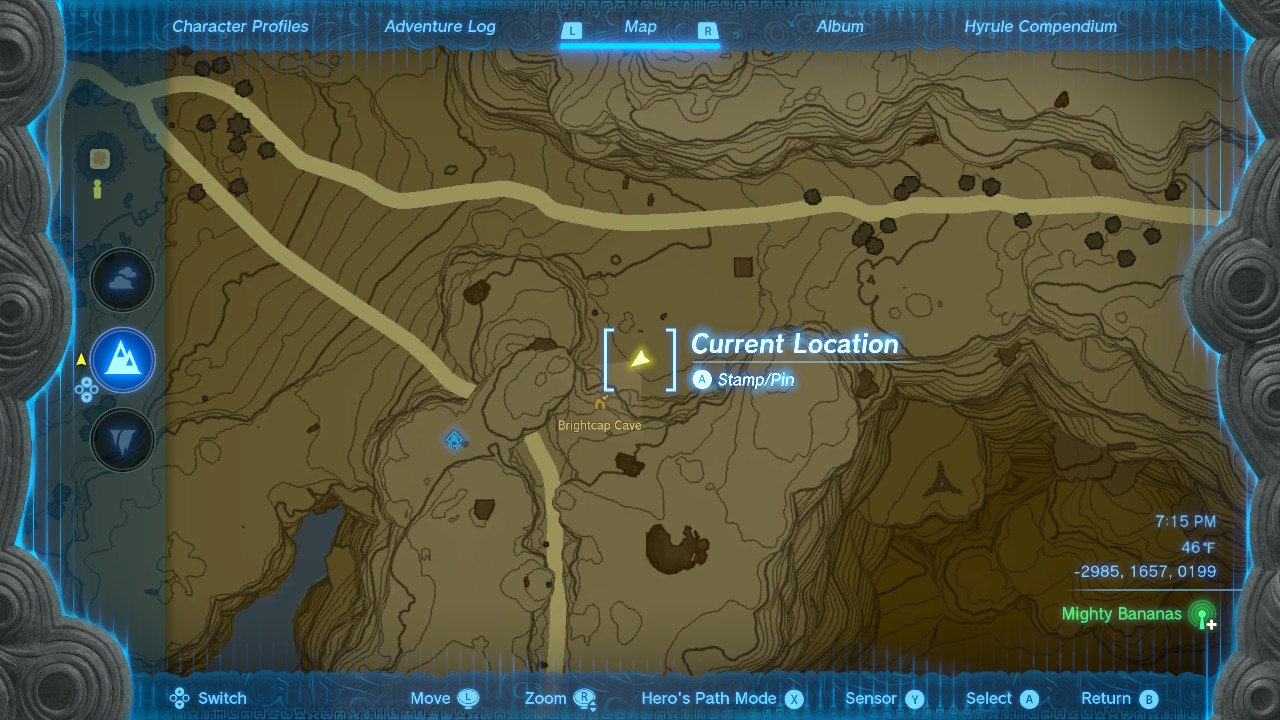
Brightcap Cave location:
It’s below the rocky hill from the Oromwak Shrine.
You can find the NPCs here facing the cave.
9. Crenel Hills Cave
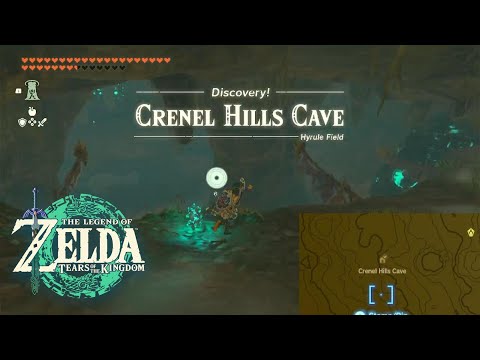
Crenel Hills Cave is east of Hyrule, near the Ren-Iz Shrine. This cave has a Stone Talus. Be prepared to take it down! Go to this cave after completing the 1st Regional Phenomena.
What makes the Crenel Hills special is that it is home to the Barbarian Chest piece to the Barbarian Armor set. The Barbarian Armor is one of the best armors to get early in TOTK because by finding all 3 pieces, you can activate the set bonus by performing many charged attacks with little stamina needed.
Not every cave has a Stone Talus! This Stone Talus in Crenel Hills is essential to take down because it's an easy Stone Talus with an important fuse weapon, a Luminous Talus Heart. This cave has plenty of mineral deposits to crush.
Why explore this Cave:
- Find the Barbarian Chest hiding behind a rubble of Luminous Stones! The Chest Piece won't be much, but it will offer attack-up power as you progress through the game when fighting mini-bosses and main bosses. Strike monsters such as Bokoblins, Horriblins, Lizalfos, and Soldier Constructs with less effort.
- The Stone Talus inside this cave will drop many Luminous Stones, some Amber, some Opal, and some Flint. It will drop a crucial fuse item, a Luminous Stone Talus Heart. It's great for fusing onto shields. It's recommended to have a great defense in the nighttime or in the depths wearing a Luminous Stone Talus Shield.
- Some Sticky Lizards are crawling on the ceiling. Get more Sticky Lizard to prepare for visiting Lanayru soon. There's a heart truffle hiding near the entrance close to a mineral deposit and stone. Heart truffles are perfect for regaining health, especially if you're cooking with many heart truffles in the future. Don’t forget to crush mineral deposits with rock salt, amber, flint, and luminous stones.
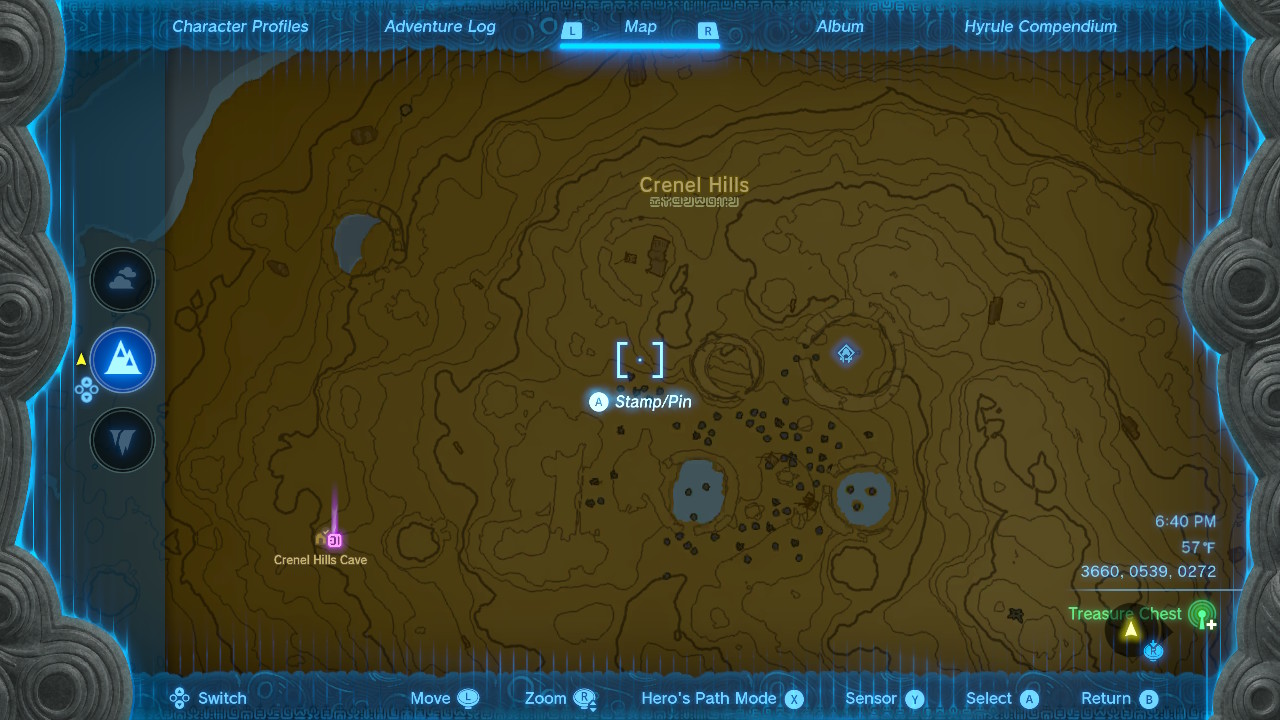
Crenel Hills location:
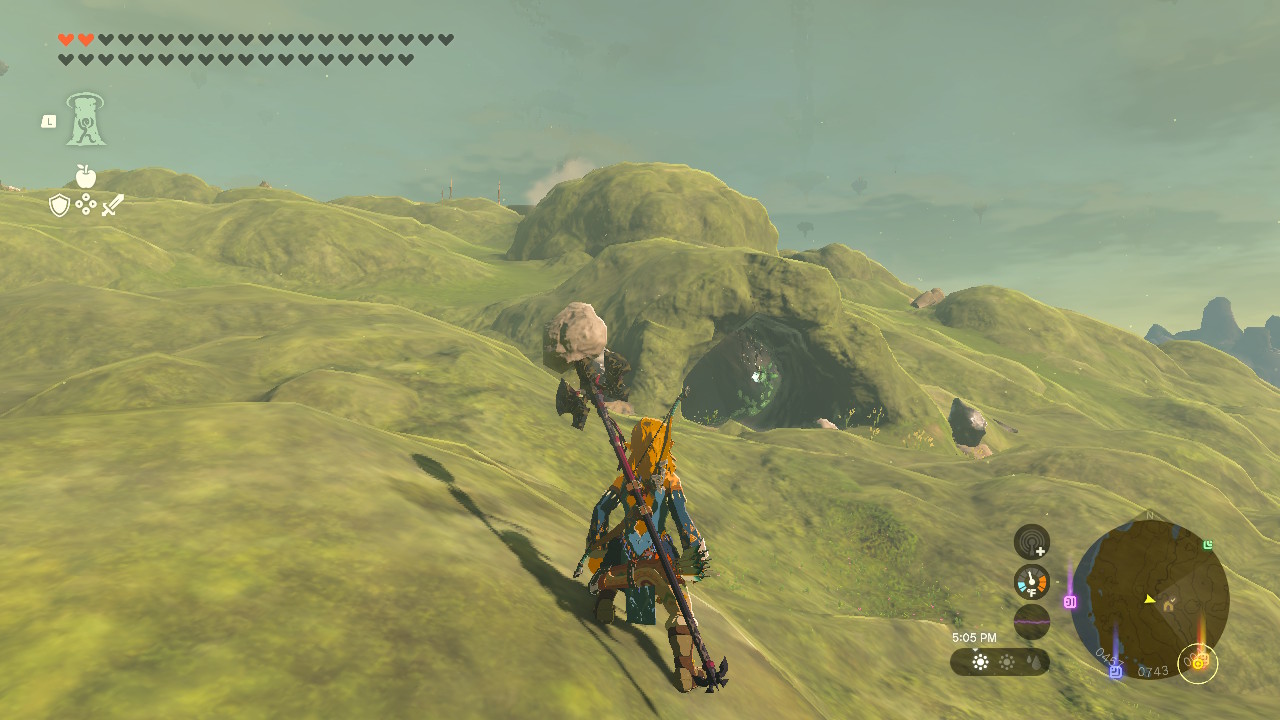
The entrance overlooks the Hylia River. You can spot it from the shore.
Here’s what it looks like!
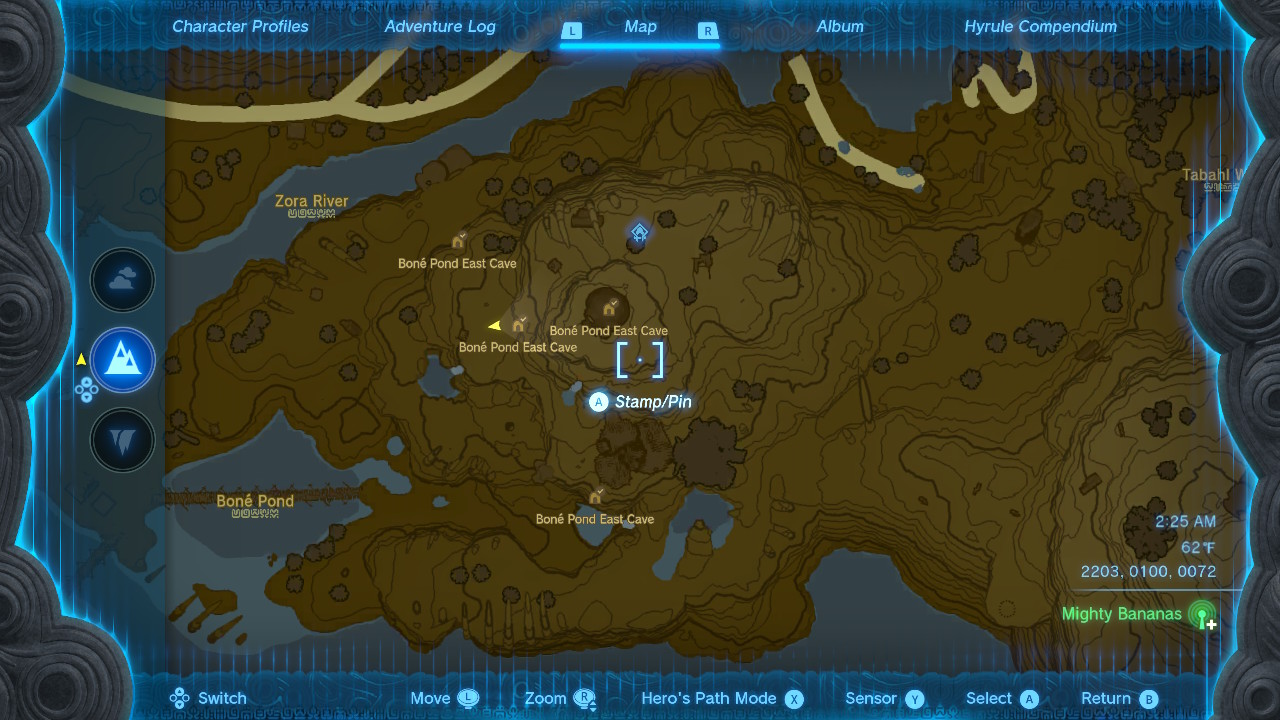
10. Boné Pond East Cave
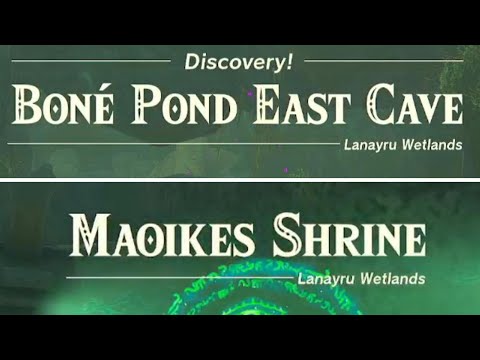
Boné Pond East Cave is east of Mercay Island, home to many monster campsites.
What makes this cave special is that the shrine inside the cave is a Rauru's Blessing, and the treasure in that shrine is a diamond. The captured NPC, Hino, will offer you various rewards, such as a Hearty Elixir!
Lots of great stuff is in here! Monsters have many great weapons, such as a Royal Broadsword hanging around. There are many items to fuse with, such as large boulders useful to create a Rock Sledge.
Why explore this Cave:
- Seek the Maoikes Shrine, which is above the monsters guarding Hino. The Shrine will grant you a diamond and light of blessing.
- Fight the monsters guarding Hino and collect their monster parts. Take down the Blue Boss Bokobolin and take his horn. It's best fused with a sword or spear. The Blue Boss Bokkoblin Horn is one of the most powerful fuse items with a level 16 fuse attack power. Many Bokoblin Horns and Blue Bokoblin Horns are useful for arrows.
- If you save Hino, he will give you rewards such as a Salt-Grilled Mushroom, a Hasty Fish Mushroom Skewer, and a Hearty Elixir! Hearty Elixirs restore you to full health and add additional hearts. These awards may differ randomly, but he will still offer two meals and an elixir. If you deeply want the hearty elixir, it's recommended that you go to your last save file and save Hino again.
- The rest of the cave offers loose weapons hanging around or weapons that monsters are holding, such as Soldier's Broadsword and Royal Broadswords. Like-Like's in this cave may drop a Zora Shield with 24 defense points with a durability up.
- Boné Pond East Cave is one of the most exciting caves to visit, where you can practice your combat skills and navigate a complicated cave system. The surrounding enemy's camp has many things hidden in wooden crates or treasure that may have rupees, food, or a weapon! Many mineral deposits inside the caves include amber, opal, flint, rock salt, and sometimes topaz.
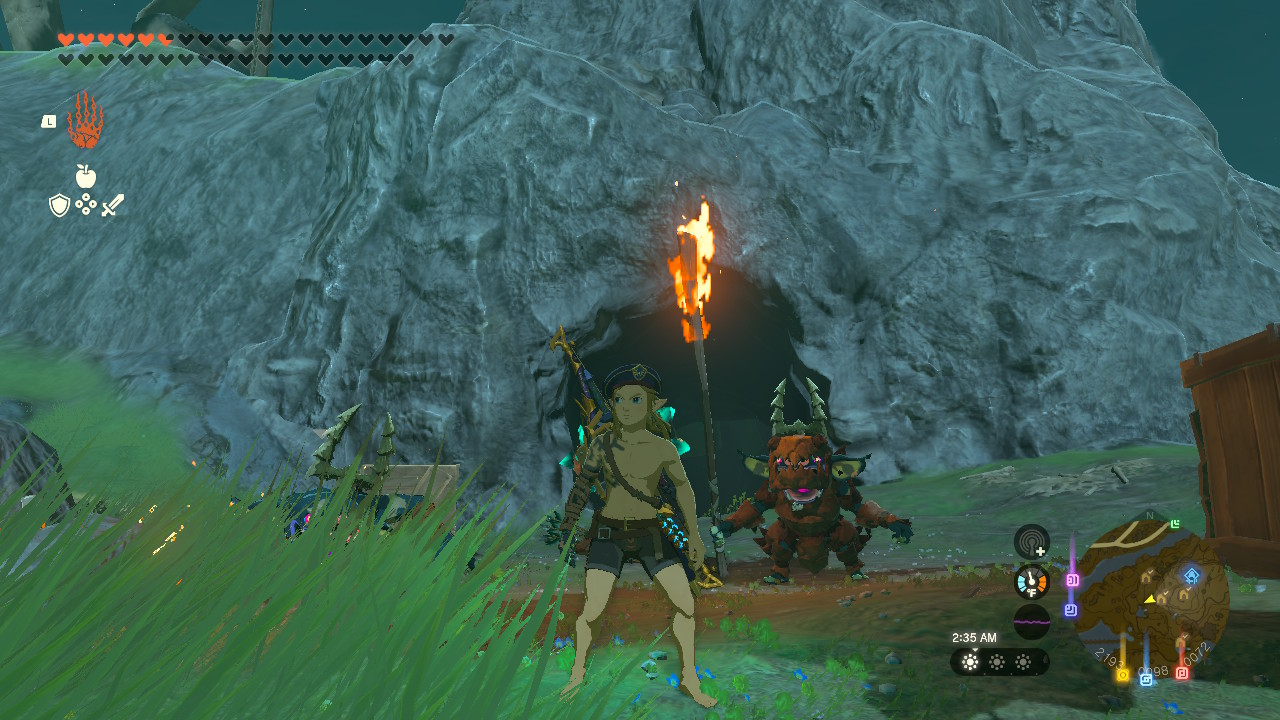
Boné Pond East Cave location:
Simply cross Boné Pond and walk uphill. There are many entrances you can enter.
Here it is! They don’t look happy that I’ve found it…
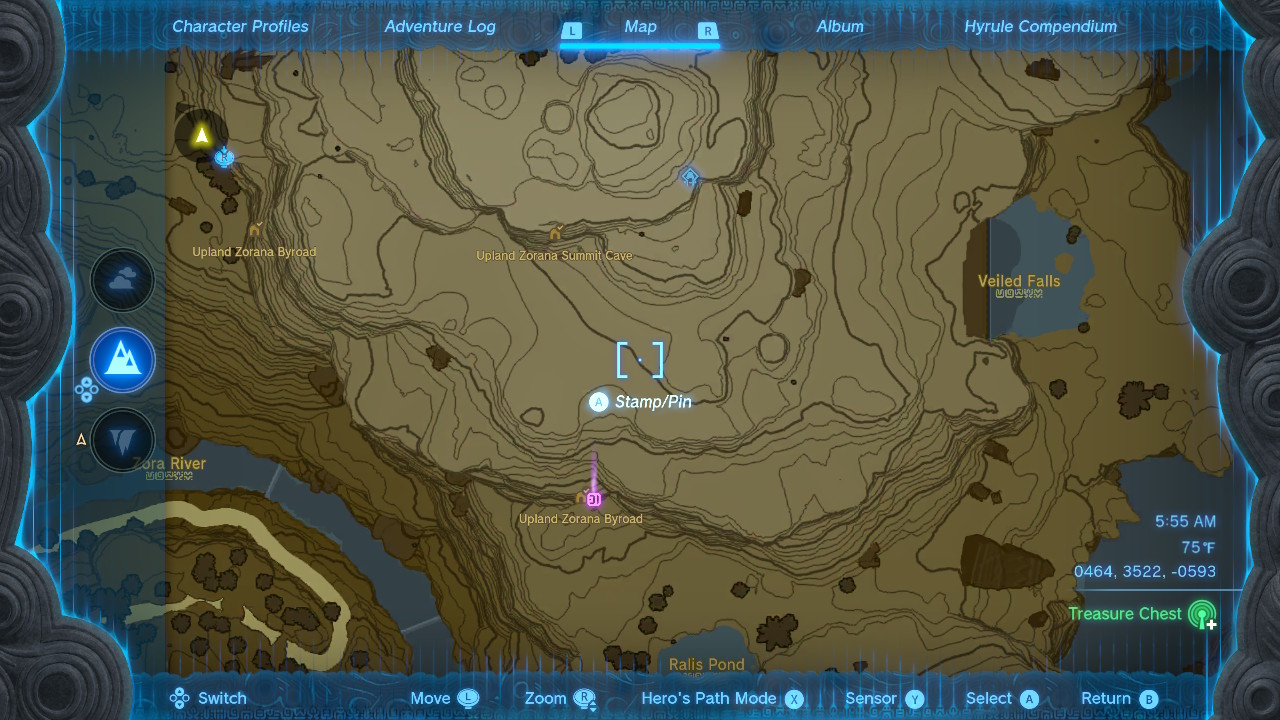
11. Upland Zorana Byroad Cave
The Upland Zorana Byroad Cave is west of Zora’s Domain, below the Zorana summit cave, and uphill from Ralis Pond. You can find this cave early by completing the side quest, Mired in Muck.
What’s special about this cave is that it has the Climbing Boots! It will increase your climbing speed.
This cave has lots of valuable stuff. Come here before attempting Zora’s Domain’s Regional Phenomena. It has lots of Bright-Eyed Crab, valuable minerals such as Topaz and Sapphire, and Zora armor hiding in Like-Likes!
Why explore this Cave:
- Get the Climbing Boots early! They will increase your climbing speed. Having two pieces of the Climbing armor set will help you climb faster with little stamina. Find them in the flooded cave ruins.
- The 2 Like-Likes in this cave have Zora weapons. One drops a Zora Sword, while the other drops a Zora Longsword. Both drop valuable Like-Like stones to sell. If you're unhappy they don't drop those weapons, go to your last save file and try again. You can always save before destroying the Like-Like.
- A Silver Horriblin lives here, so plan to defeat it. You’ll find one of the most useful fusion weapons, a Silver Horriblin Horn with a level 32 fuse attack power! It’s best fused with any sword or spear-type weapon. Save it to fuse with pristine weapons in the future.
- You can find Amber, Topaz, Flint, Sapphire, Opal, and Luminous Stones. Topaz and Sapphire are high-selling minerals. Sapphire sells for 150 rupees, as Topaz sells for 80 rupees.
- You can find a rusty claymore and broadsword in the flooded ruins near the Climbing Boots. You can find a Bubbul Gem in a pit. Bright-Eyed Crabs and Staminoka Bass live here. Both have similar effects when cooked into a dish, replenishing your stamina.
Upland Zorana Byroad Cave location:
One of the best ways to find the Upland Zorana Byroad Cave is to glide down from the summit to where a 2’nd glowing bunny rests on a rocky surface. The cave overlooks Ralis Pond.
Here’s what it looks like!
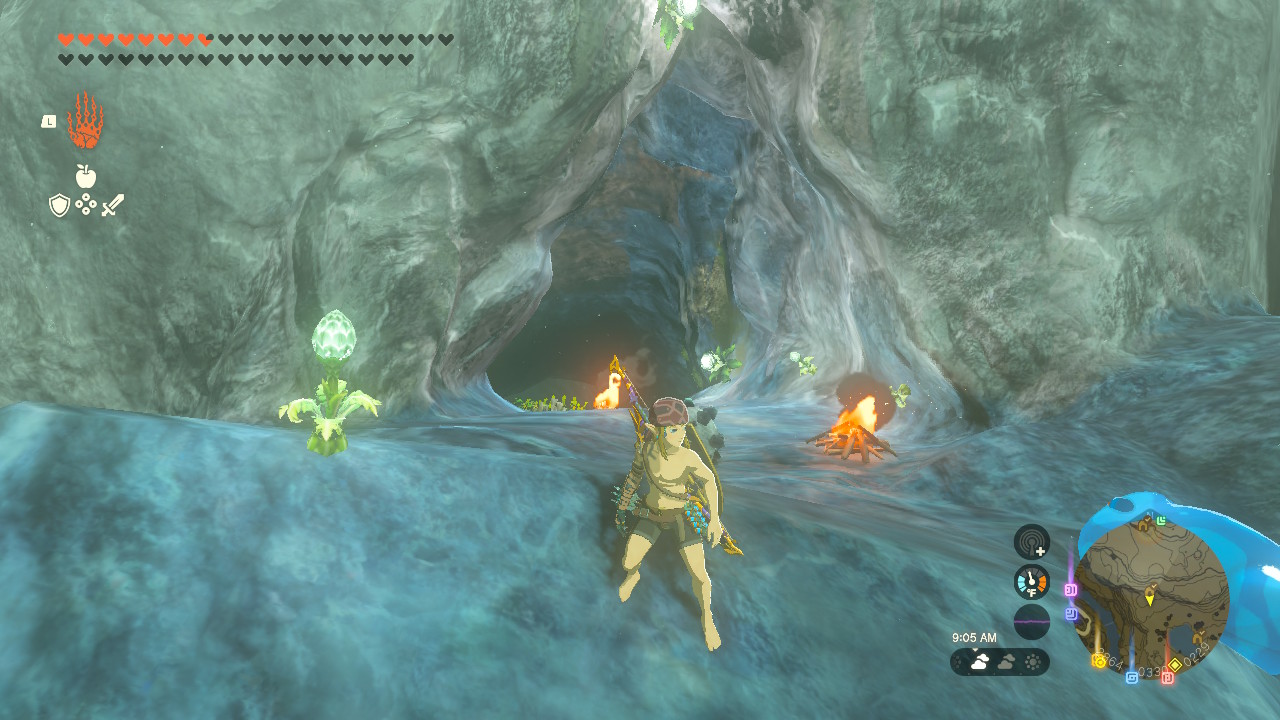
12. Ploymus Mountain Cave
Ploymus Mountain Cave is east of Zora's Domain and near the Pristine Sanctum's waterfall.
What's special about Ploymus Mountain Cave is that it has the Climbing Bandana! Plan to finish the Climbing armor early because a neat set bonus comes with it.
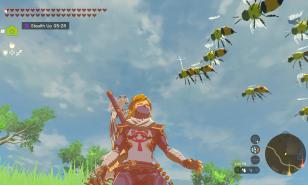
Ploymus Mountain cave has essential survival needs, such as Bright-Eyed Crabs and Glow Fish. There is a Blue Nightshade in front of the cave. They offer stealth abilities. Before exploring more of the Depths, you'll need plenty of stamina and glow meals, including stealth meals.
Why explore this Cave:
- Achieve the Climbers Bandana! Finishing the Climber's Armor early will make life easier when you have little stamina. Wearing the full armor grants a set bonus, reducing the amount of stamina while jumping as you climb. You must get the full armor before visiting the Depths because you will climb a lot.
- Bright-Eyed Crabs, Glow Fish, and Sticky Lizards live here. Grab plenty of them for meals and elixirs. Bright-Eyed Crabs and Glow Fish are highly useful for meal preparation for the Depths, while Bright-Eye Crabs restores stamina and Glow Fish makes you glow. Sticky Lizards make Sticky Elixirs, which help climb in rainy areas such as Lanayru, Necluda, Faron, and sometimes Central Hyrule.
- Minerals you can find here are amber, flint, opal, and rock salt. The shiny mineral deposit will drop either Ruby, Sapphire, or Topaz. Topaz sells for 80 rupees, Ruby sells 110 rupees, and Sapphire sells 150 rupees.
- A Blue Nightshade is in front of the cave. You should grab it immediately! Blue Nightshades are herbs with a soft blue glow. They are useful when cooked into a meal, which increases your stealth, preferably during nighttime or in the Depths.
- Other food items are in front of the cave and by the trees. Stamella Shrooms can be cooked into a meal for stamina recovery. Hylian Pine Cones create stronger fire by throwing them into an existing fire. Make your own "Revali's Gale"!
Ploymus Mountain Cave location:
It’s closeby to the Pristine Sanctum’s waterfall.

It looks like this!
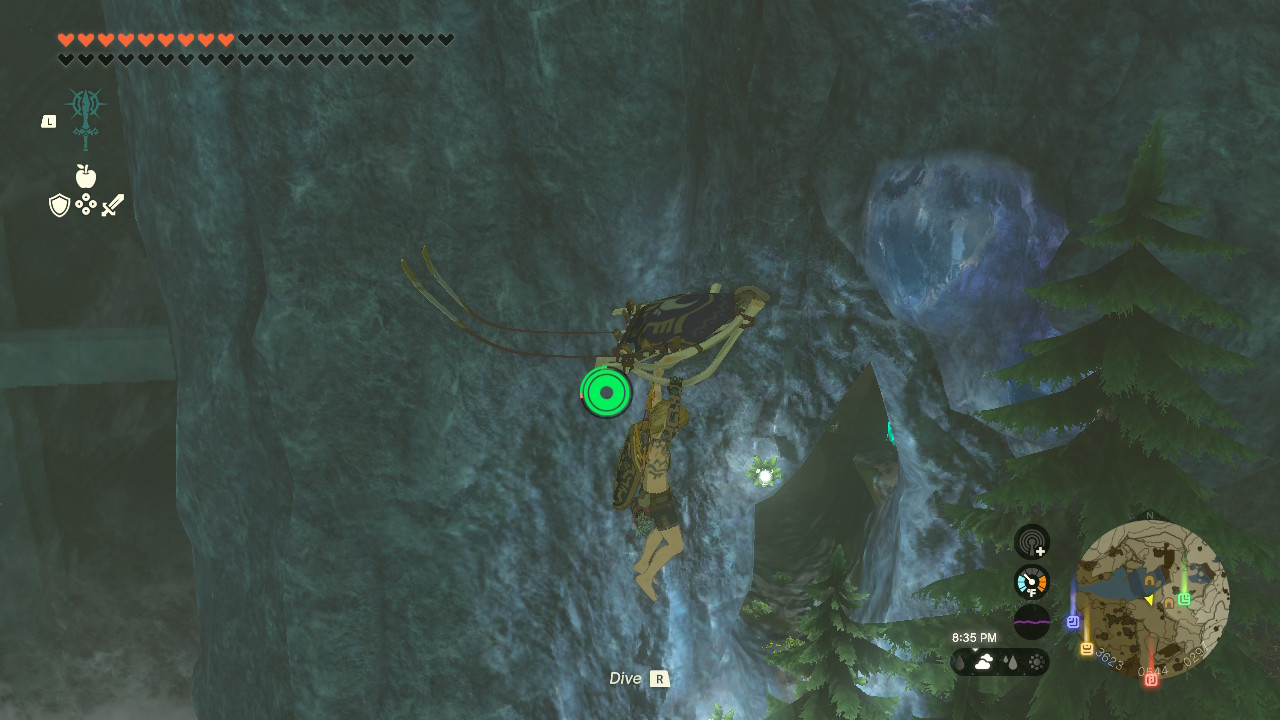
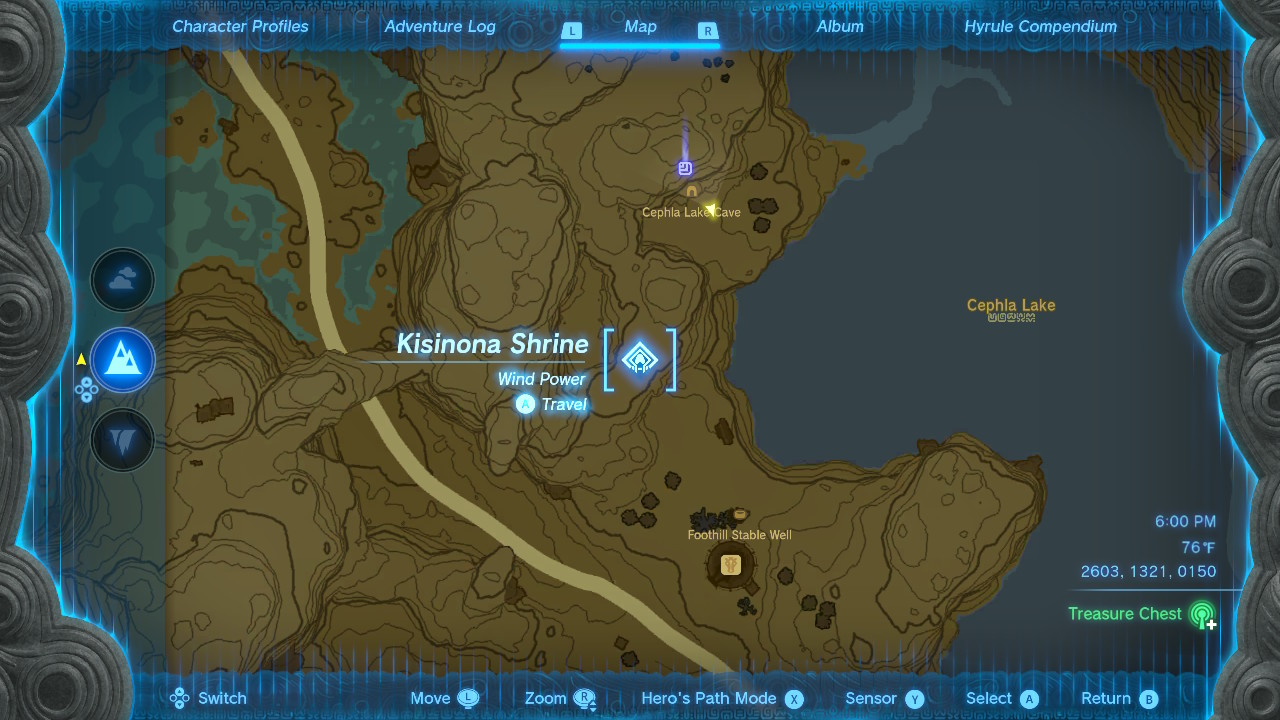
13. Cephla Lake Cave

Cephla Lake Cave is south of Eldin, directly next to Cephla Lake. I recommend arriving here immediately after getting the Climbing Bandana in the Upland Zorana Byroad Cave.
What makes the Cephla Lake Cave special is that it has the Ember Trousers! After achieving the Ember Trousers, the Fierce Deity Armor quest becomes available by talking to the NPCs.
Cephla Lake Cave is a hidden gem in the game where you can trigger finding special armor, the Fierce Deity Armor. It's nice to activate some quests early and know they exist so you can discover them at your own pace. The cave may have finite resources, but Fireproof Lizards can be found here before entering the extreme heat of Eldin.
Why explore this Cave:
- Achieve the Ember Trousers early! In the future, you'll need hot-weather attack armor when visiting hot areas such as Eldin and Gerudo. You may need to bribe a dog with food from the Foothill Stable to sniff out the Ember Trousers.
- The NPCs outside the cave, Domidak and Prissen, will trigger a special quest for the Fierce Deity Armor after you find the Ember Trousers. It's optional if you want to attempt the quest early or later.
- After achieving all pieces of the Fierce Deity Armor, Cephla Lake Cave will offer you the Fierce Deity Sword! It's one of the most overpowered weapons in the game, with a 38-level attack.
- All the treasure here has green rupees. It's not much, but it's better than nothing! You can find Fireproof Lizards and save them to make Fireproof elixirs for visiting Eldin's hot caves later in the game. They prevent you from catching fire.
- After completing the Fierce Deity Armor, Domidak and Prissenn will give riddles to the rest of Misko's treasure, which are pieces to the Tingle Armor. This quest is optional and can be attempted later in the game if desired.
Cephla Lake Cave location:
Right after getting the Climbing Bandana, use the Upland Zorana Skyview Tower to glide and dive into Cepha Lake. You can activate the Kisinona Shrine.
Here’s what it looks like, where you can find Domidak and Prissen near a campfire.
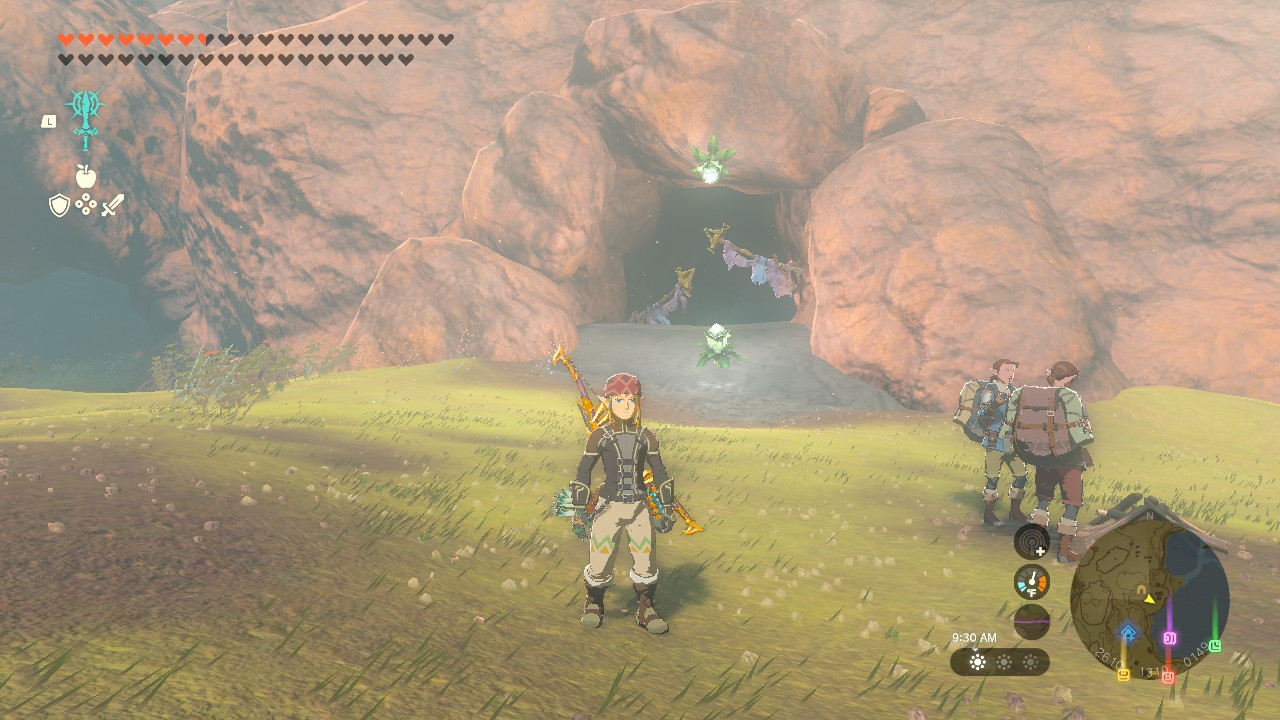
14. Ancient Tree Stump Cave
The Ancient Tree Stump Cave is west of Passeri Greenbelt and north of Mount Daphnes. It has a long bridge surrounded by water.
What makes the Ancient Tree Stump Cave special is that the Fierce Deity Boots are here! Visit this cave after visiting the Cephla Lake cave, triggering Misko's Treasure Quest for the Fierce Deity Armor. The Fierce Deity Boots have an attack-up ability to help you strike enemies easily.
This cave has plenty to offer when continuing to stock up on necessary needs such as Brightbloom Seeds and Brightcaps. Depending on your luck, the Like-Like here may drop Amber, a bow, or a Royal Shield.
Why explore this Cave:
- Achieve the Fierce Deity Boots early! They offer an attack-up ability, which helps you strike weaker enemies with less effort.
- You can find minerals here: Amber, Ruby, Flint, and Diamond. The cave has a smorgasbord of Brightbloom Seeds and Brightcaps. You can find Glow Fish, too. Remember to acquire a Bubbul Gem.
- The Like-Like in this cave drops a Like-Like stone. The treasure it holds can vary, such as finding a type of mineral like amber or royal weapons. One of the best things it can drop is a Royal Shield with a durability up or a Royal Bow.
- This cave has plenty of other holes to explore, such as finding a hole with Hylian Shrooms, which are good for bulking up meals to get more hearts.
- You can practice your climbing on tree stumps. Try Ascending from different angles in this cave. For example, you may need to Ascend through slanted surfaces, which is possible!
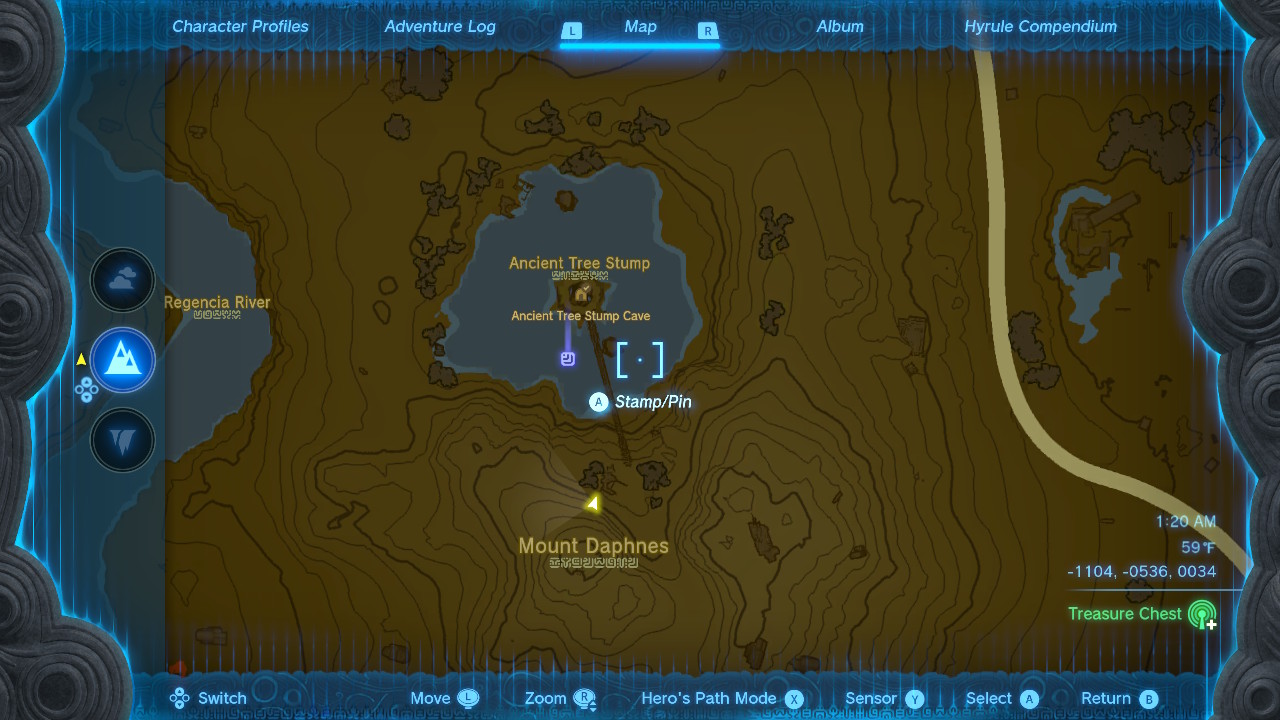
Ancient Tree Stump location:
You can use the Hyrule Field Skyview Tower to glide to this location.
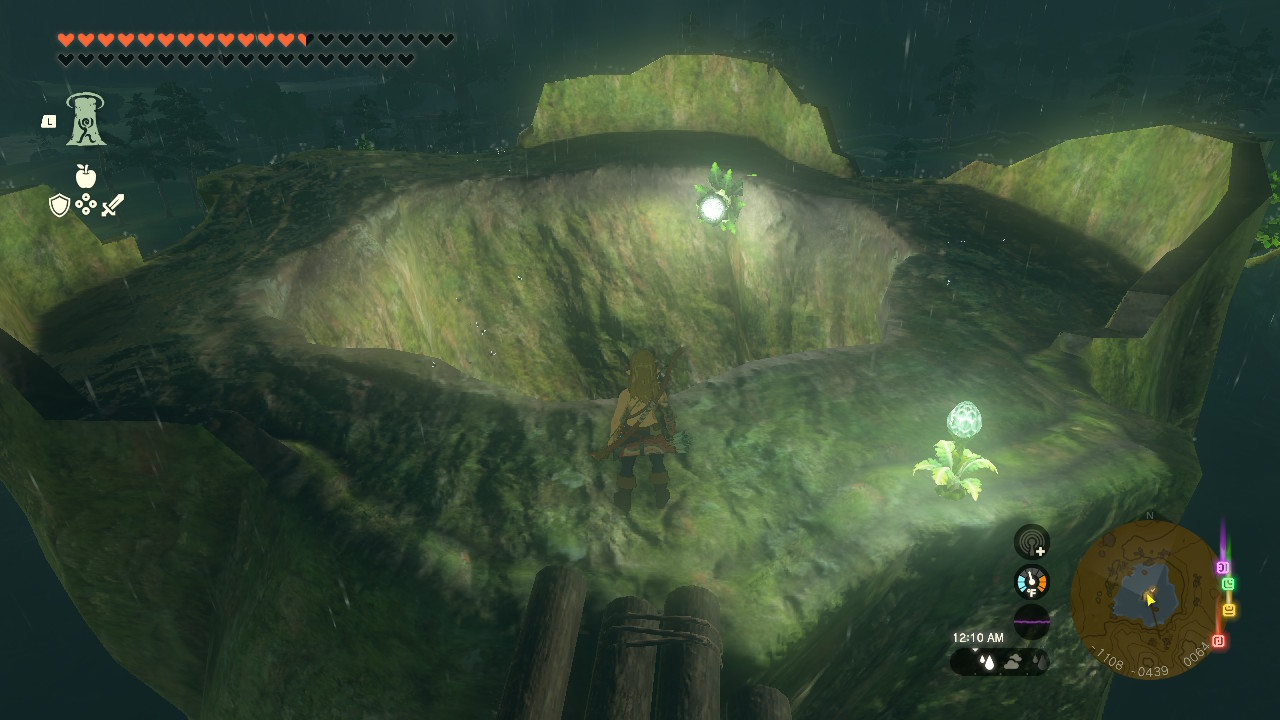
Here’s what it looks like!
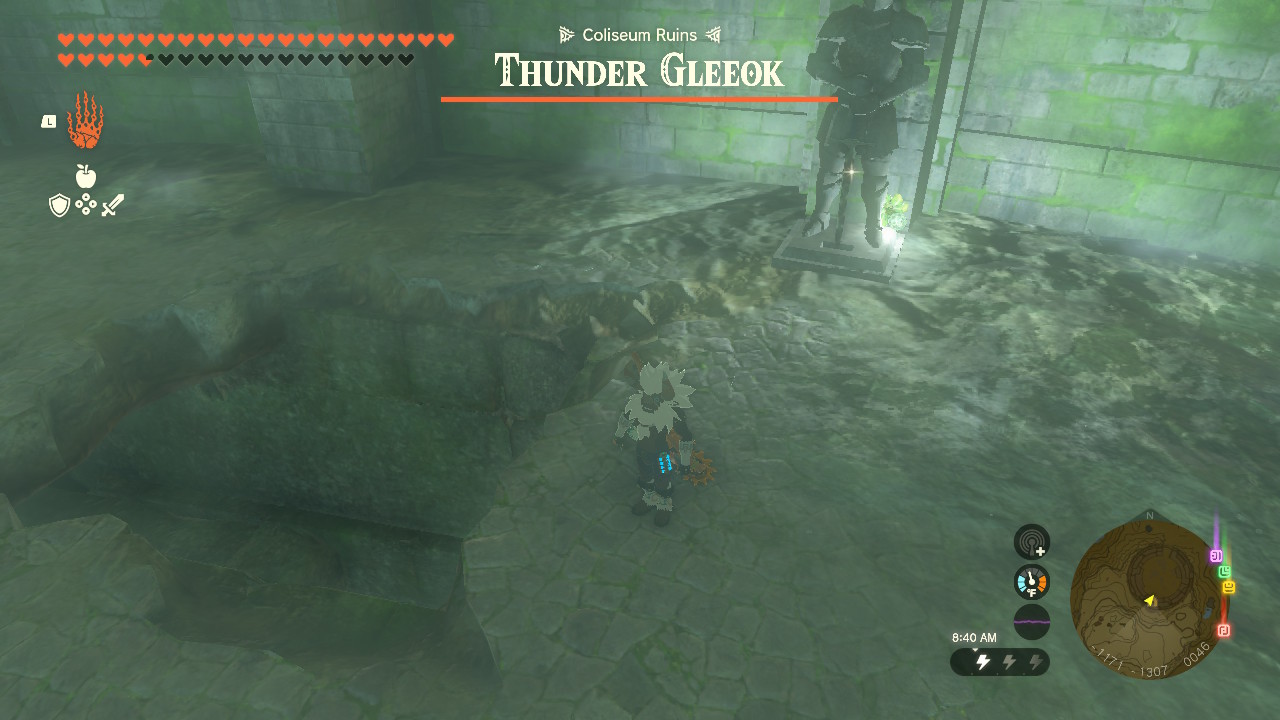
15. Coliseum Ruins Cave

The Coliseum Ruins Cave is north of the Great Plateau and inside the Coliseum Ruins. A Gleeok is guarding the area! Don’t plan on fighting it.
What’s special about this cave is that you can find the Awakening Trousers early!
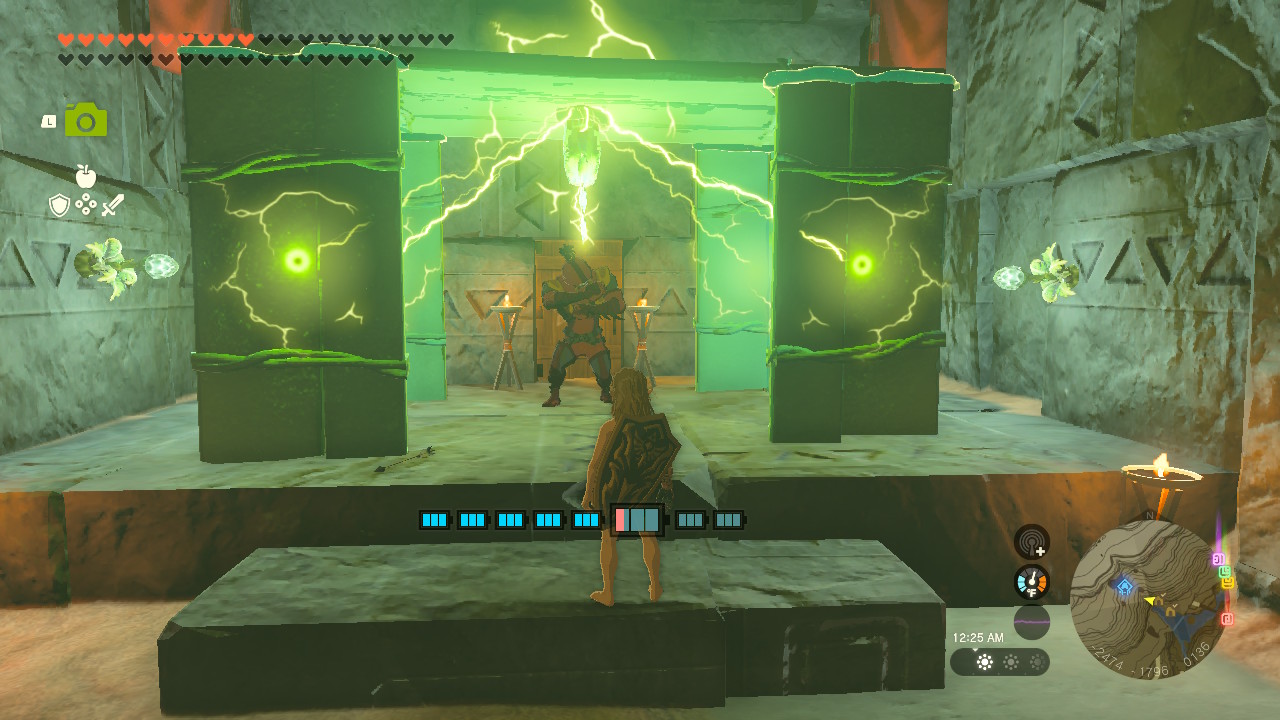
This is one of the first caves that introduces you to hidden caves. The cave is well hidden, and to open it is to give a statue a sword. You get early weapons here. The stone tablet inside will trigger one of the best Misko’s Treasure quests, and there is a large payoff for acquiring all the pieces.
Why explore this Cave:
- Get one of the most powerful armor pieces in the game early! Misko’s treasure in this cave is the Awakening Trousers. Acquiring all the Awakening Armor pieces will grant you a set bonus, raising your attack.
- There are great weapons here! 2 statues hold 2 Soldier’s Broadswords. The other 2 statues hold 2 Soldier’s Claymores. Several crates have loose arrows in them. Grab them while you can!
- The stone tablet gives you a riddle about where the other pieces are. You can also find Sticky Lizards. A hole behind the crates leads to where you can acquire Bubbul Gem, Brightcaps, Rock Salt, Flint, Amber, and Sapphire.
Coliseum Ruins Cave location:
You can glide over here from the Hyrule Field Skyview Tower. Or you can walk from the Tsutsu-um Shrine close to the Outskirt Stable.
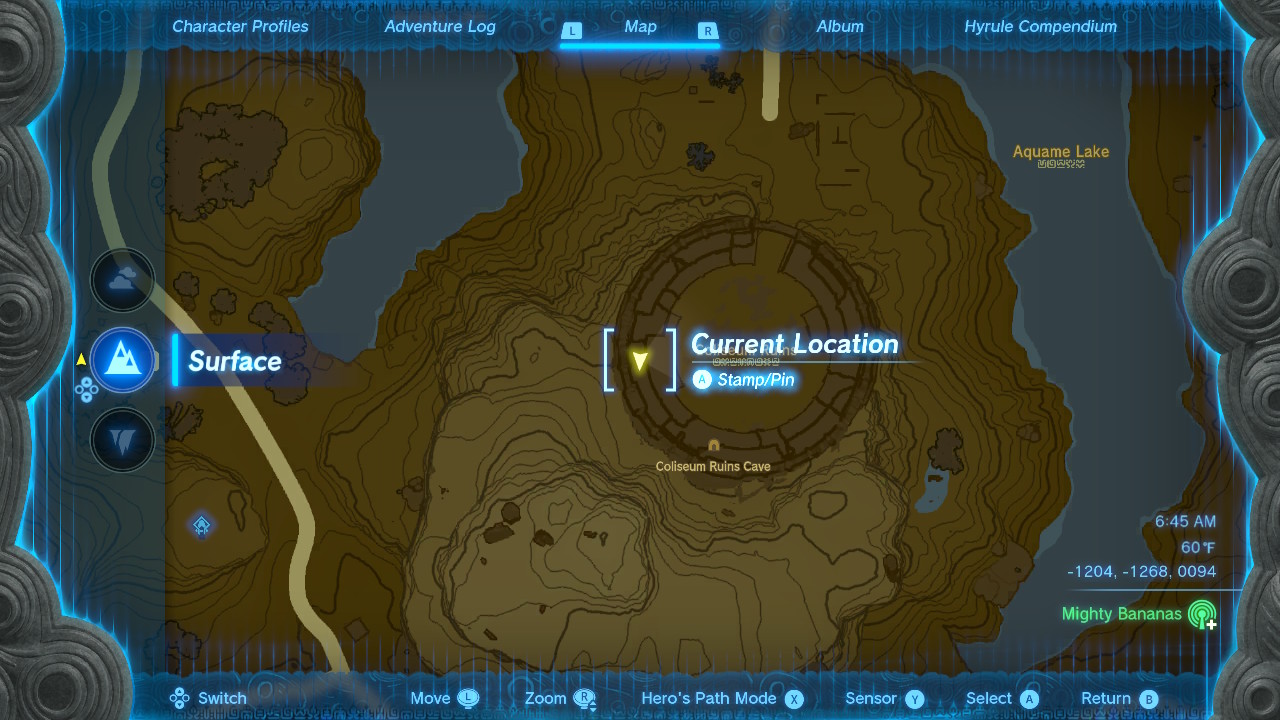
Here’s what it looks like!
Thanks for reading!
Share this Article:

- Log in or register to post comments