Home
Home PC Game Trailers
 News
News Menu
MenuStardew Valley Building Guide (Top 25 Tips)
Updated: 09 May 2023 7:05 am

“If you need any buildings on your farm upgraded, just ask me!" - Robin
 BY: Layla Ahmad
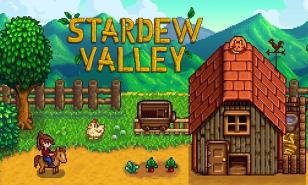
Stardew Valley Building Guide
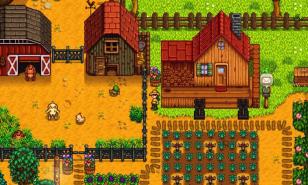
There are several purposes for farm structures. Some can be used as storage, while others are necessary to keep animals. Some of the numerous structures that players can buy, some of which can be improved to accommodate more or different animals, include Coops, Barns, Ponds, and Sheds.
The number of farm buildings that can be constructed by the player is limited only by available space. The Carpenter's Shop also allows for the relocation of pre-existing farm structures, such as the Greenhouse and default Shipping Box. Other than the time it takes to get to the Carpenter's Shop, this action doesn't cost anything and takes effect right away. It also doesn't require any gold or other resources. The building moves as a whole, including its contents.
A building can be moved without needing to be empty, unlike chests. In addition, after the quest to recover the wizard's magic ink is finished, he will start selling various unusual structures like obelisks. The Island Obelisk will open up once Ginger Island has also been unlocked. These structures can cost up to a million gold, yet they don't take long to create.
This Stardew Valley guide goes into great detail about every kind of building that is offered, how it functions, and how to get it. Let's get started!
25-Mill
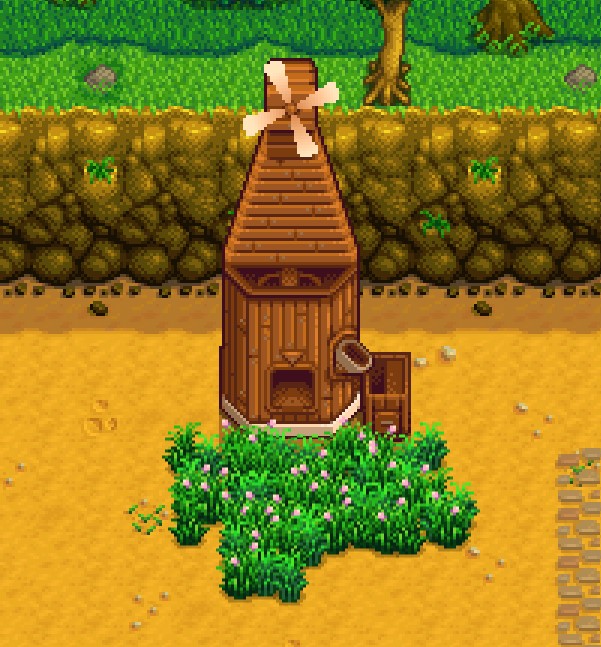
The Mill is a farm building that produces important ingredients like flour from wheat, sugar from beets, and rice from unmilled rice. It produces the same quality of milled goods for each crop, no matter what the quality of the crop is.
It can also process an unlimited amount of goods, which take one day to produce. So you can mill wheat, rice, and beets together at one time, go to sleep, and the goods will be ready to collect the next day from a small box to the right.
The Mill has 36 inventory spaces, so if you have stacks of crops to mill, there’s enough space for them. This also has the added bonus of the space being able to be used as a chest as long as there are two different items inside.
Note that one wheat and one unmilled rice produce one flour and one rice, with one beet producing three sugars. Flour sells for 50g, sugar sells for 50g, and rice sells for 100g. Players can hire Robin to build a Mill at the Carpenter’s Shop, and it takes two days to construct.
- Cost: 2,500g
- Materials: 50 Stone, 150 Wood, and 4 Cloth
- Dimensions: 4x2 Tiles
24-Shipping Bin
The Shipping Bin lets players sell their crops, goods, and other items without having to leave their farms. This is great because some shop sellers will only buy certain types of items from you, and with the Shipping Bin, you can sell nearly everything you own without having to figure out who will buy what from you. The only con is having to wait until you fall asleep to get the money for it all.
This purchasable Shipping Bin functions the same way as the Shipping Bin that comes with the Farmhouse. Instead of running from one side of the farm to the other to sell items, just buy another Shipping Bin from Robin, and it will instantly be built; there is no need to wait for it.
There are three achievements associated with shipping items from the Shipping Bin, so be sure to not only sell items directly to shop sellers but also from the Bin. The achievements are:
Polyculture: Ship 15 of each crop you grow.
Monoculture: Ship 300 of one crop of your choosing.
Full Shipment: Ship one of every item which can be seen in the Collections tab of the player menu.
- Cost: 250g
- Materials: 150 Wood
- Dimensions: 2x1 Tiles
23-Silo
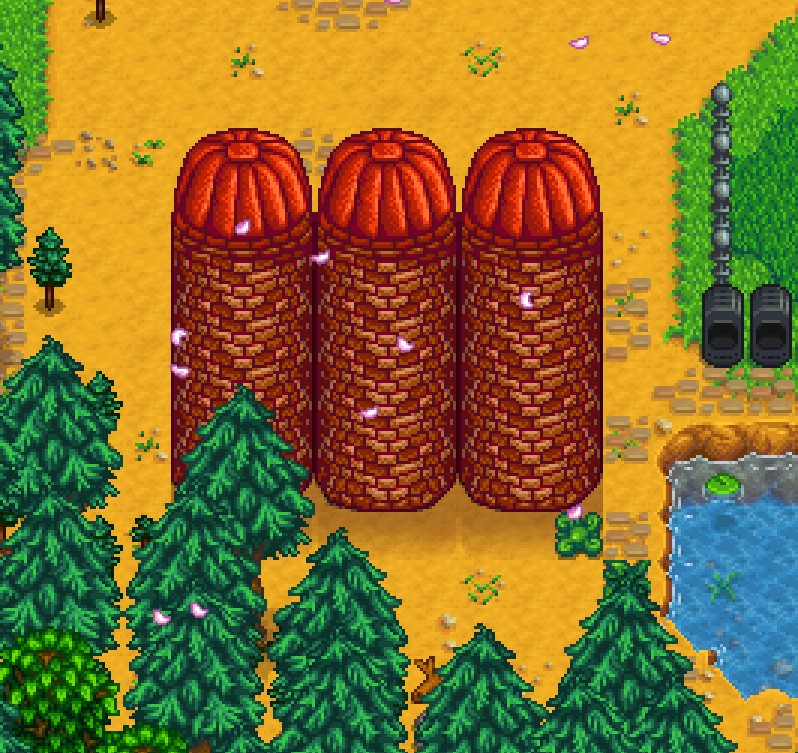
The Silo is a farm building that stores Hay as feed for farm animals. One Silo holds 240 pieces of Hay and with each additional Silo, the storage capacity increases. There are a few different ways to get and add Hay.
- Cutting grass with a scythe. There is a 50% chance of cut grass turning into Hay, which will automatically be added to the Silo if one is already built.
- Buy Hay from Marnie’s Ranch for 50g each and add it to the Silo by interacting with it.
- Harvesting the Wheat crop has a chance to produce Hay, which can then be added by interacting with the Silo.
It’s recommended to build a Silo as soon as possible, even before building a Coop. This is so that players can get a head start on storing Hay for their animals.
Because Hay can be added to a Silo, it is also a good idea to store any extras in a chest to have them available when stock gets low. This is also good to do before winter when all of the grass dies. Players can hire Robin to build a Silo at the Carpenter’s Shop, and it takes two days to construct.
- Cost: 100g
- Materials: 100 Stone, 10 Clay, and 5 Copper Bars
- Dimensions: 3x3 Tiles
22-Stable
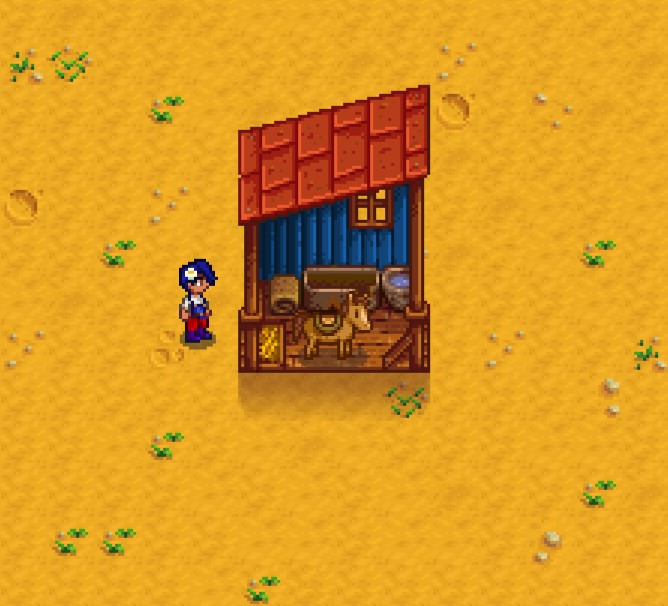
One of the best building investments is a Stable. This is a building that includes a horse when purchased, and it can be named just like any other animal. Once the Stable is built and the horse is interacted with for the first time, it can be named.
The horse is an in-game mount that increases players' movement speed by 30%, which is a great benefit. If players drink coffee before riding their horses, their speed gets a further boost. It also continues at the same speed while riding through crops and grass.
The horse takes two tile spaces when riding vertically but can go through one tile space horizontally. If the horse is left anywhere on the farm or in the Valley when the player goes to sleep, it will automatically return to the Stable the next day. Players can interact with several things while riding their horse, such as gates, coop and barn doors, fish ponds, and villagers.
Later in the game, there is a Horse Flute that warps the horse to the player, even on Ginger Island and the Desert. Players can hire Robin to build a Stable at the Carpenter’s Shop, and it takes two days to construct.
A fun little feature is that hats can be placed on horses.
- Cost: 10,000g
- Materials: 100 Hardwood and 5 Iron Bars
- Dimensions: 4x2 Tiles
21-Well

Watering crops is one of the important steps for farming and before having access to sprinklers, the watering can is basically every player's best friend. But it can only hold a certain amount of water before needing to be refilled, and depending on where the crops are planted, it can take a while to get to a water source.
While each type of farm has at least two areas with water, it can still take some time to get to it to refill the watering can. Building a Well nearby the crops helps with that and it’s pretty affordable to build, needing only 75 Stone and 1,000 gold. This is cheaper than upgrading the watering can to copper, which costs 2,000 gold and five copper bars. Purchase a Well from Robin’s Carpenter’s Shop and it will be ready in two days.
- Cost: 1,000g
- Materials: 75 Stone
- Dimensions: 3x3 Tiles
20-Cabins

Cabins are farm buildings that allow farmers to host friends in a multiplayer game, and in a single-player game, they can function as extra storage space. Said to be subsidized by the town agricultural fund, these Cabins function the same way as the Farmhouse and can be chosen at the start of a new co-op game in two layouts, either next to each other or separately.
There are three different kinds of cabin styles available to purchase and build from Robin, and they are built instantly. They are free if chosen for a multiplayer farm, and the style and location are chosen at random by the game. For a pre-existing farm, it costs money, but players have the choice of which cabin they want. Each Cabin costs only 100 g, and each style requires different materials.
Because the Cabins work the same as the Farmhouse, they can also be upgraded the same way, but only by the owner of the cabin. Friends playing in a multiplayer farm can choose to live in one house and keep the cabins as storage space for chests and, particularly with the upgrade that adds the kitchen, for food.
Plank Cabin
- Cost: 100g
- Materials: 5 Wood and 10 Fiber
- Dimensions: 5x3 Tiles Outside
Log Cabin
- Cost: 100g
- Materials: 10 Wood
- Dimensions: 5x3 Tiles Outside
Stone Cabin
- Cost: 100g
- Materials: 10 Stone
- Dimensions: 5x3 Tiles Outside
19-Fish Pond
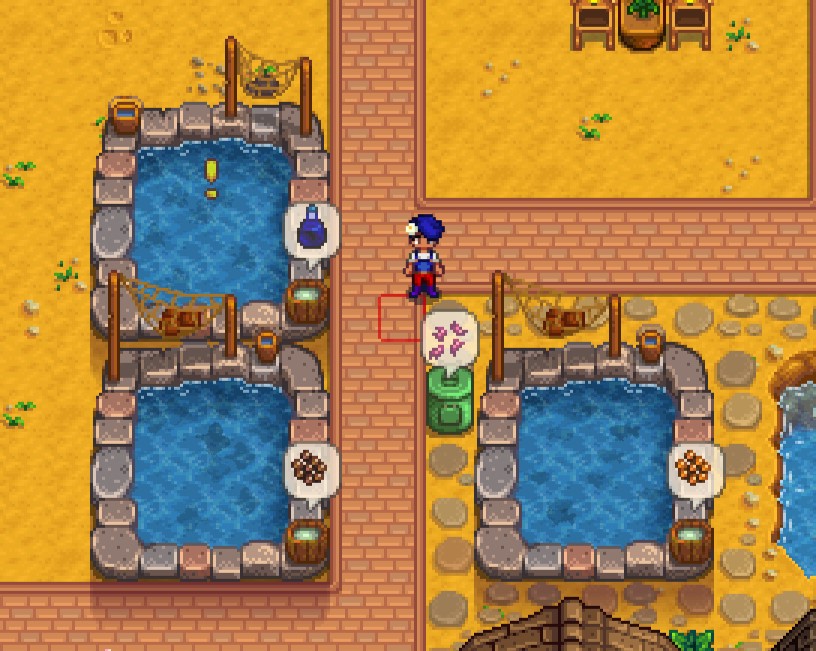
The Fish Pond is a building where players can raise fish and harvest their produce. Most fish types can be raised to produce fish Roe and a number of valuable items, such as Wood, Rainbow Shells, and Batteries. Fish placed in the Ponds also can reproduce except for Tiger Trout and only one pond can populate one type of fish. Harvesting the produce from the Ponds has the benefit of adding to players’ Fishing Skills, with each harvest giving experience points.
A great tip is to place a sign on the pond to show how many fish are living inside, including a picture of the fish. If players ever want to empty a Pond to hold a different kind of fish, they can fish them out one by one or by selecting the “Empty Pond” option in the Fish Pond menu. It’s better to fish them out since they can be kept. Ponds can also refill Watering Cans. Purchase Ponds from Robin and it will be completed in two days.
- Cost: 5,000g
- Materials: 200 Stone, 5 Seaweed, and 5 Green Algae
- Dimensions: 5x5 Tiles
18-Greenhouse
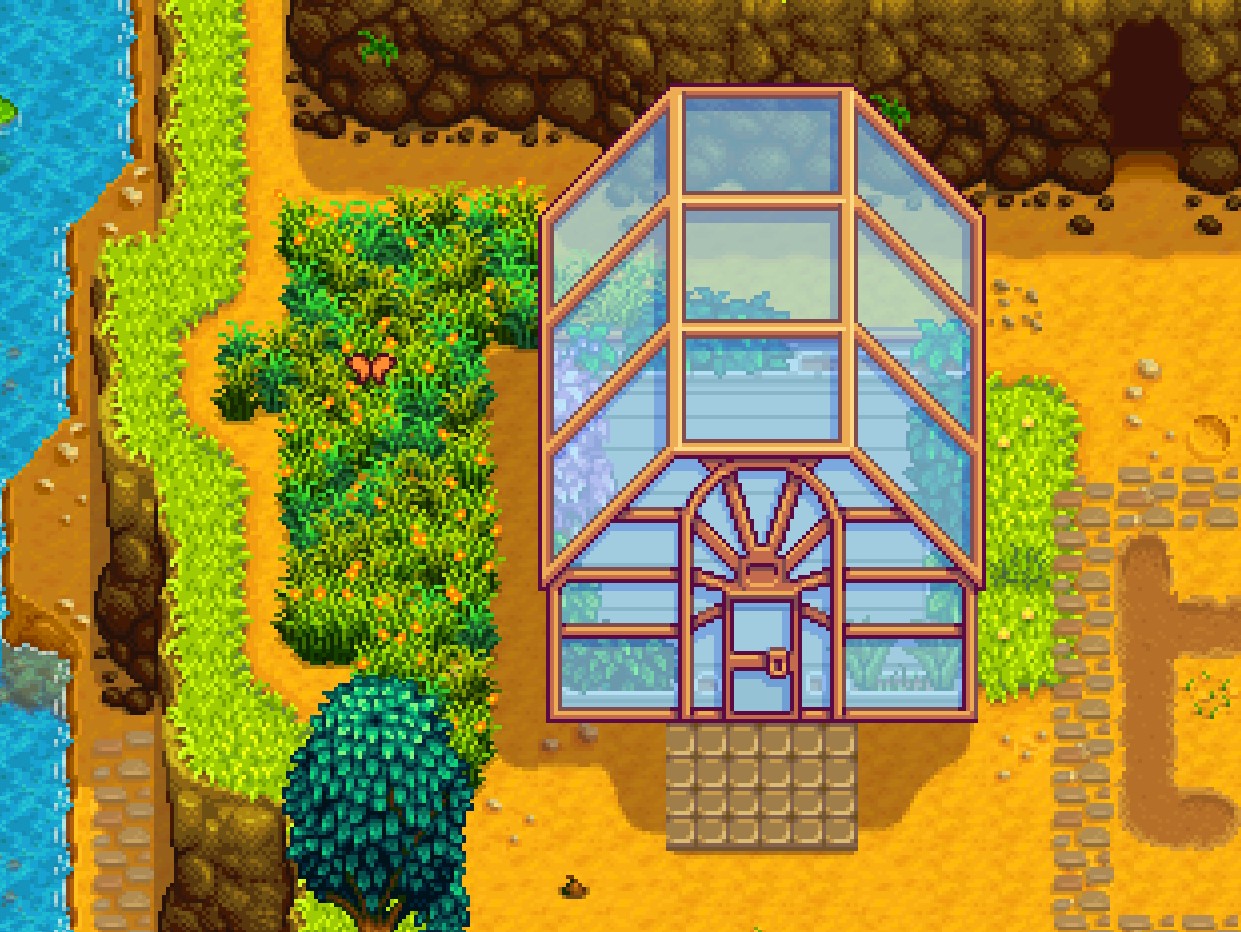
A structure that has been part of the farm since the beginning is the greenhouse. It is originally in a condition of disrepair, rendering it useless. You can fix it by finishing the Community Center Pantry Bundles or by paying 35,000g for "Greenhouse" on the Joja Community Development Form. It can be moved around at the Carpenter's Shop after being restored, just like other farm structures.
The building's interior has a 10-row by 12-column parcel of ground that is surrounded by a one-tile-thick border. It is possible to install sprinklers on this border to water any of the crop land tiles that are within its range, and using Quality or Iridium Sprinklers is strongly advised. However, using them will result in the loss of certain soil tiles.
Without the usual seasonal limitations, crops can be planted, produced, and harvested on this plot at any time of the year. Scarecrows are unnecessary since crops are planted indoors because crows stay outside. Even on days when it rains, crops need to be watered. The north wall has a water trough where the Watering Can can be refilled.
However, if sprinklers are used, the Watering can presumably won't be used that frequently. Crops that may be harvested multiple times will continue to grow and not wither away at the end of the season. Another advantage is that, unless the player removes it or leaves the soil unwatered, fertilizer cannot disappear from the soil.
An area two tiles thick, unsuited for crops, and filled with beautiful plants, tools, and barrels line the walls between the wood border and the greenhouse. However, if there are two tiles between them, you can place up to 18 fruit trees anywhere in this region. As a result, the fruit can grow all year long. Keep in mind that neither giant crops nor honey production from beehives is possible indoors.
Planting Ancient Fruit, Strawberries, Blueberries, or Cranberries within the greenhouse is extremely profitable because they never disappear at the end of the growing season. This also affects trellis crops including green beans, hops, and grapes as well as corn, eggplants, and hot peppers. These vegetables, however, are marginally less rewarding, and in the case of trellises, it is marginally more difficult to position them because they cannot be stepped over.
- Cost: All Pantry Bundles completed or 35,000g for Joja
- Materials: None
- Dimensions: 7x6 + 3x2 Tiles Outside and a 10x12 plot of dirt
17-Slime Hutch
The Slime Hutch is a farm building that can house up to 20 Slimes and is available from Robin at the Carpenter's Shop. The user will receive a Slime Egg from Marlon after purchasing the Slime Hutch, allowing them to begin breeding slimes. To accomplish this, fill the water troughs, and when there are at least five Slimes in the hutch, they will produce Slime Balls. Occasionally they will drop Slime Eggs, which can be hatched to make more Slimes.
Getting the Slime Charmer Ring will shield the player from damage and debuffs caused by the slimes, who will still try to harm them by leaping at them. Another way to get Slime Eggs is to use a Slime Egg-Press, which is unlocked after reaching Combat Level 6. It is recommended to fence off an area of the hutch to contain the Slimes so that the player can harvest the balls in peace.
It is possible for a witch to transform all the slimes in a hutch into opaque, black slimes in a Random Event.
- Cost: 10,000g
- Materials: 500 Stone, 10 Refind Quartz, and 1 Iridium Bar
- Unlocks: Slime Eggs
- Features: 4 water troughs and a Slime Incubator. It can hold 20 Slimes.
- Dimensions: 11x6 Tiles outside and 16x8 with 120 usable Tiles inside
16-Shed
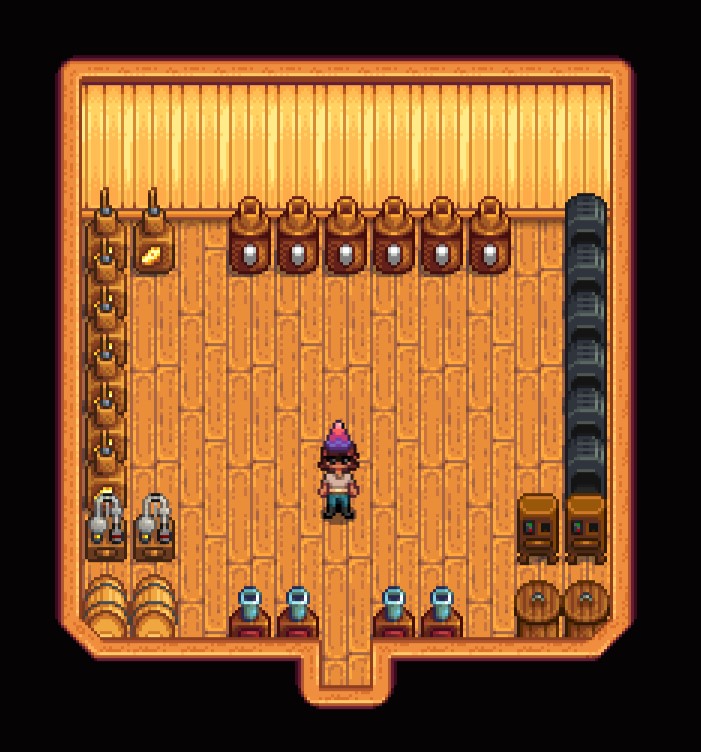
Robin can build players' empty building called Sheds that acts like small farmhouses, allowing them to decorate the inside however they'd like with furniture, wallpaper, and flooring. The interior has size of 11x9, which is approximately the same size as the player's starting farmhouse. The optimal layout of a shed provides 67 spaces for machines such as kegs, mayonnaise, cheese presses, and others.
- Cost: 15,000g
- Materials: 300 Wood
- Dimensions: 7x3 Tiles outside and 11x9 Tiles (67 spaces) inside
15-Big Shed
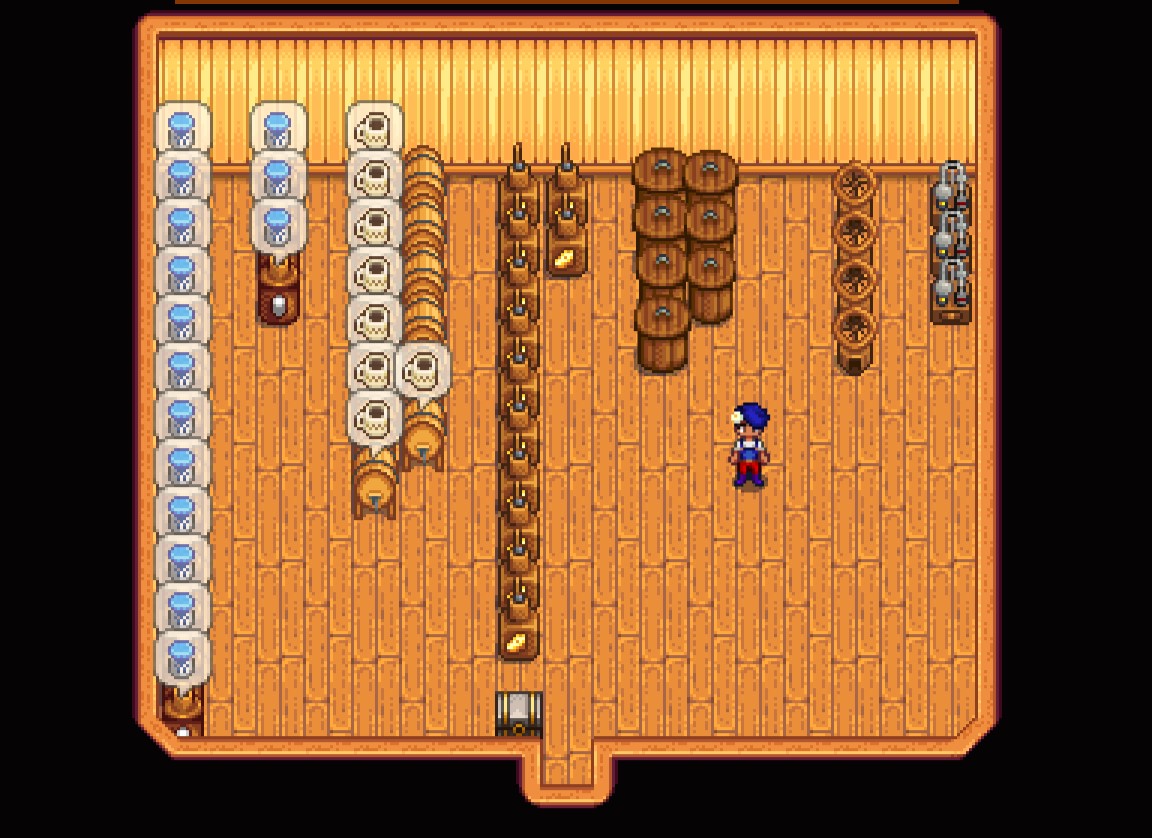
The shed's interior has doubled thanks to the major makeover! Still functioning the same as the regular Shed, this translates to extra room for storage, a large decorative room, or optimal machine productivity. The exterior size stays the same, with the building sprite getting a makeover too. The best layout for this shed provides 137 spaces.
- Cost: 20,000g
- Materials: 500 Wood and 300 Stone
- Dimensions: 7x3 Tiles outside and 17x12 (137 spaces) Tiles inside
14-Coop
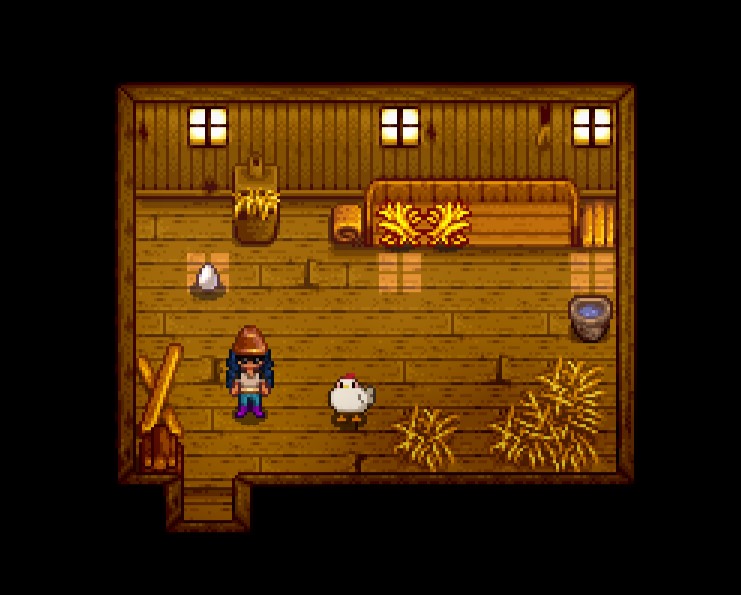
Coops can house chickens, ducks, rabbits, and dinosaurs. They can be upgraded twice, and a new animal is unlocked with each upgrade. After that, you can put any Coop animal in any other Coop you've created, even if it isn't renovated. The basic Coop can be bought from Robin’s Carpentry Shop and houses four coop-dwelling animals. One of the first quests players get on a new game save is to build a coop and buy a chicken.
There are five chicken varieties, with the White and Brown Chickens being available first. The other varieties are Blue Chicken, which is unlocked after Shane’s 8 Hearts event; Void Chicken, which can be bought from Krobus or obtained during the Witch event; and Golden Chicken, which is unlocked after reaching Perfection. Chickens produce eggs, which are sold at a base price of 50g. Creating Mayonnaise with the eggs sells for a base price of 190g.
If the coop doors are shut at night, the animals may be trapped outside. An animal's attitude the following day will be "grumpy" if they are left outside the coop during the night. Animals trapped outside are also vulnerable to attacks from wild animals.
- Cost: 4,000g
- Materials: 300 Wood and 100 Stone
- Unlocks: Chickens
- Features: Hay Hopper and Feeding Bench
- Dimensions: 6x3 Tiles Outside
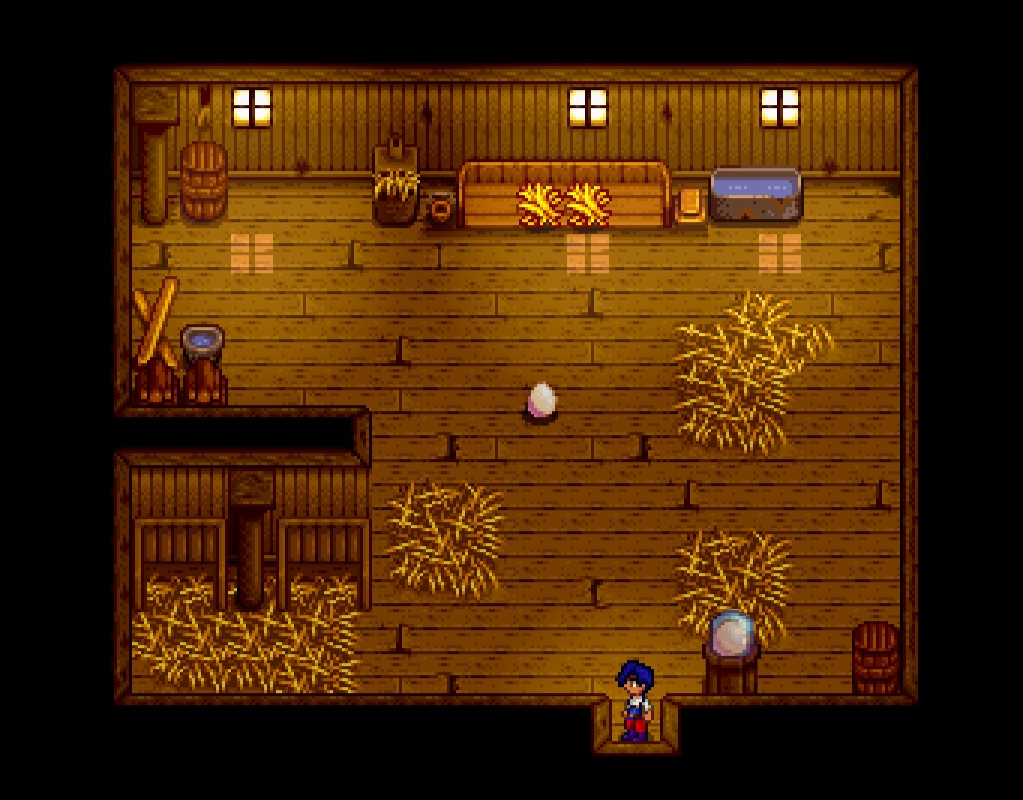
13-Big Coop
The first Coop upgrade increases the interior space allowing up to 8 animals and adding a wider Feeding Bench and an Incubator that hatches eggs. The Incubator is located to the left of the hay hopper and is included in the Big Coop and the Deluxe Coop. Place an egg into the incubator by right-clicking on it to use it. Once an egg is in an incubator, it cannot be taken out.
This upgrade also unlocks Ducks that produce Duck eggs that sell at a base price of 95g and Feathers that sell at a base price of 250g. Duck Eggs can be made into Duck Mayonnaise which sells at a base price of 375g.
- Cost: 10,000g
- Materials: 400 Wood and 150 Stone
- Unlocks: Ducks
- Features: Hay Hopper, Feeding Bench, Incubator.
- Dimensions: 6x3 Tiles Outside
12-Deluxe Coop
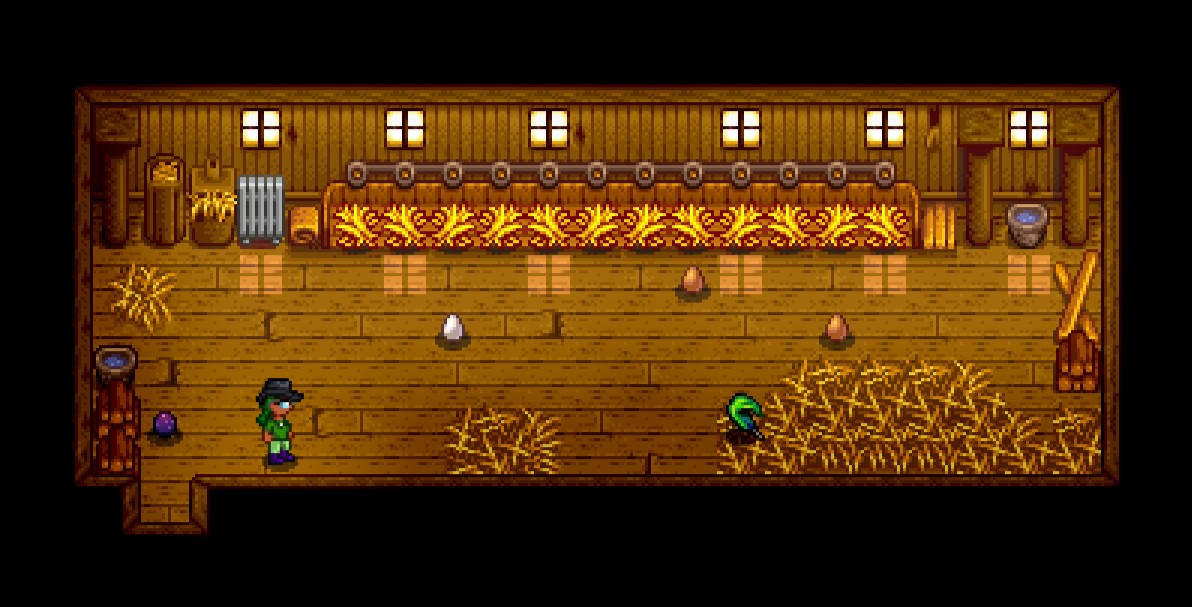
The second Coop update expands the interior to accommodate a total of 12 animals. Players can now purchase Rabbits for Wool and Rabbit’s Foot once they have received this upgrade for the first time. As long as the Hay Hopper and Silo are full, the newly added Autofeed system ensures that the animals always receive Hay on their Feeding Bench. The Wool sells at a base price of 340g and Rabbit’s Foot sells at a base price of 565g.
- Cost: 20,000g
- Materials: 500 Wood and 200 Stone
- Unlocks: Rabbits
- Features: Hay Hopper, Feeding Bench, Incubator, Autofeed System
- Dimensions: 6x3 Tiles outside
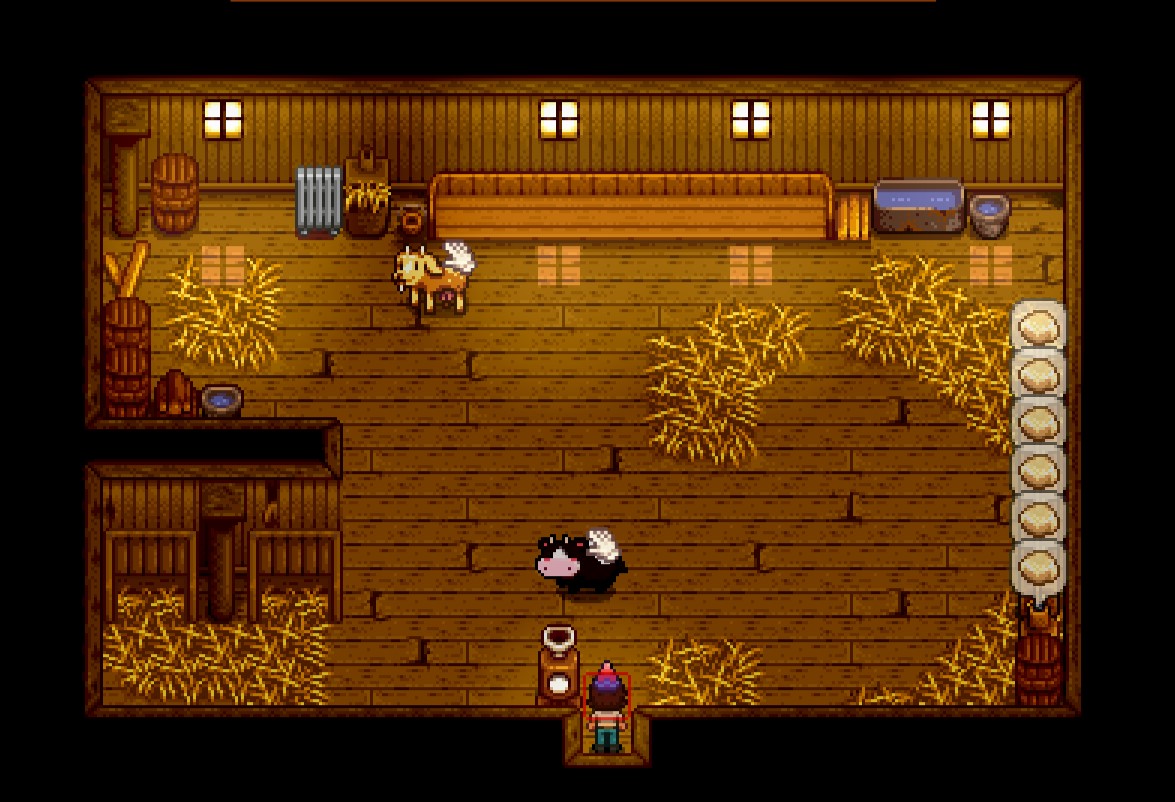
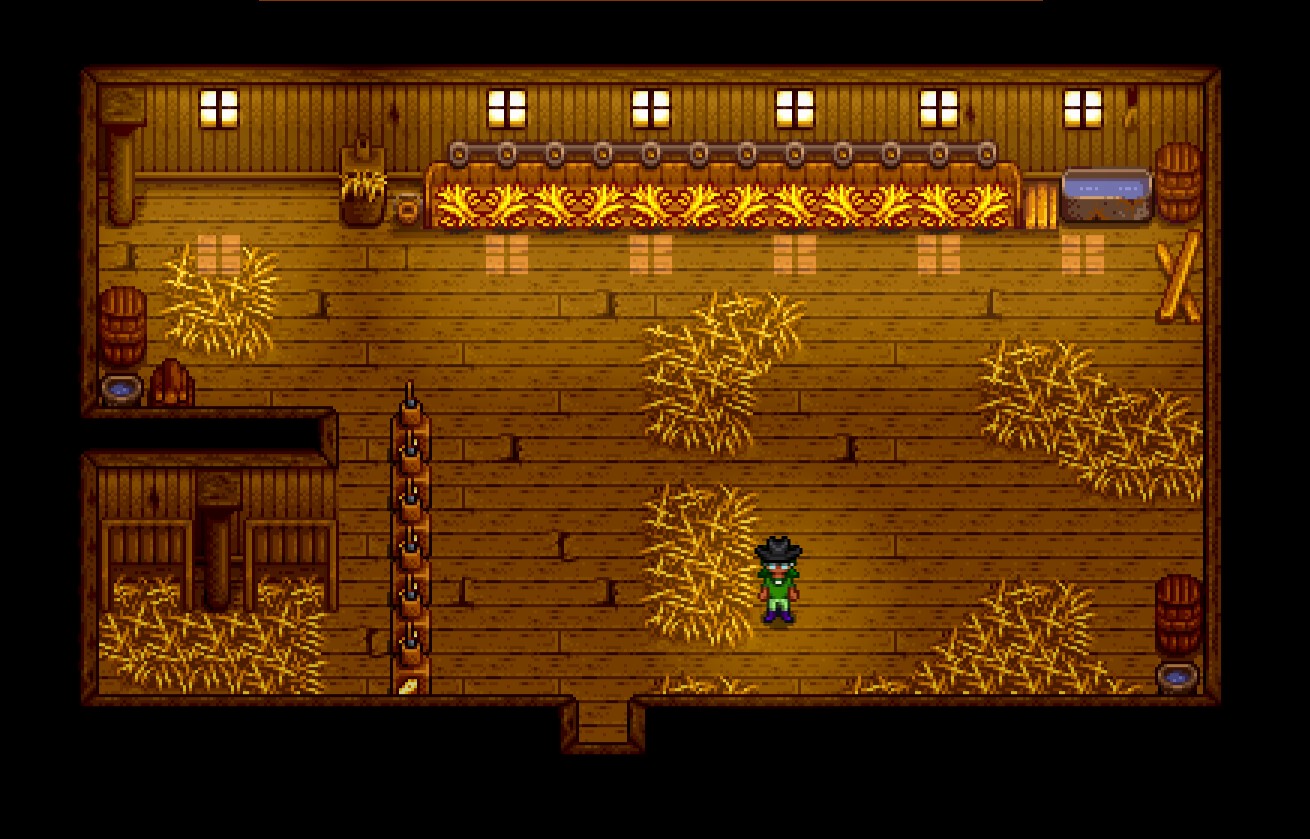
11-Barn
Cows, goats, lambs, pigs, and ostriches are kept in barns. A new animal is unlocked with each upgrade, which the players can employ Robin to make for them. After that, you can put any barn animal in any other barn you've created, even if it isn't renovated. The first barn constructed unlocks Cows, and it has a capacity for four animals. Daily milk produced by cows is sold for a basic price of 125g, while the milk used to make cheese is sold for a base price of 230g.
If the barn doors are shut at night, the animals may be trapped outside. An animal's attitude the following day will be "grumpy" if they are left outside the barn during the night. Animals trapped outside are also vulnerable to attacks from wild animals.
- Cost: 6,000g
- Materials: 350 Wood and 150 Stone
- Unlocks: Cows
- Features: Hay Hopper and Feeding Bench
- Dimensions: 7x4 Tiles outside and 90 Tiles inside
10-Big Barn
The first upgrade opens up the Barn to hold up to 8 animals, adding a wider Feeding Bench. With the first barn upgrade, Goats can be purchased and now the farm animals can also get pregnant, which will happen randomly. Goats produce Goats Milk every other day which sells at a base price of 225g, and the milk can be turned into Goats Cheese, which sells at a base price of 400g.
- Cost: 12,000g
- Materials: 450 Wood and 200 Stone
- Unlocks: Goats
- Features: Hay Hopper and Feeding Bench. Enables Pregnancy
- Dimensions: 7x4 Blocks Outside
9-Deluxe Barn
The last Barn update expands the interior to accommodate a total of 12 animals. Players can now purchase Pigs for truffles and Sheep for Wool once they have received this upgrade for the first time. Truffles sell at a base price of 625g and Wool sells at a base price of 340g. As long as the Hay Hopper and Silo are full, the Autofeed system ensures that the animals always receive Hay on their Feeding Bench. Pigs and Sheep can also get pregnant.
- Cost: 25,000g
- Materials: 550 Wood and 300 Stone
- Unlocks: Sheep and Pigs
- Features: Hay Hopper, Feeding Bench, and Autofeed System. Enables Pregnancy
- Dimensions: 7x4 Tiles Outside and 136 Tiles inside
8-Ginger Island Farmhouse
The Island Farmhouse is the player's home on Ginger Island. Once the player unlocks Island West, they can access it. Initially unusable due to its state of disrepair, the building can be renovated for 20 Golden Walnuts. The repair happens quickly after payment, just like with other Golden Walnut transactions. It comes with a shipping bin to the exterior as part of the renovation. The building and the shipping container cannot be relocated.
Players can ship products and spend the night on Ginger Island without falling asleep by mending the farmhouse. The interior of the renovated farmhouse can be further personalized with furniture, wallpaper, and flooring. It is provided with a kitchen and a Tropical Bed for each player. Players can live on Ginger Island indefinitely without returning to the mainland. Families, kids, and farm animals cannot be transported to the island, though.
For an additional 5 Golden Walnuts, the player can add a mailbox and start receiving mail on the island. No matter where the player spent the prior night, undelivered mail can now be recovered from either mailbox thanks to that upgrade.
The player can then spend 20 Golden Walnuts to have the parrots construct a Farm Obelisk adjacent to the farmhouse after the farmhouse has been rebuilt and the mailbox has been constructed. The obelisk enables a quick return to the farm on the mainland.
When the Island Obelisk is finished on the main farm, it will be possible to instantly travel between the mainland and the island without using Willy's ferry services. This will eventually give immediate access between the main farm and the Island farm.
- Cost: 20 Golden Walnuts
- Materials: None
- Dimensions: 7x5
7-Junimo Hut
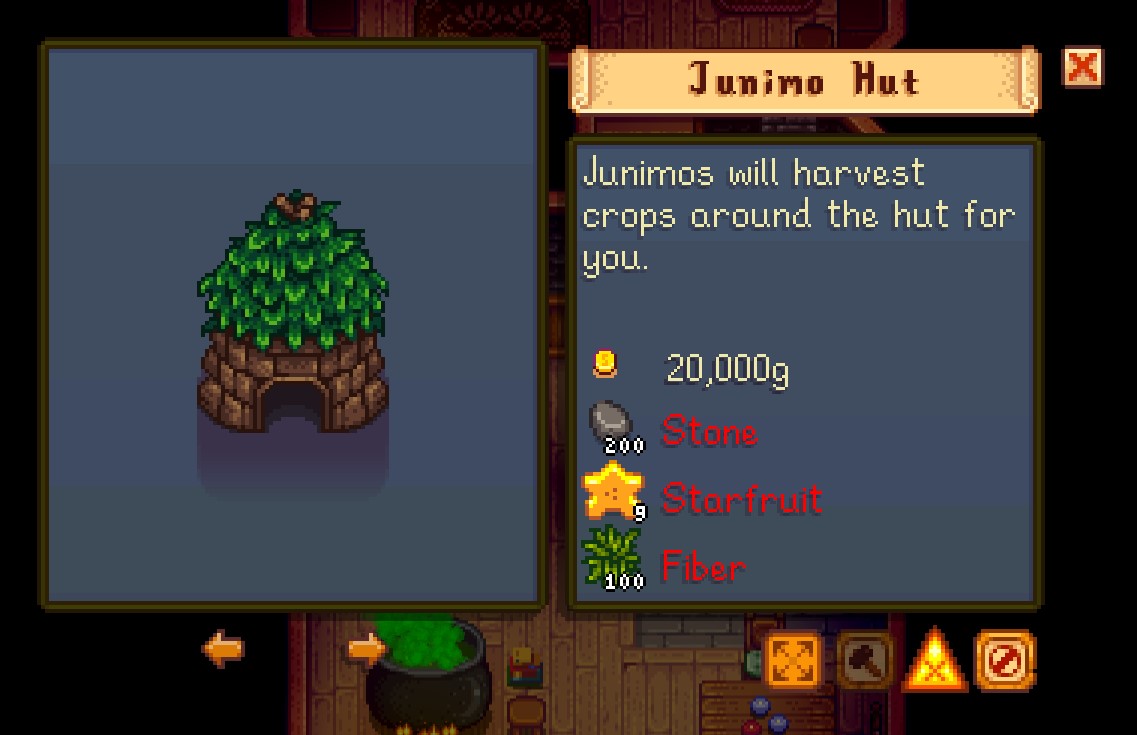
After completing the Goblin Problem Quest, you can purchase the Junimo Hut from the Wizard in the Wizard's Tower.
The majority of agricultural plants, such as flowers and tea leaves, as well as plants that must be harvested with a scythe, such as fiber, as well as crops that grow on trellises, are among the mature crops that the Junimos give their services to. Trellis plants can be heavily placed where a player would be obstructed since Junimos, unlike the player, can cross through tiles that have a trellis or bush.
The way the huts work is that the crops nearby, which are made up of 17x17 square tiles, are harvested by Junimos. A maximum footprint of 289 crop spaces results from this.
It is crucial to note that crops collected by a Junimo do not count towards Farming XP. But regardless of who handles the harvesting, the grade of the crops is determined by the player's level of agricultural proficiency.
Interacting with the Huts will enable or disable the services. Each bag used by the Junimos to store their collected crops may carry up to 36 things. The sack vanishes until the following harvest when the crops are harvested. By putting gems inside the hut's storage slots, players can alter the color of the Junimos, which is a bit additional and entertaining.
- Cost: 20,000g
- Materials: 200 Stone, 9 Starfruit, and 100 FiberStone (200) Starfruit (9) Fiber (100)
- Dimensions: 3x2 Blocks
6-Gold Clock
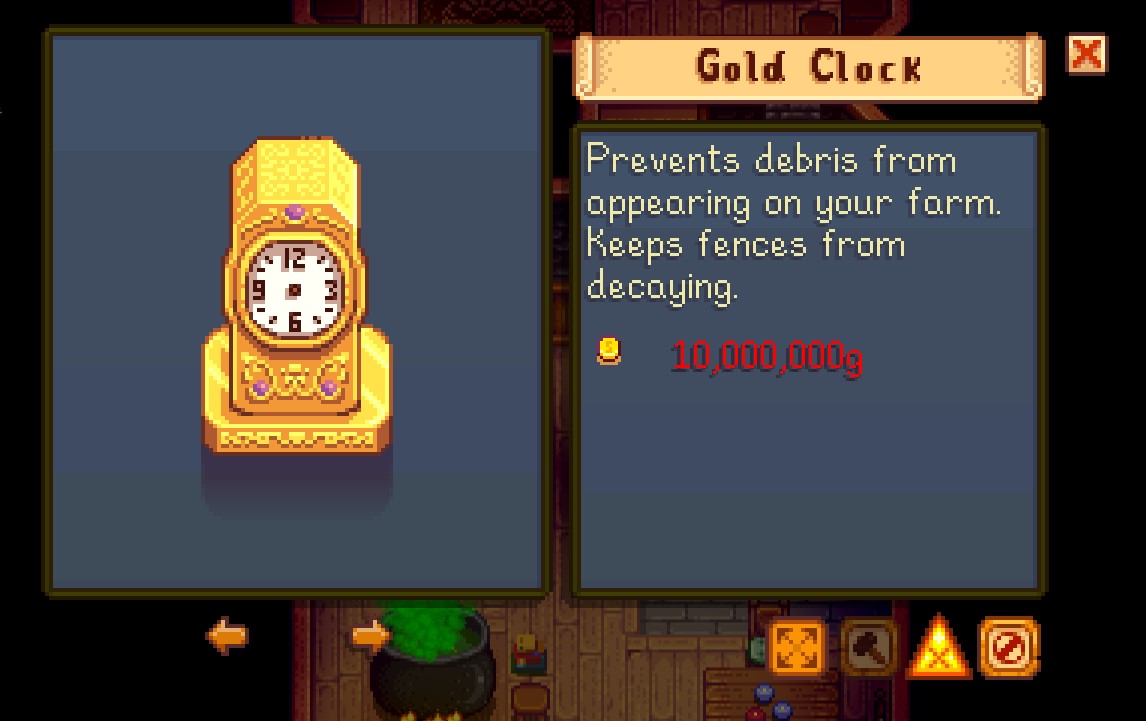
The Gold Clock is a structure that may be purchased from the Wizard in the Wizard's Tower after completing the mission Goblin Problem. It is the most costly building that can be purchased, costing 10,000,000g. On both your home farm and the farm on Ginger Island, this pricey golden clock has the unique ability to stop all types of debris—except grass—from appearing.
Additionally, it prevents the degradation of fences, stops the growth of trees on farms, and indicates the time. Constructing this Gold Clock is needed to achieve Perfection. The Gold Clock cannot be turned off after being installed without destroying it.
- Cost: 10,000,000g
- Materials: None
- Dimensions: 3x2 Blocks
5-Earth Obelisk
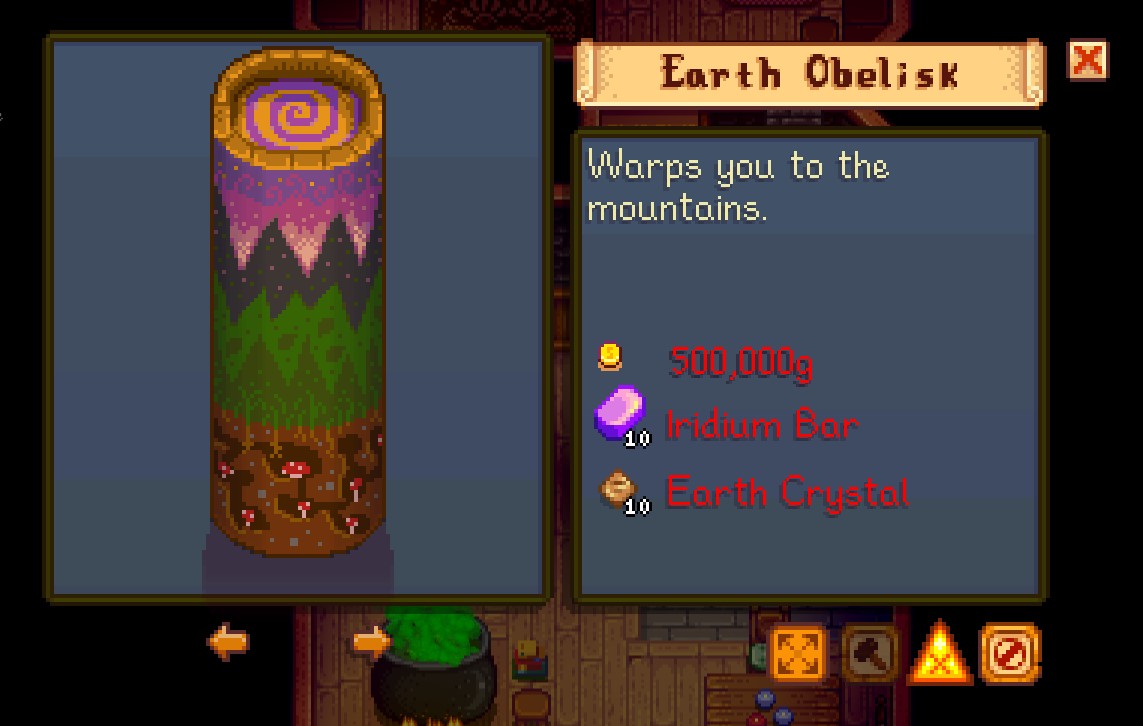
After completing the Goblin Problem quest, you can buy the Earth Obelisk building from the Wizard in the Wizard's Tower. It is one of four partner structures; the Wizard also sells the Water Obelisk, Desert Obelisk, and Island Obelisk.
Taking the place of the craftable Mountains Warp Totem, interacting with the obelisk takes the player to the warp totem position in the mountains. This helps you get to the Mountain Lake, the Spa, and Robin's Carpentry Shop faster. You can't interact with it while on a horse.
The obelisks are movable, permanent structures on farmland that are not consumed after use, just like other agricultural buildings. The Wizard's Tower can also be used to adjust an obelisk's location on the farm at any moment. The Earth Obelisk must be built in order to reach Perfection. It is a little simpler to acquire initially because it is one of the less expensive obelisks to buy.
- Cost: 500,000g
- Materials: 10 Iridium Bars and 10 Earth Crystals
- Dimensions: 3x2 Blocks
4-Water Obelisk
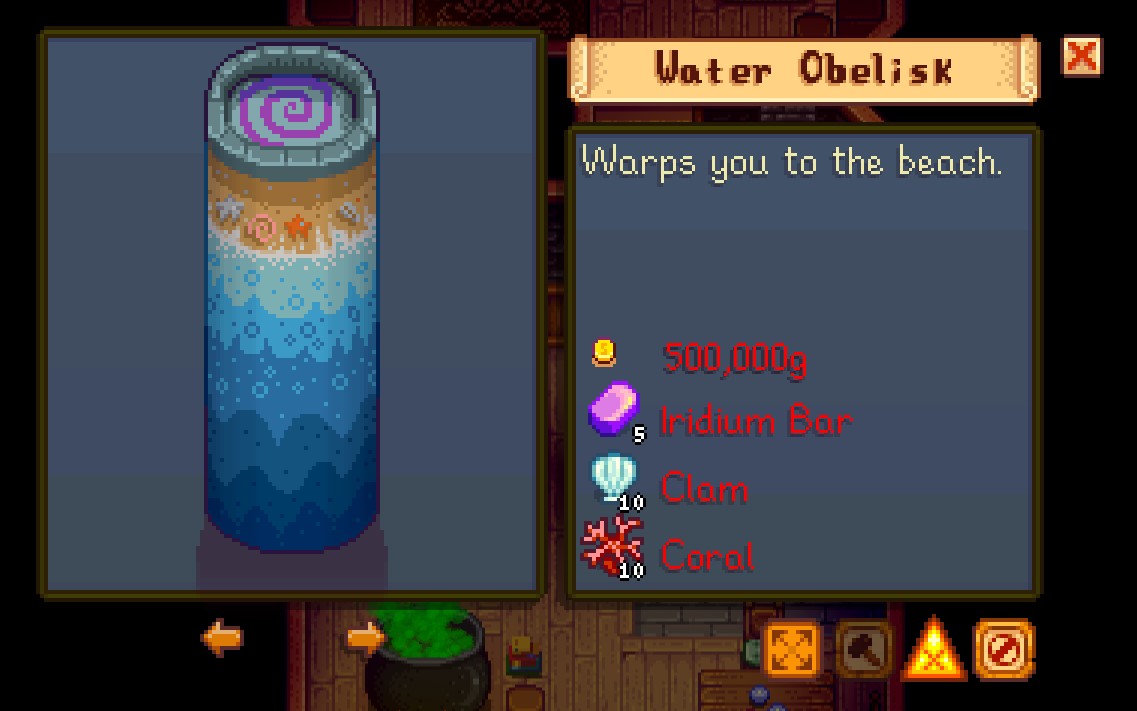
After completing the Goblin Problem quest, you can buy the Water Obelisk building from the Wizard in the Wizard's Tower. It is one of four partner structures; the Wizard also sells the Earth Obelisk, Desert Obelisk, and Island Obelisk.
In place of the craftable Beach Warp Totem, interacting with the obelisk takes the player to the warp totem position on the beach. This helps you get to Elliot’s Cabin, the Beach, and Willy’s Fish Shop faster. You can't interact with it while on a horse.
The Water Obelisk must be built in order to reach Perfection. Just like the Earth Obelisk, it is a little simpler to acquire initially because it is one of the less expensive obelisks to buy.
- Cost: 500,000g
- Materials: 5 Iridium Bars, 10 Clams, and 10 Coral
- Dimensions: 3x2 Blocks
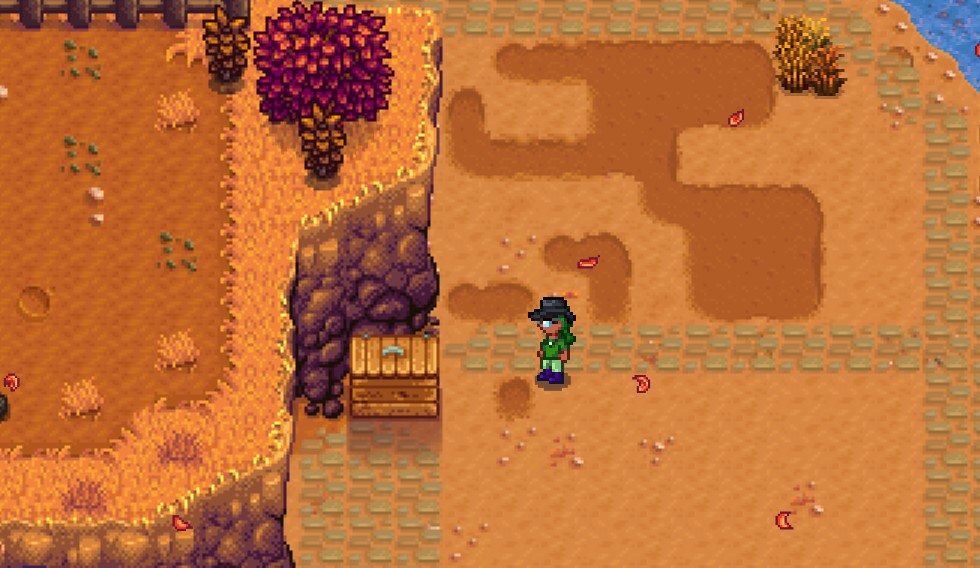
3-Desert Obelisk
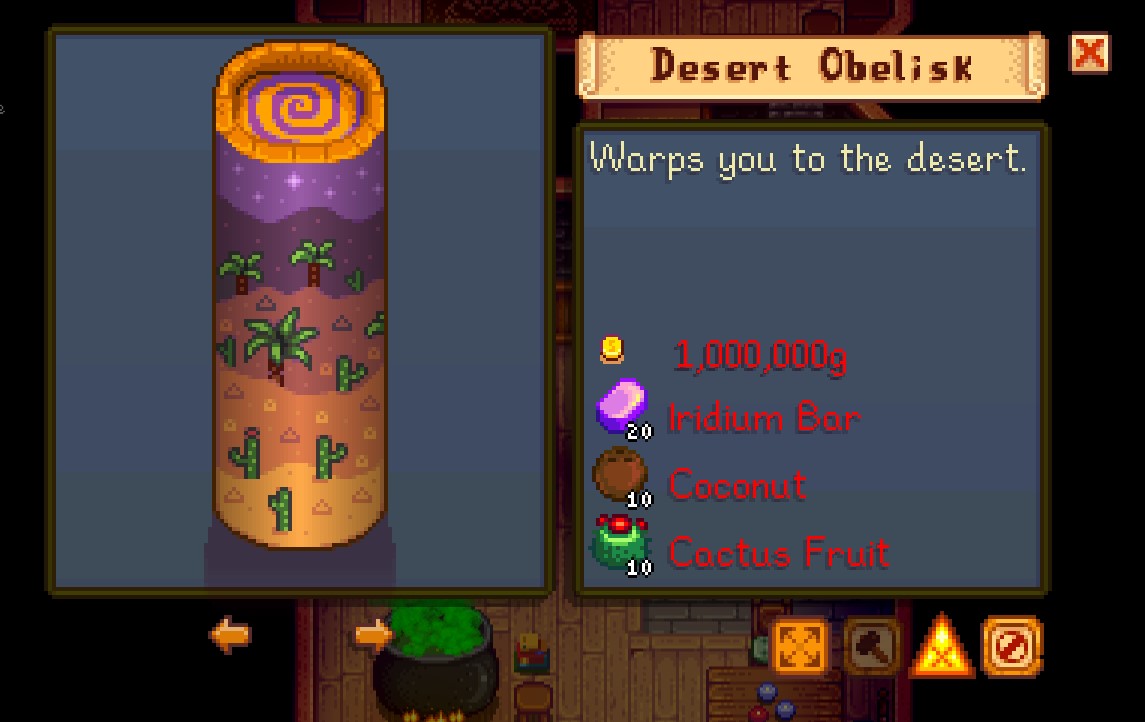
After completing the Goblin Problem quest, you can buy the Desert Obelisk building from the Wizard in the Wizard's Tower. It is one of four partner structures; the Wizard also sells the Water Obelisk, Earth Obelisk, and Island Obelisk.
Taking the place of the craftable Desert Warp Totem, interacting with the obelisk takes the player to the warp totem position in the Calico Desert. This helps you get to the Deseert Trader, Skull Cavern, and Sandy’s Oasis Shop faster. You can't interact with it while on a horse.
The Desert Obelisk must be built in order to reach Perfection. Because this location is not in the valley it costs more gold and materials to acquire.
- Cost: 1,000,000g
- Materials: 20 Iridium Bars, 10 Coconuts, and 10 Cactus Fruit
- Dimensions: 3x2 Blocks
2-Island Obelisk
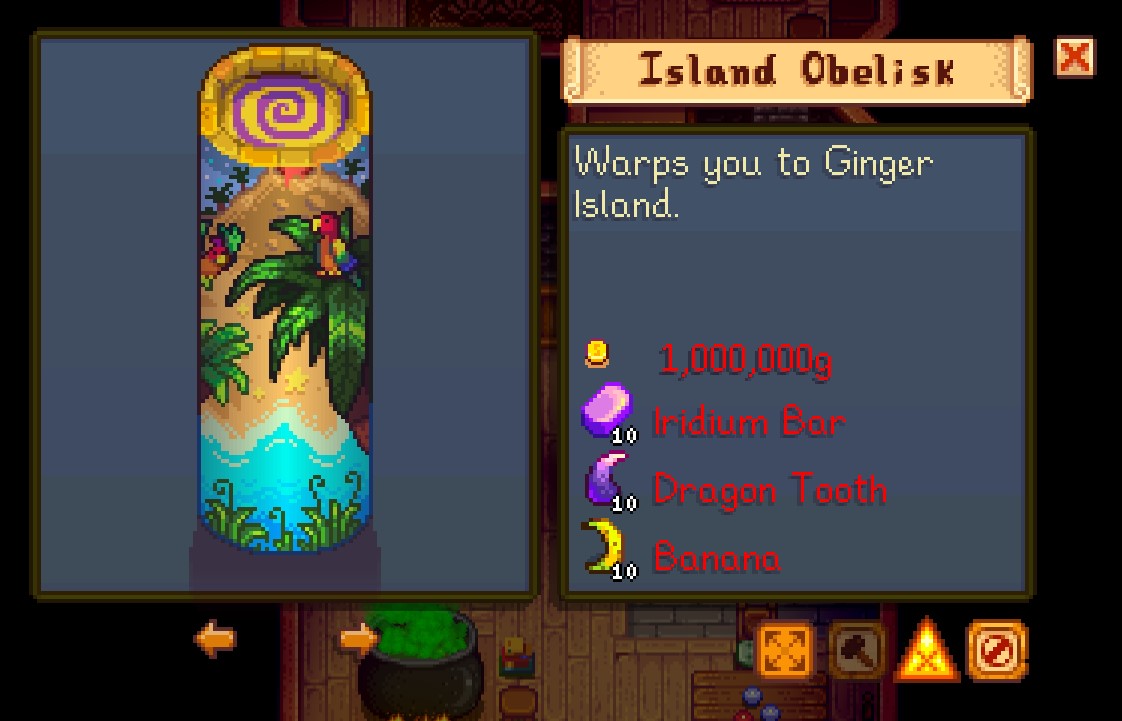
After completing the Goblin Problem quest and unlocking Ginger Island, you can buy the Island Obelisk building from the Wizard in the Wizard's Tower. It is one of four partner structures; the Wizard also sells the Water Obelisk, Desert Obelisk, and Earth Obelisk.
In place of the craftable Island Warp Totem, interacting with the obelisk takes the player to the warp totem position on the Island. This helps you get to the Mountain Lake, the Spa, and Robin's Carpentry Shop faster. You can't interact with it while on a horse.
The Island Obelisk must be built in order to reach Perfection. Like the Desert Obelisk, because this location is not in the valley it costs more gold and materials to acquire.
The Dragon Tooth is a unique item that can be found in the skeleton remains of a dragon in the Volcano Dungeon or by killing a Lava Lurk, which has a 15% drop chance. Additionally, a pond with at least nine stingray fish can provide them. Players can exchange five Dragon Teeth for a Banana Sapling from the Island Trader in order to obtain a banana.
- Cost: 1,000,000g
- Materials: 10 Iridium Bars, 10 Dragon Tooth, and 10 Bananas
- Dimensions: 3x2 Blocks
1-Farmhouse

The player's primary residence and the first structure they interact with in Stardew Valley is The Farmhouse. It starts off with just one modest room, which can later be expanded and changed, and which has a single bed, a fireplace, an old TV (either a Budget TV or Floor TV), numerous décor depending on the farm style selected, and a floor mat with a variety of designs.
The farmhouse's overall dimensions are 6 by 9 feet. With patterns obtained from a catalog, Pierre's or JojaMart, or both, flooring and wallpaper can be altered. Fireplaces can be added at any moment by buying new furnishings from Robin and other retailers.
The Carpenter's Shop sells a number of improvements for the Farmhouse. When remodeling, each additional room may have its own flooring and wallpaper designs. When a player marries or has Krobus move in as a roommate, the game automatically creates an extra room based on that character's style.
Each farmhouse update takes Robin three days to complete, whereas renovations are finished immediately. After finishing the second farmhouse upgrade, renovations become available.
The Farmhouse is linked to two Achievements.
Moving Up: Make one home improvement.
Living Large: Make two upgrades to the home.
The third upgrade to the farmhouse, which adds the cellar, does not result in an achievement.
First Upgrade
- Cost: 10,000g
- Resources: 450 Wood
This update includes a kitchen with a counter for cooking and a refrigerator that doubles as a chest. Items in the fridge can be utilized for cooking even if they are not in the player's inventory. Additionally, a bedroom is added, and the single bed is changed to a double. Players can now also tie the knot.
Second Upgrade
- Cost: 50,000g
- Construction: 150 Hardwood
With the addition of two new rooms—one unoccupied and the other a nursery with a cot and two toddler beds—this update makes it possible for the player to have kids. Renovations are unlocked, and the kitchen and bedroom are bigger.
Renovation:
All remodeling is free. Removing the crib, which stops the player from having more kids, is part of it. The wall between the entrance area from the bedroom might be taken down to make the space more open. The bedroom will gain a room if the southern room is added, and the northeast corner of the home will gain a room if the corner room is added.
Third Upgrade
- Cost: 100,000g
The most recent addition adds a cellar beneath the home, with an entrance through the kitchen. Casks are kept in the cellar, where they can be used to mature goods like wine and cheese to improve their quality and worth. There are 33 barrels in the cellar already, but it has the capacity to hold up to 189, all of which must be made.
You may also be interested in:
Share this Article:

- Log in or register to post comments


![[Top 10] Stardew Valley Best Defense Items and How to Get Them](https://www.gamersdecide.com/sites/default/files/styles/308x185-scale-crop--more-top-stories/public/bestdefensive_items.jpeg "[Top 10] Stardew Valley Best Defense Items and How to Get Them")


")


![[Top 8] Stardew Valley Best Fruit Trees](https://www.gamersdecide.com/sites/default/files/styles/308x185-scale-crop--more-top-stories/public/stardew_valley_trees_header.jpg "[Top 8] Stardew Valley Best Fruit Trees")


![[Top 7] Stardew Valley Best Farms That Are Excellent](https://www.gamersdecide.com/sites/default/files/styles/308x185-scale-crop--more-top-stories/public/best_farms_header.jpeg "[Top 7] Stardew Valley Best Farms That Are Excellent")